Want to see Raider King content first? Add us as a preferred source.
Puzzles in video games can be a blast if you’re good at them in general. However, if you lack that certain something that makes some excel at them, you might just feel frustration and nothing else as you try endlessly to complete them. In this guide I will show you how to solve the “harder” puzzles in Dragon Quest 7 Reimagined (which just means those that require more than 2 moves to solve) to allow you to get back to fighting monsters and saving the world.
If you still need some help, make sure to hit me up on Discord so I can help you in more detail!
Rainbow Mines Underground Level 4 – Rolling Boulders Puzzle
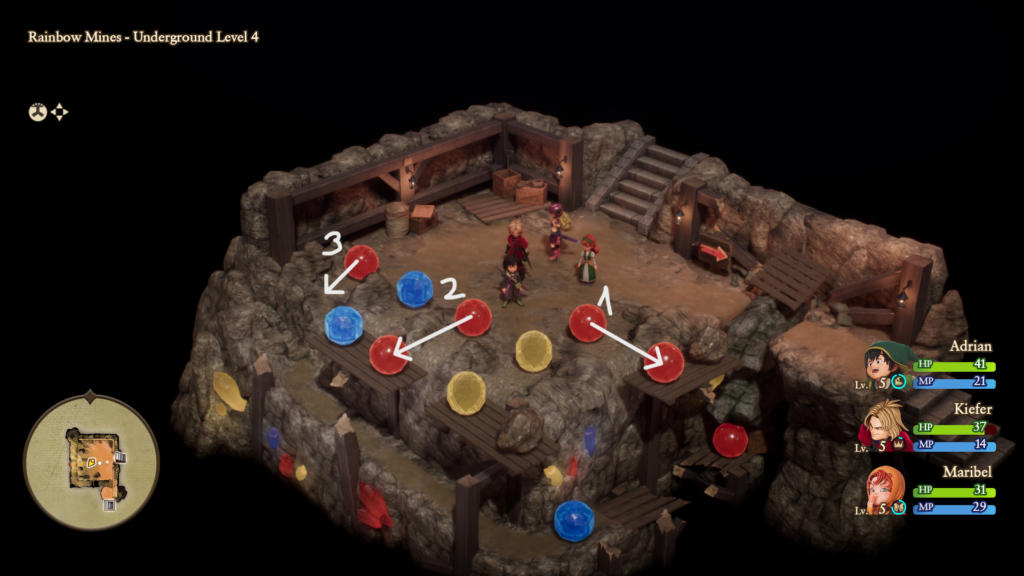
I obviously skipped the first two puzzles since those were extremely easy. This one I needed 2 tries to get, so here’s a guide.
- Roll the red boulder on the right first. This will drop a stone that will allow you later to get a red boulder to the final one that will repair the bridge.
- Then roll the 2nd red boulder. This will drop the blue boulder and break the one in the way down below.
- The puzzle is now done, just roll the last red boulder and you’re past.
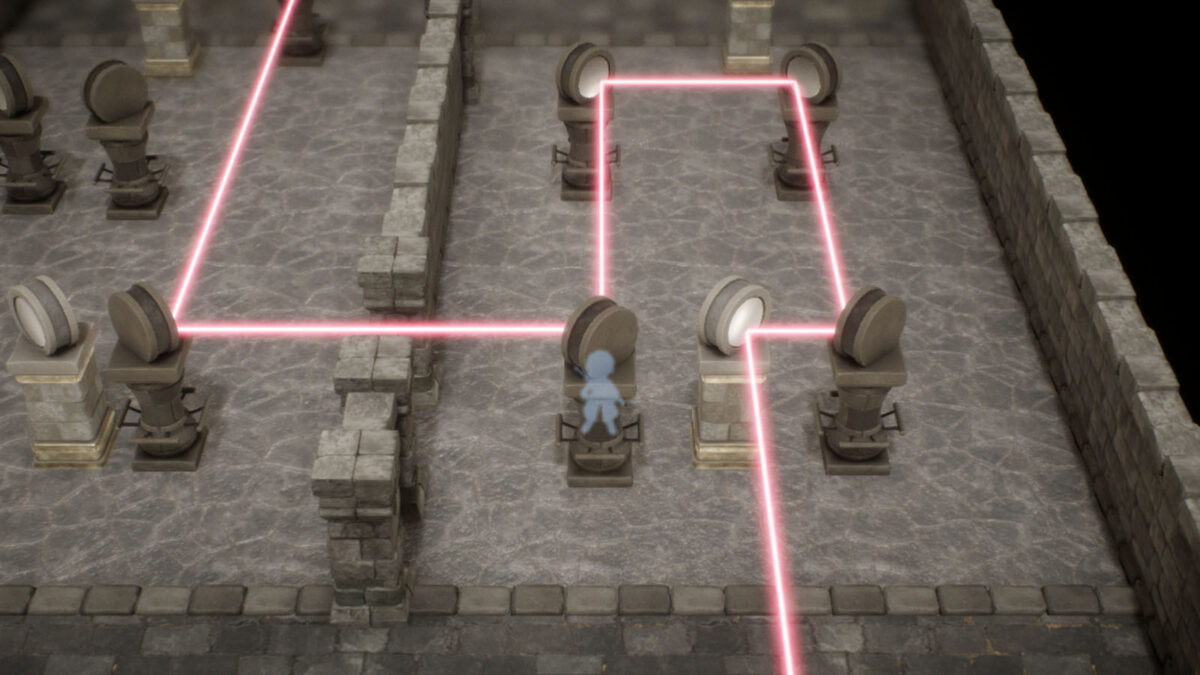
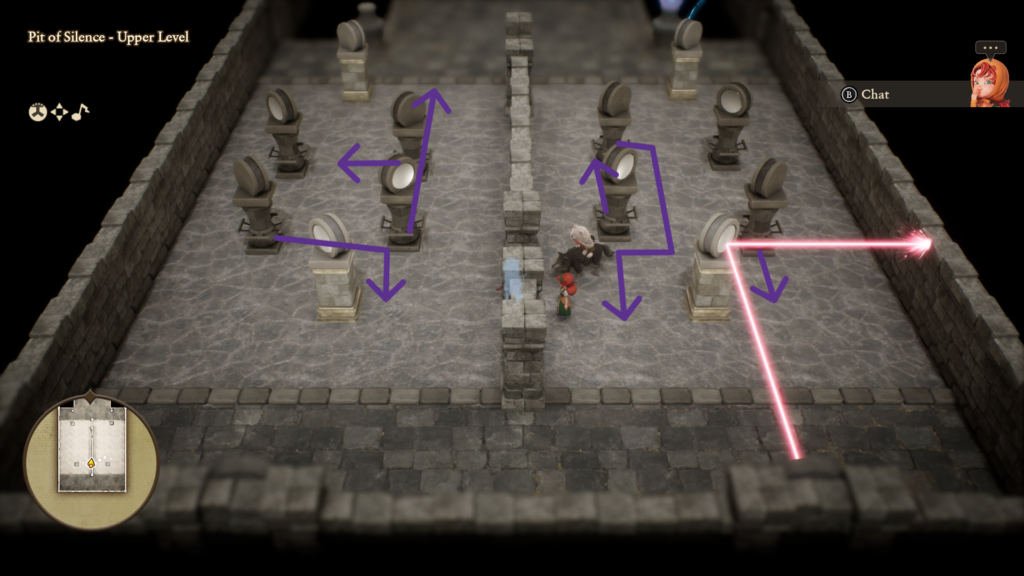
Pit of Silence Upper Level – Laser Puzzle
You’ll have two puzzles to solve here where your goal is to get the laser to hit the blue orbs at the end.
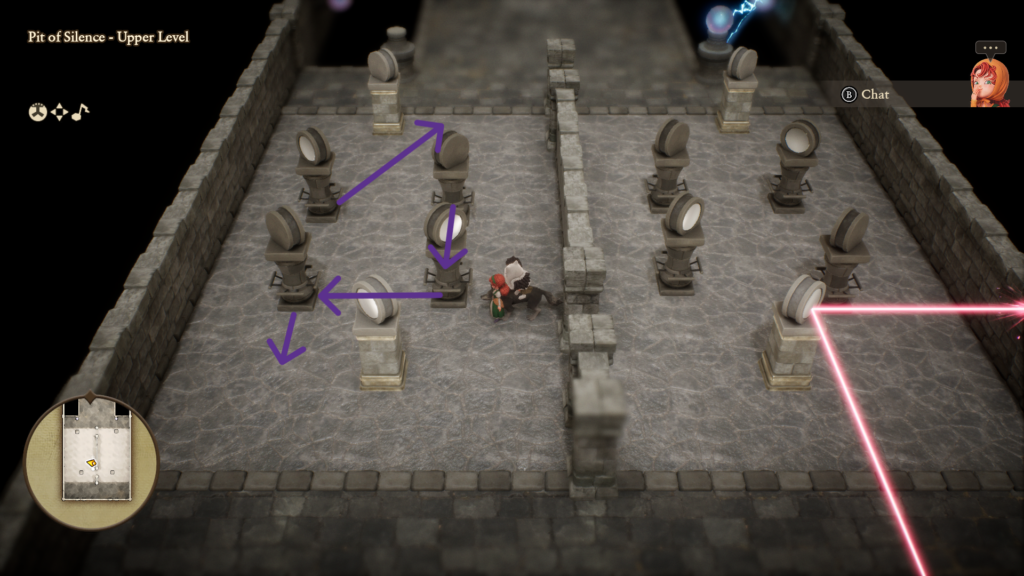
For the first one, the one on the left, you can see the how to move the mirrors in the image on the left and how they should look at the end on the right.
If you’d also like a written solution, let’s pretend the mirrors are called SW (southwest), SE, NW, NE, based on their position.
- Move SW down to get the laser to hit it.
- Move SE to the left until the laser hits it.
- Move NE down until the laser hits it.
- Move NW right and then up until the puzzle is solved.
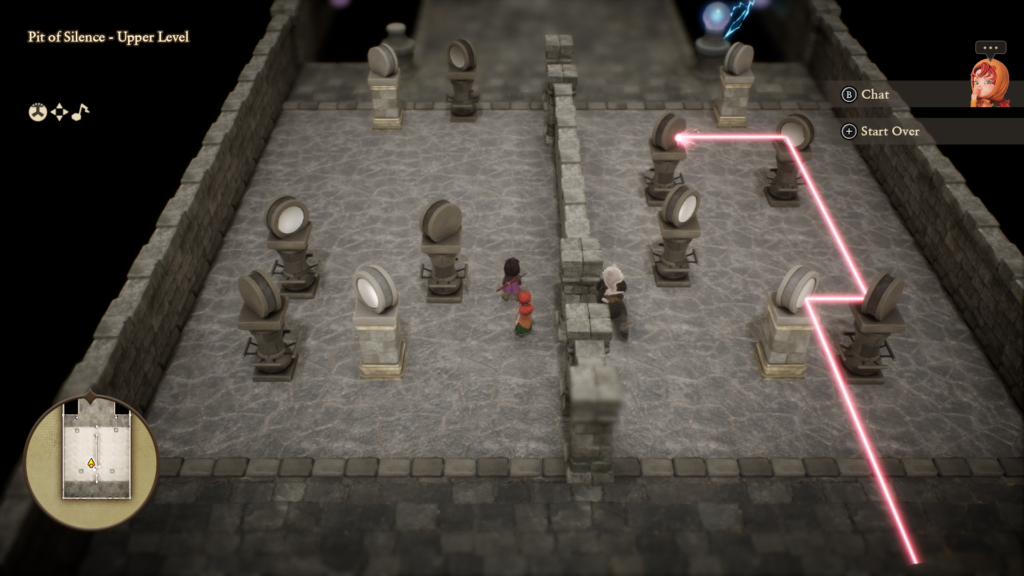
For the second one you’ll need to get the laser to move from the right side to the left side where you’ve already solved the puzzle. I recommend pressing the button to restart the puzzle so you can get the mirrors back in their original positions.
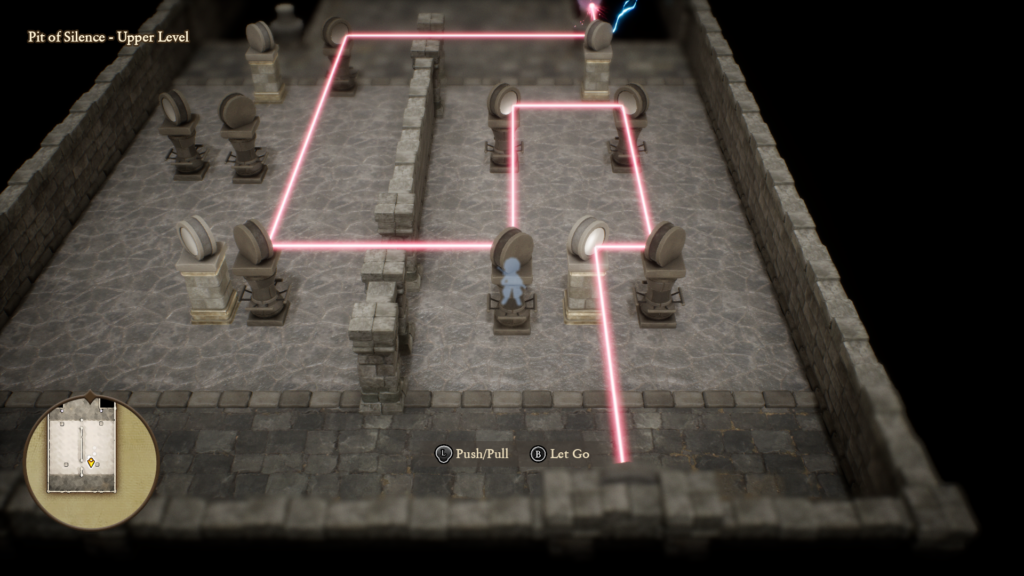
Again, just follow the instructions shown in the first image above. If it’s not clear enough, here’s the solution based on the locations of the mirrors again:
- Move SE down until the laser hits it.
- Move NW down around SW until it’s lined up with the hole in the wall to the left.
- Move SW up until the laser hits it. You know you’ve done it right if the laser is passing through to the previous laser puzzle.
- Now we’re moving to the old puzzle on the left. Move NE to the left so it’s out of the way.
- Move SE all the way to the top.
- Move SW to the right and down so the laser from the puzzle on the right hits it. The puzzle should be solved now.


