Want to see Raider King content first? Add us as a preferred source.
Where Winds Meet has many bosses; some of these bosses can be encountered while playing the campaign, which requires you to spend energy points to take them on and claim their rewards. They are unlocked as you progress the story and complete their Campaign Quest. These usually require you to take them multiple times to unlock specific Talents further and farm certain items.
Some of these bosses roam around the world and can be encountered and fought against. They can be fought anytime and are not tied to any questline, but have a certain level recommendation to guide you better. There are also Challenge Fights that are some of the most difficult Bosses in the game to earn achievements. They are mostly considered as skill-checks for those looking for a more challenging fight and are not required to defeat in order to progress further in the game.
Some of these bosses can be difficult to locate or fight against, and can eat up a lot of your time. This is why I have written this guide, so that you can find all the bosses in Sundara Lands – Qinghe, and how you can defeat them.
All Bosses’ Location and How to Beat Them in Sundara Lands – Qinghe
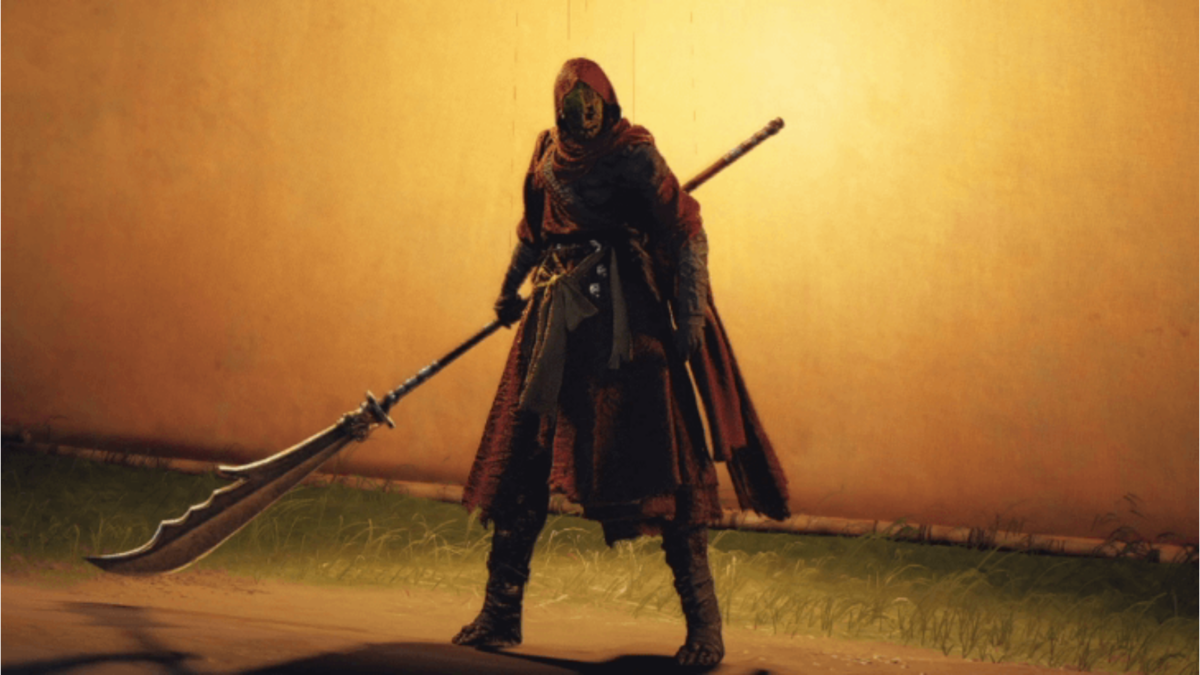
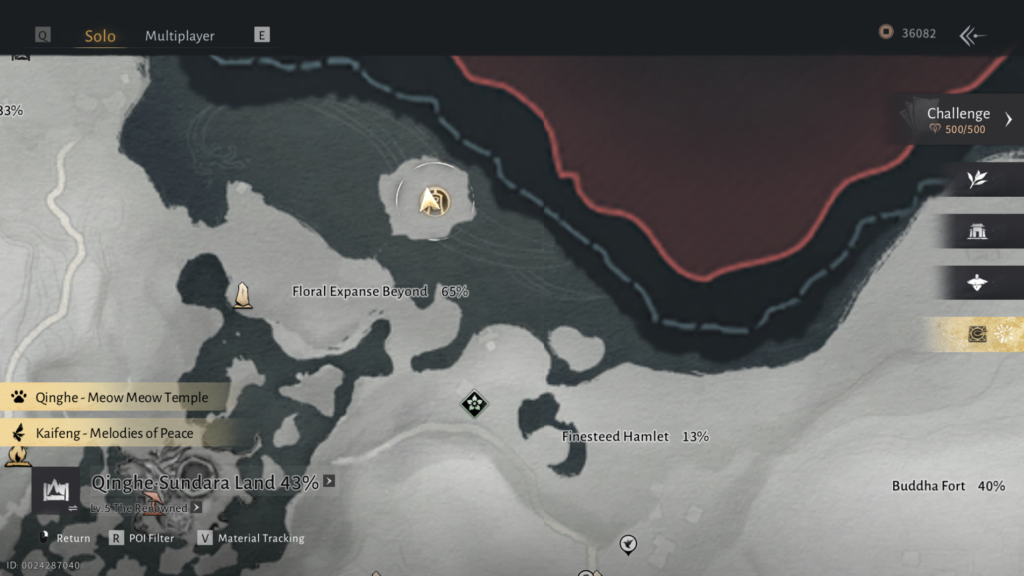
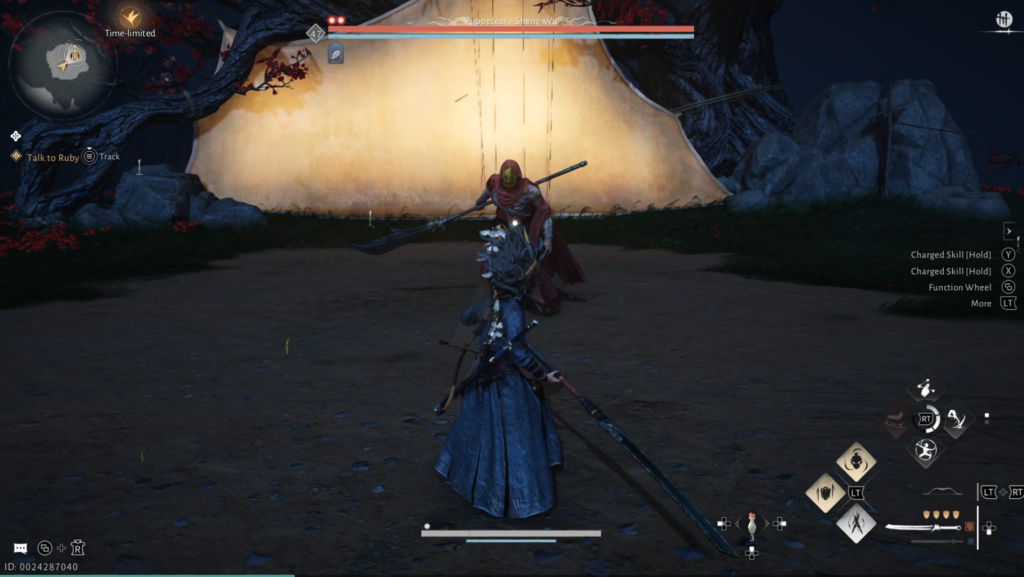
Puppeteer – Curtaincall
Location
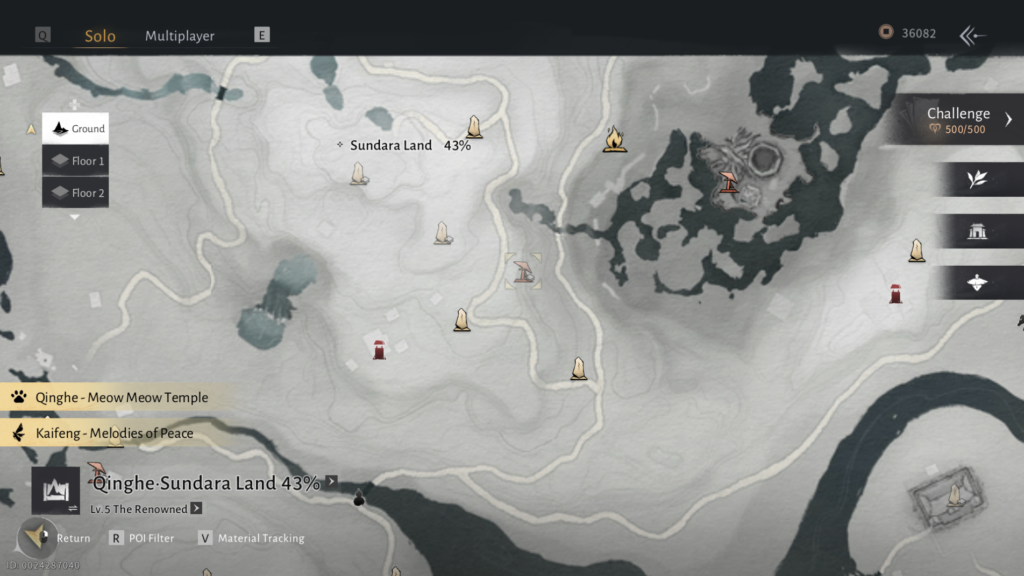
You can encounter the Puppeteer – Curtaincall World Boss in a small island at the northwest border of Sundara Land in the Qinghe region.
Martial Arts
- Infernal Twinblades
- Nameless Spear
- Thundercry Blade
Mystic Arts
- Cloud Steps
- Meridian Touch
- Flaming Meteor
Best Companion
The best companion to bring with against Puppeteer – Curtaincall would be Elder Gongsun due to his ability to stagger and knock down enemies for crowd control. He can stun-lock the Puppeteer with ease, giving you huge openings for burst damage and a chance to recover your health.
Movesets
Phase 1
- Glaive Lunge: The Puppeteer winds up and lunges towards you with its glaive across the arena. This move can be parried and dodged when timed correctly.
- Triple Spiral Slash: The Puppeteer spins around while swinging his glaive forward three times. This move can be parried and dodged when timed correctly.
- Double Sweep: The Puppeteer winds up briefly to execute two consecutive sweeping attacks with a wide range. This move can be parried and dodged when timed correctly.
- Descending Strike: The Puppeteer jumps up and slashes downwards to hit you with a brief sweep attack. This move can be parried and dodged when timed correctly.
- Spinning Glaive Throw: The Puppeteer readies its sword and throws it toward you while spinning it around until it returns. This move can be parried and dodged when timed correctly.
- Fourfold Combo: The Puppeteer spins his glaive left and right to hit you twice and follows up with a double sweep. This move can be parried and dodged when timed correctly.
- Falling Puppet Slam: The Puppeteer backflips into the air and charges its glaive with a red glow to slam the glaive towards you. This move can be perfectly parried to trigger a counterattack and dodged when timed correctly.
Phase 2
- Puppet Thrust: The Puppeteer starts swinging his glaive around with a gold glow to execute a powerful thrust in front of it. This move cannot be parried and can only be dodged when timed correctly.
- Double Glaive Lunge: The Puppeteer winds up and lunges towards you with its glaive two consecutive times across the arena. This move can be parried and dodged when timed correctly.
- Winding Glaive Slam: The Puppeteer swings his glaive around to wind up with a red glow and hits you with a glaive slam two consecutive times. This move can be perfectly parried to trigger a counterattack and dodge when timed correctly.
Rewards
- Echo Jade x20
- Qinghe Exploration x50
- Character EXP x8000
- Coin x8000
- Banner of Resolve x1
- Inner Way Note: Custom Chest x5
- Medicinal Tales x3
Tips
- Focus on Parrying During 1st Phase
- Parry the Puppeteer Shadow, Dodge the Puppet Soldiers
Sleeping Daoist
Location
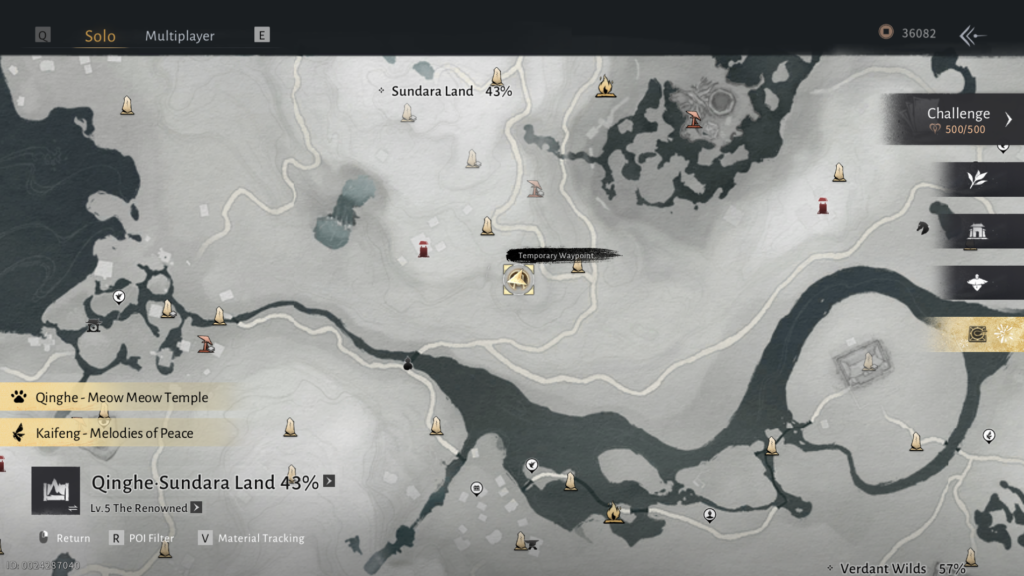
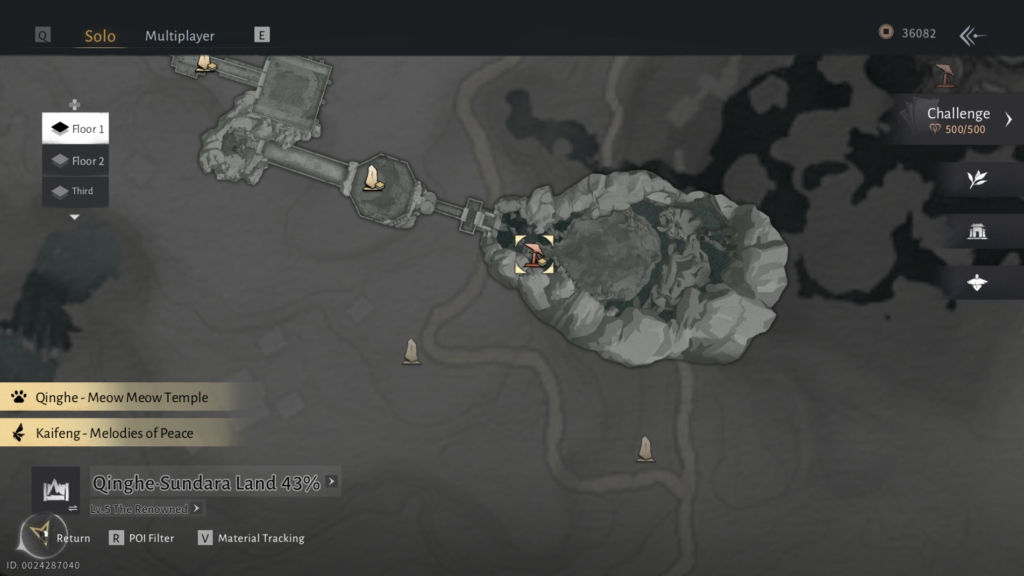
You can encounter the Sleeping Daoist World Boss between two Waypoints in the middle of Jadebrook Mountain in the Qinghe region.
Mystic Arts
- Cloud Steps
Infernal Arts
- Evening Snow
Best Companion
The best companion to bring against Sleeping Daoist would be Yi Dao due to his ability to stagger enemies for crowd control and healing capabilities to help you survive throughout the fight. He is especially useful whenever you need to keep your distance and recover health via items or martial arts.
Movesets
Phase 1
- Triple Stomp: Sleeping Daoist charges towards you and jumps three consecutive times to execute a stomp attack. This move can be parried and dodged when timed correctly.
- Tailwind Combo: Sleeping Daoist executes three short wind bursts in front and follows up a long-range wind burst with a tail swipe with a red glow. The first four hits can be parried and dodged when timed correctly, while the tail swipe can be perfectly parried to trigger a counterattack.
- Fart Blaster: Sleeping Daoist turns around and starts throwing out three heaps of dung from its behind and follows up with wide fart sweep. This move can be parried and dodged when timed correctly.
- Horseplay Combo: Sleeping Daoist lunges forward to stomp you and follows up with a flurry of punches and a horse kick to finish it off. This move can be parried and dodged when timed correctly.
- Double Tailwhip: Sleeping Daoist extends his hair and whips it out to attack twice you at a long range. This move can be parried and dodged when timed correctly.
- Golden Donkey Kick: Sleeping Daoist turns around and winds up with a gold glow to execute a powerful horse kick that can knock you down. This move cannot be parried and dodged when timed correctly.
- Charged Headbutt: Sleeping Daoist emits a red aura and follows up with a red glow to initiate a quick headbutt. This move can be perfect parried to trigger a counterattack and dodged when timed correctly.
- Rock Throw: Sleeping Daoist conjures six rocks in the air and throws them at you consecutively. This move can be parried and dodged when timed correctly.
Phase 2
- Heavenly Wind Combo: Sleeping Daoist fires a series of wind projectiles towards you from afar until he finally charges at you with a gold glow to sweep you with his hair. The projectiles can be parried and dodged when timed correctly, while the last hit cannot be parried and can only be dodged.
- Overgrowth Slam: Sleeping Daoist jumps high into the air and stomps into the ground to surround themselves with growing roots for a brief moment. This move can be parried and dodged when timed correctly.
Hero’s Realm
- Fart: Sleeping Daoist will turn around and fart in a wide cone that can apply Prison to enemies caught in the attack. We recommend circling him to avoid the attack and continue dealing damage in a safe spot.
- Vine Prison: Sleeping Daoist randomly affects a few of your allies with an AoE trap that pops out after a few seconds. Affected players should distance themselves from their allies to avoid hitting them with the trap, while players who are not affected should destroy the vines once they sprout to break their allies free.
- Illusion Donkey: Sleeping Daoist flies up and creates a huge storm to summon various donkeys throughout the field while attacking you with homing projectiles for the duration. Destroy all donkeys in the field while parrying the projectiles to survive the attack.
- Donkey Transformation Array: Sleeping Daoist jumps and slams into on the players to leave a lasting AoE effect that can turn players into donkeys. We recommend dodging this move to avoid the AoE effect once he slams into the ground.
- Charging Donkeys: Sleeping Daoist summons two portals to send out a horde of donkeys in a straight line that intersects with each other. Make sure to avoid the donkeys by staying outside of their running direction.
- Stampede of Donkeys: Sleeping Daoist turns all players into donkeys and summons two portals to send out a horde of donkeys while he starts attacking with projectiles. Merge with the running donkeys to blend in and easily avoid Sleeping Daoist’s projectiles.
- Levitation Curse: Sleeping Daoist levitates up 3 random players for a few seconds and slams them down into the ground to deal damage. Make sure to turn yourself into a donkey so you can stand beneath the floating players to catch them and avoid damage.
- Summon Dream Donkey: Sleeping Daoist summons various donkeys throughout the field to attack you. Destroy the donkeys quickly so you can focus on Sleeping Daoist himself.
Rewards
- Echo Jade x20
- Character XP x12000
- Qinghe Explorationn x50
- Medicinal Tales x3
- Zhou Coin x8000
- Esoteric Revival: Tome x1
Hero’s Realm Rewards
- Inner Way Note: Custom Chest (First Clear Reward)
- Gear Chest x5
- Attunement Stone: Rhapsody x1
- Adventure Slip x20
- Coins x9600
- Character EXP x19200
Tips
- Focus on Ranged Attacks During 1st Phase
- Use Cloud Steps to Close Gaps
- Merge with Donkeys to Avoid the Projectiles
- Destroy All Donkeys to Survive the Attack
- Turn Into a Donkey to Catch Your Allies
Tian Ying

Location
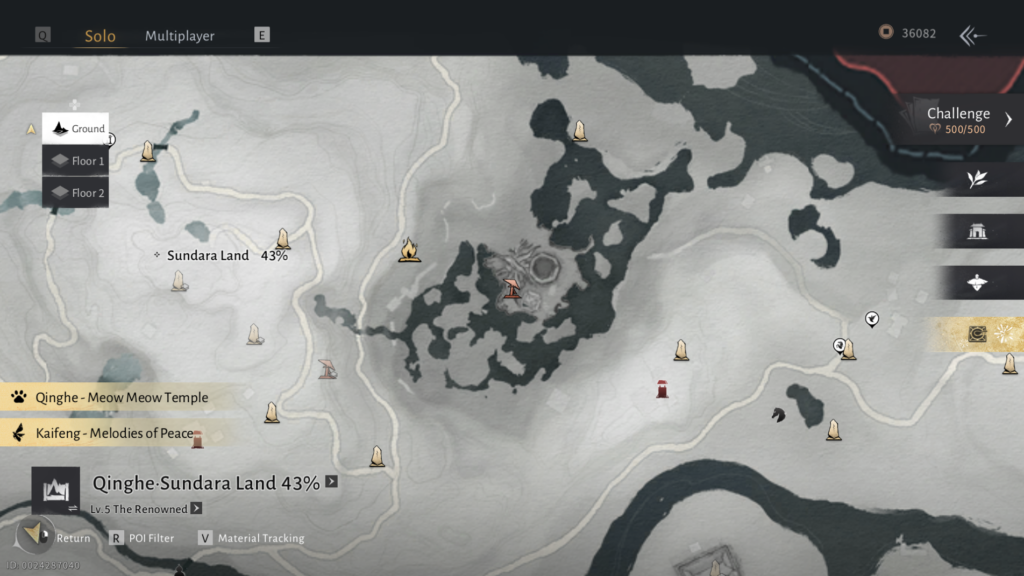
In order to fight Tian Ying, you first have to accumulate 6,000 Qinghe Exploration Points and then take on The Promised Light quest over at the Wayfarer in Sundara Land.
Once you have defeated Tian Ying at the end of the quest, his Campaign version will be automatically unlocked in your map, where you can spend 20 Energy Points to claim more rewards depending on your World Level.
Best Companion
The best companion to bring with against Tian Ying would be Yuan Jin’gang due to his ability to deal huge Qi damage from a far with his Bow. He can also knock down and stagger Tian Ying at long range to give you openings for burst damage and eventually exhaust him for an Execute attack.
Movesets
Phase 1
- Gold Smash: Tian Ying goes into stance and suddenly smashes the ground with his left hand, causing small tremors from that attack.
This move can be parried and dodged. - Golden Charge: Tian Ying wields his staff and calls forth his power before plunging his staff onto the ground with a wide range of tremors going across the field.
This move can be parried and dodged. - Gold Slash: Tian Ying raises his staff and uses it to summon a wave of gold towards his opponent, damaging them from long range.
This move can be parried and dodged. - Golden Swings: Tian Ying swings his staff and summons a gold meteorite with his hand. Afterwards, he continues to swing his staff twice.
This move can be parried and dodged. - War Staff Combo: Tian Ying swings his staff violently and spins at the fourth move.
This move can be parried and dodged. - Golden Dance: Tian Ying wields his staff to spin and smash into the ground, causing gold to splatter around him. Afterwards, he plunges his staff with a small gold tremor around it.
This move can be parried and dodged.
Phase 2
- Sandstorm: Tian Ying summons his Sand Golem to attack with sand projectile. Afterwards, Tian Ying smashes his opponent with sand from above.
This move can be parried and dodged. - Assassin Sting: Tian Ying throws a jab followed by a spinning elbow. He jabs again and throws a devastating punch that he telegraphs from his back.
This move can be parried and dodged. - Divine Punishment: Tian Ying throws multiple punches with his Sand Golem onto the ground and rushes forward to his opponent to attack with an axe kick.
This move can be parried and dodged. - Enlightenment: Tian Ying hovers into the air and summons a giant Sand Golem behind him. The Sand Golem will then do a sweep with its right hand and finish it with a double hammer fist, causing immense damage in a wide range.
Move to a blind spot to avoid getting hit. - Tornado Kicks: Tian Ying advances with spinning kicks toward his opponent and suddenly retreats across the field.
This move can be parried and dodged. - Golden Flurry: Tian Ying spins across the field with his kicks, and after travelling a certain distance, he throws a left uppercut followed by a smashing right.
This move can be parried and dodged. - Asura Rush: Tian Ying suddenly rushes with a red glow and grabs his opponent with a Sand Golem before smashing them violently into the ground and punching them, causing immense damage.
This move can be perfect parried to trigger a counterattack and dodged when timed correctly.
Phase 3
- Shadow Dance: Tian Ying jumps away from his opponent before suddenly rushing towards them, attacking from a different direction in quick succession, and finishing the move with a strike from behind.
This move can be parried and dodged. - Sand Clones: Tian Ying hovers at the center of the field to summon three sand clones for them to form an inverted triangle. The three sand clones will drop down onto the field, and Tian Ying disappears.
Ignore the Sand Clones and focus on Tian Ying. - Ambush: With the three clones chasing his opponent, Tian Ying will suddenly appear from different directions to strike them from behind.
This move can be parried and dodged. - Assassin’s Bladework: Tian Ying rushes forward with his daggers, slicing his opponent in the air before doing a spinning attack with his daggers.
This move can be parried and dodged. - Sand Rush: Tian Ying rushes quickly to his opponent and does so three times in different directions.
This move can be parried and dodged. - Shadow Break: Tian Ying walks around the field and suddenly teleports in a different direction, disorienting his opponent. He teleports twice before suddenly striking his opponent down. This move can be parried and dodged.
- Assassin’s Blade Dance: Tian Ying leaps toward his enemies to strike them in a downward motion before following it up with two spinning blade strikes.
This move can be parried and dodged. - Blade Chain: Tian Ying jumps to strike his opponent, one strike as he rises and one as he descends, and suddenly rushes forward to strike upfront.
This move can be parried and dodged.
Rewards
- Echo Jade x30
- Qinghe Exploration x50
- Character EXP x5000
- Coin x5000
- Yaksha Rush x1
- Medicinal Tales x1
- Lv. 1 Ebon Iron x4
Campaign Rewards
Level 1
- Tier 16 Eaglerise Greaves (Uncommon) x2
- Halo Peak Cosmetic Chest x1
- Crimson Leaves Chest x1
- Martial Arts: Custom Tips x2
- Oscillating Jade x2
- Zhou Coin x3200
- Character XP x4000
Level 2
- Tier 16 Eaglerise Greaves (Epic) x2
- Halo Peak Cosmetic Chest x1
- Crimson Leaves Chest x1
- Martial Arts: Custom Tips x2
- Oscillating Jade x2
- Zhou Coin x3200
- Character XP x4400
Level 3
- Tier 16 Eaglerise Greaves (Epic) x2
- Halo Peak Cosmetic Chest x1
- Crimson Leaves Chest x1
- Martial Arts: Custom Tips x2
- Oscillating Jade x2
- Zhou Coin x3200
- Character XP x4800
Level 4
- Tier 31 Eaglerise Greaves (Epic) x2
- Halo Peak Cosmetic Chest x1
- Crimson Leaves Chest x1
- Martial Arts: Custom Tips x2
- Inner Way Note: Custom Chest x1
- Oscillating Jade x2
- Zhou Coin x3200
- Character XP x5200
Level 5
- Tier 41 Eaglerise Greaves (Epic) x2
- Halo Peak Cosmetic Chest x1
- Crimson Leaves Chest x1
- Martial Arts: Custom Tips x2
- Inner Way Note: Custom Chest x1
- Oscillating Jade x2
- Zhou Coin x3200
- Character XP x5600
Level 6
- Tier 51 Eaglerise Greaves (Epic) x2
- Halo Peak Cosmetic Chest x1
- Crimson Leaves Chest x1
- Martial Arts: Custom Tips x2
- Inner Way Note: Custom Chest x1
- Attunement Stone: Doom x1
- Oscillating Jade x3
- Zhou Coin x3200
- Character XP x6000
Level 7
- Tier 56 Eaglerise Greaves (Epic) x2
- Halo Peak Cosmetic Chest x1
- Crimson Leaves Chest x1
- Martial Arts: Custom Tips x2
- Inner Way Note: Custom Chest x1
- Attunement Stone: Rhapsody x1
- Oscillating Jade x3
- Zhou Coin x3200
- Character XP x6400
Level 8
- Tier 61 Eaglerise Greaves (Epic) x2
- Halo Peak Cosmetic Chest x1
- Crimson Leaves Chest x1
- Martial Arts: Custom Tips x2
- Inner Way Note: Custom Chest x1
- Attunement Stone: Gold Inlay x1
- Oscillating Jade x3
- Zhou Coin x3200
- Character XP x6800
Level 9
- Tier 61 Eaglerise Greaves (Legendary) x2
- Halo Peak Cosmetic Chest x1
- Crimson Leaves Chest x1
- Martial Arts: Custom Tips x2
- Inner Way Note: Custom Chest x1
- Attunement Stone: Gold Inlay x1
- Oscillating Jade x3
- Zhou Coin x3200
- Character XP x7000
Level 10
- Tier 71 Eaglerise Greaves (Legendary) x2
- Gear Echo: Fieryheart x2
- Halo Peak Cosmetic Chest x1
- Crimson Leaves Chest x1
- Martial Arts: Custom Tips x2
- Inner Way Note: Custom Chest x1
- Attunement Stone: Fieryheart x1
- Oscillating Jade x3
- Zhou Coin x3200
- Character XP x7200
Level 11
- Tier 71 Eaglerise Greaves (Legendary) x2
- Gear Echo: Fieryheart x2
- Halo Peak Cosmetic Chest x1
- Crimson Leaves Chest x1
- Martial Arts: Custom Tips x2
- Inner Way Note: Custom Chest x1
- Attunement Stone: Fieryheart x1
- Oscillating Jade x3
- Zhou Coin x3200
- Character XP x7400
Tips
- Use Meridian Touch to Cancel His Shockwave Move
- Stay on the Side During His Statue Attack
- Ignore the Minions and Parry the Original
Ye Wanshan
Location
To unlock Ye Wanshan, you will need to complete the Bodhi Sea campaign quest to progress further.
Once you have finished the quest, you can find Ye Wanshan’s Campaign version at the Sundara Land area in the Qinghe region.
Best Companion
The best companion to bring against Ye Wanshan would be Elder Gongsun due to his ability to chase the enemy across the battlefield.
Movesets
Phase 1
- Jousting Rush: Ye Wanshan rushes in horseback towards his opponent and swings his glaive to deal damage. This move can be parried and dodged.
- Two Hit Performance: Ye Wanshan slashes with his sword before following it up with a slash from his glaive. This move can be parried and dodged.
- Three Hit Performance: Ye Wanshan rushes forward and performs three sweeping attacks to topple his opponent. This move can be parried and dodged.
- Horseplay: Ye Wanshan’s Horse performs a jump with a red glow for Ye Wanshan to use as a momentum to plunge his glaive, causing massive damage. This move can be perfectly parried to trigger a counterattack and dodged when timed correctly.
- Glory: Ye Wanshan rushes forward and performs two quick slashes before brandishing both his glaive and sword with a red glow and violently slamming them together, dealing massive damage in the process. This move can be perfectly parried to trigger a counterattack and dodged when timed correctly.
- Majestic: Ye Wanshan brandishes his glaive and sword with a red glow, but this time, he rushes toward his opponent and uses the jump of his horse as momentum to quickly slash with his sword and plunge his glaive to the ground. This move can be perfectly parried to trigger a counterattack and dodged when timed correctly.
Phase 2
- Grand Performance: At the start of Phase 2, Ye Wanshan’s horse prepares to jump with a golden glow and rises for Ye Wanshan to throw his glaive towards his opponent. Shortly after, Ye Wanshan’s Horse jumps once again to the location of the glaive to retrieve it. This move can only be dodged and not parried.
- Four Hit Performance: Ye Wanshan rushes forward and performs four fire slashes towards his opponent, disorienting them with the flames and dealing staggering damage in the process. This move can be parried and dodged.
- Flame Jousting: Similar to Jousting Rush, Ye Wanshan rushes on horseback towards his opponent and swings his flame-imbued glaive to deal damage. This move can be parried and dodged.
- Bodhi’s Wrath: Ye Wanshan uses his flaming sword to slash at his opponent two times before his horse jumps for him to use as momentum to plunge his glaive. This move can be parried and dodged.
- Mercy Pass: Ye Wanshan brandishes his flaming sword with a red glow before rushing forward to strike his opponent with it. This move can only be dodged and not parried.
Hero’s Realm
- Flame Charge: Ye Wanshan glows yellow and charges on a straight path. We recommend evading the move by going out of his lane to avoid the attack.
- Bladed Inferno: Ye Wanshan calls upon a rain of chaos. The floor will glow red, indicating where they will land. We recommend running away from the indicated landing spots to avoid the attack.
- Burning Wraith: Ye Wanshan summons a couple of wraiths. You can take this time to regroup and heal while dealing with the weaker summons.
- Inferno Sweep: Ye Wanshan imprisons you in a circle of fire with flaming horses dashing in intersecting lanes. We recommend running in the middle, then dashing to the side, unaffected by the horses, to give you enough space and time to find the safe spot.
- Meteor Fall: Ye Wanshan will launch and impact a large area of effect, indicated by the red glow on the floor. We recommend evading this move by moving outside his melee range.
- Unending Flames: Ye Wanshan fills the arena with horses running around and flames dropping from the sky. We recommend using your Cloud Steps to ride a horse and quickly evade the flames.
- Flame Flash Combo: Ye Wanshan slams the ground in front of him twice. The area of effect will be indicated by the red semi and full circles. You can easily dodge this move by going outside the area of effect.
- Total Annihilation: Ye Wanshan charges a powerful strike, slashing in a straight line. The area of effect will be indicated by the red path on the ground. You can easily dodge this move by going outside its straight path.
Rewards
- Echo Jade x50
- Buddha’s Light Jade: Yin x1
- Medicinal Tales x1
- Zhou Coin x30000
- Fury Harvest: Tome x1
- Oscillating Jade x5
Tips
- Deflect Red Attacks and Dodge Yellow Attacks
- Use Cloud Steps to Cancel His Charging Attack
- Avoid Chasing Him and Use Ranged Attacks
- Use Cloud Steps to Ride the Horses (Hero’s Realm)
- Avoid Fighting In Front of the Boss (Hero’s Realm)
- Dodge His Area of Effect Attacks (Hero’s Realm)


really good guide this is, thanks a lot for sharing this
Back to back great guides thank you
Awesome i was already wondering if i had left something behind in this zone
How would you personally rank these bosses in difficulty and/or how enjoyable you found the comabt against them?
Yet another useful guide. Thanks again
Another banger guide thanks man!
Amazing guide! Really needed this
Awesome, thank you 🫡