
Want to see Raider King content first? Add us as a preferred source.
Where Winds Meet has many bosses; some of these bosses can be encountered while playing the campaign, which requires you to spend energy points to take them on and claim their rewards. They are unlocked as you progress the story and complete their Campaign Quest. These usually require you to take them multiple times to unlock specific Talents further and farm certain items.
Some of these bosses roam around the world and can be encountered and fought against. They can be fought anytime and are not tied to any questline, but have a certain level recommendation to guide you better. There are also Challenge Fights that are some of the most difficult Bosses in the game to earn achievements. They are mostly considered as skill-checks for those looking for a more challenging fight and are not required to defeat in order to progress further in the game.
Some of these bosses can be difficult to locate or fight against, and can eat up a lot of your time. This is why I have written this guide, so that you can find all the bosses in Moonveil Mountain – Qinghe, and how you can defeat them.
All Bosses’ Location and How to Beat Them in Moonveil Mountain – Qinghe
Dalang The Horse Tamer
Location
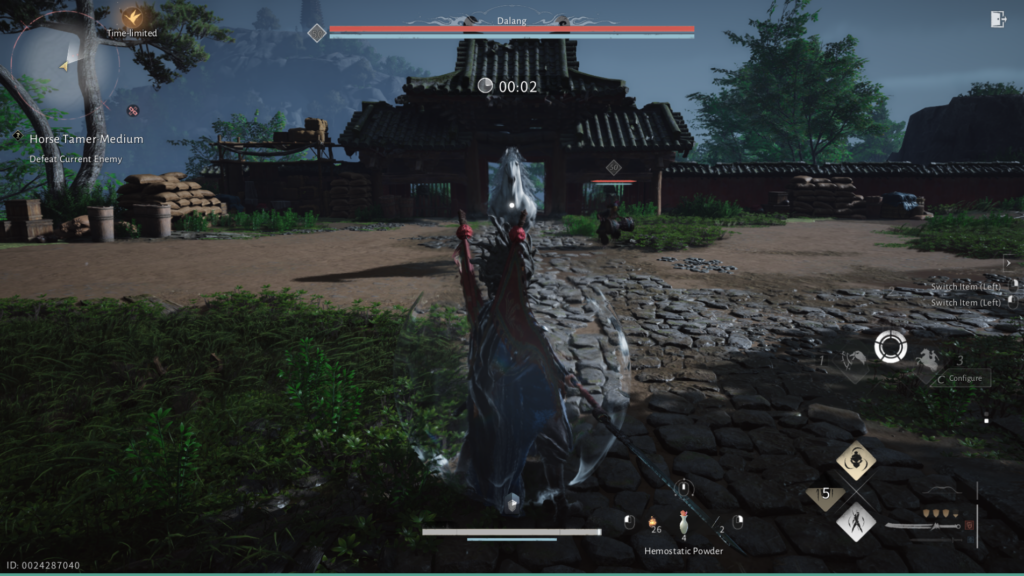
You can encounter Dalang during Chapter 1: A Horse Neighs in the Forest main questline, where you will need to defeat the boss to progress further.
Martial Arts
- Nameless Sword
- Nameless Spear
Mystic Arts
- Cloud Steps
Movesets
Phase 1
- Heavenly Horse: Dalang leaps into the air and slams the ground with their body, causing shockwaves. Dalang does this four times. This move can be parried and dodged.
- Dalang Stomp: Dalang stomps the ground 4 times causing small shockwaves. This move can be parried and dodged.
- Dalang Charge: Dalang prepares themself and suddenly charges. This move can be parried and dodged.
- Double Mare: Dalang swing their head twice while also lunging forward. This move can be parried and dodged.
- Headbutt: Dalang rises and headbutts. This move can be parried and dodged.
- Baji Quan: Dalang faces to their sides and suddenly charges with their shoulders and stomps three times afterwards. This move can be parried and dodged.
- Gold Ship: Dalang jumps and drop kicks. We recommend to avoid going forward when Dalang jumps and spin as the move can stagger. This move can be parried and dodged.
- Horse-nado: Dalang spins, causing shockwaves and directly after, charges towards you. This move can be parried and dodged.
Phase 2
- Red: Heavenly Horse: Dalang leaps into the air and slams the ground with their body, causing shockwaves. Afterwards, Dalang prepares to stomp with a red glow, causing tremors across the field. This move can be perfectly parried to trigger a counterattack and dodged when timed correctly.
- Gold: Dalang Charge: Dalang prepares themself and suddenly charges. Upon nearing contact, a golden glow will shine through their head. This move can only be dodged and not parried.
Rewards
- Echo Jade x20
- Qinghe Exploration x10
- Zhou Coin x5000
- Character XP x5000
- Enlightment Point x500
- Hemostatic Powder x2
Tips
- Focus on damaging Dalang and ignore the Owner since he will be useful throughout the fight to inflict Poison on the Boss itself.
- Once you reach the 2nd phase, this will turn into a 1v1 where you will have to learn Dalang’s timings to deflect its attacks, especially the move where it stomps multiple times. Then, Parry his Stomp Attacks.
Earth Fiend Diety

Location
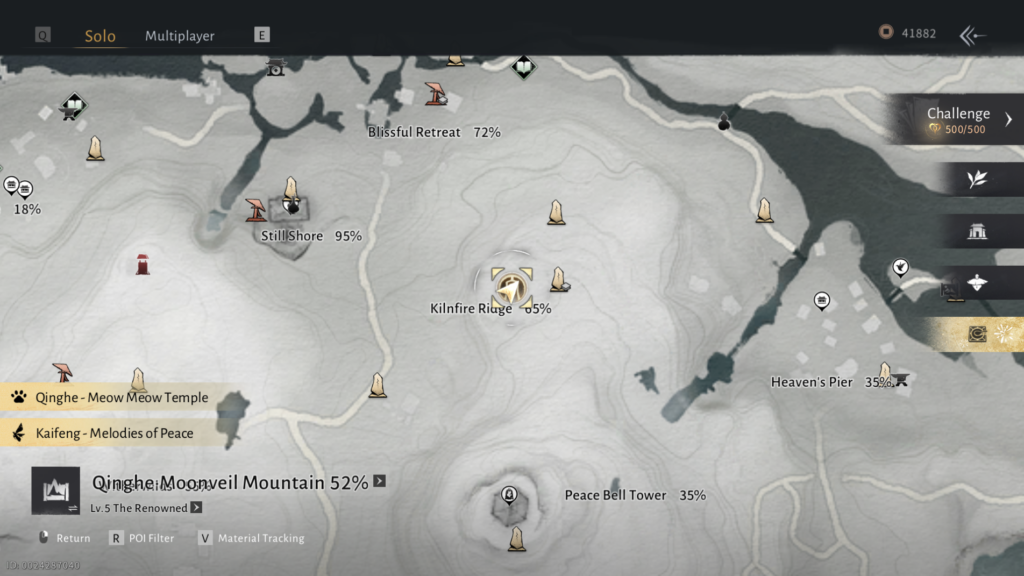
You can encounter the Earth Fiend Deity World Boss next to the road leading south between Witherwilds and Peace Bell Tower in the Qinghe region.
Martial Arts
- Thundercry Blade
Mystic Arts
- Cloud Steps
- Meridian Touch
- Golden Body
Best Companion
The best companion to bring against the Earth Fiend Deity would be Yuan Jin’Gang due to his ability to deal Qi damage from a distance. His arrows can also interrupt the animation of Earth Fiend Deity’s moves, such as Windslash and Aerial Tailspin.
Movesets
- Whirlwind: The Earth Fiend Deity channels a powerful attack that can easily one-shot you. This move can interrupt his channeling by using the Cloud Steps mystic skill.
- Armadillo Roll: The Earth Fiend Deity leaps and rolls over you. This move can be parried and dodged when timed correctly.
- Giant Frog: The Earth Fiend Deity jumps and slams the ground with powerful impact, repeating four times. This move can be parried and dodged when timed correctly.
- Wolverine Dive: The Earth Fiend Deity spins and flies towards you, digging the ground on impact. This move can be parried and dodged when timed correctly.
- Wind Slash: The Earth Fiend Deity slashes on the wind, damaging you even from a distance. This move can be parried and dodged when timed correctly.
- Aerial Tailspin: The Earth Fiend Deity spins in the air and quickly drops on you. This move can be parried and dodged when timed correctly.
- Burrowstrike: The Earth Fiend Deity glows red, burrows underground, and appears near you. This move can be perfectly parried and counterattacked, or dodged when timed correctly.
Rewards
- Echo Jade x20
- Qinghe Exploration x50
- Character EXP x8000
- Coin x8000
- Inner Way Note: Custom Chest x5
- Medicinal Tales x3
Tips
- Earth Fiend Deity will execute Whirlwind, a large AoE move that constantly pulls you towards him to perform a huge burst damage attack at the end that can easily one-shot you. Use Clouds Steps to Cancel his Whirlwind.
- Use Vernal Umbrella and ranged attacks.
- Parry His Melee Attacks.
Heartseeker
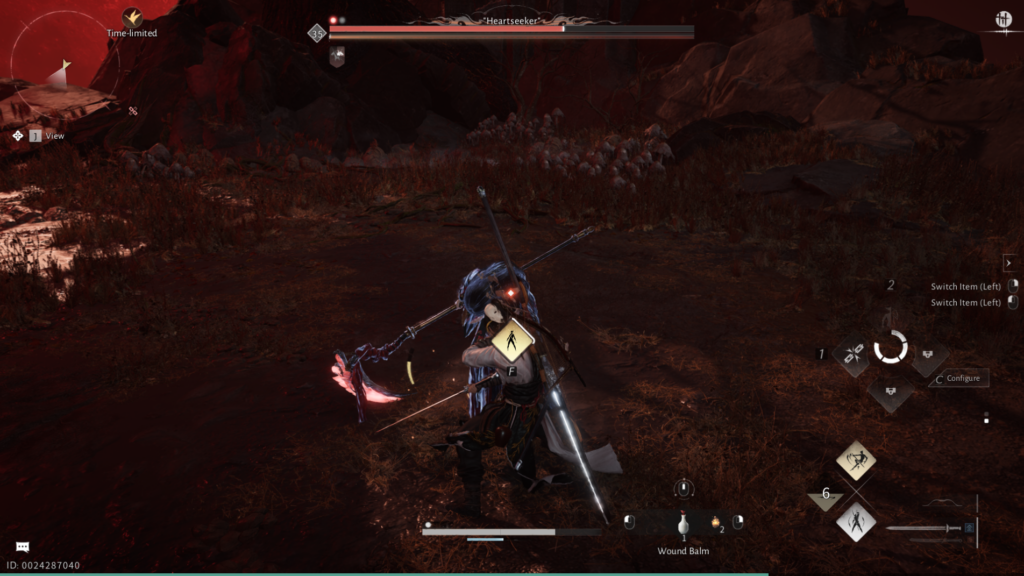
Location
In order to fight Heartseeker, you first have to progress the Chapter 1 A Horse Neighs in the Forest main quest until your next objective is to complete the Still Shore campaign quest and defeat Heartseeker herself.
Martial Arts
- Panacea Fan
Mystic Arts
- Meridian Touch
Best Companion
The best companion to bring against Heartseeker would be Yuan Jin’Gang due to his ability to deal high Qi damage from a safe distance to easily exhaust her for a huge Execute attack.
Movesets
Phase 1
- Shadow Step: Heartseeker will walk and briefly disappear before teleporting at your right side as an opening move. This move can be parried and dodged.
- Thundering Banshee: Heartseeker will start hovering at the air and scream for roughly 5 seconds, dealing AoE damage. This can be parried and dodged.
- Scythe Slash: Heartseeker goes into a stance and charges her Scythe before lunging with an upward slash. This can be parried and dodged.
- Charge Attack: Heartseekers comes nears and charges her Scythe with a red glow before lunging with an upward slash. This move can be perfect parried to trigger a counterattack and dodged when timed correctly.
Phase 2
- Thunderstorm: At the start of Phase 2, Heartseeker will start summoning thunderstorms and charges her sword while hovering in the air before slamming into the ground, dealing tremendous amount of AoE damage.
While she’s charging, hide behind the stone tablets to defend against the Thunderstorm. This move cannot be dodged or parried. - Double Scythe Slash: After Thunderstorm, Heartseeker will start to do a Double Scythe Slash, one vertically and one horizontally. This can be parried and dodged.
- Scythe Up Slash: Heartseeker performs a simple up slash from her scythe. This can be parried and dodged.
- Five Slash Combo: Heartseeker performs a 5 hit Scythe Slash combo. Before performing this move, Heartseeker charges her scythe with a red glow. This move can be perfect parried to trigger a counterattack and dodged when timed correctly.
- Three Slash Combo: Heartseeker performs a 3 hit Scythe Slash combo. The first two slashes are in quick succession while she briefly charges the last slash. This move can be parried and dodged when timed correctly.
- Thunder Orbs: Heartseeker steps back and summons three orbs of thunder with a golden glow and shoots them one by one before lunging forward with a Slash Attack. This move can only be dodged and not parried.
- Lunging Scythe Slash: Heartseeker goes into a stance and lunges with a Scythe Slash. This slash attack can be parried and dodged.
- Sky Fall: Once Heartseeker is exhausted, she will summon thunder strikes around her while she remains stationary. The thunder strikes can be dodged but cannot be parried.
Rewards
- Qinghe Exploration x20
- Enlightment Point x600
- Character XP x6000
Campaign Drops
Upgrading your World Level as you level up and progress will also provide higher-quality rewards whenever you take on Campaign Bosses. Make sure to manage your Energy consumption to claim all the rewards you can get from Hearterseeker.
Level 1
- Tier 16 Hawkwing Set (Uncommon) x2
- Still Shore Cosmetic Chest x1
- Crimson Leaves Chest x1
- Bellstrike: Umbra Tips x2
- Oscillating Jade x2
- Zhou Coin x3200
- Character XP x4000
Level 2
- Tier 16 Hawkwing Set (Epic) x2
- Still Shore Cosmetic Chest x1
- Crimson Leaves Chest x1
- Bellstrike: Umbra Tips x2
- Oscillating Jade x2
- Zhou Coin x3200
- Character XP x4400
Level 3
- Tier 16 Hawkwing Set (Epic) x2
- Still Shore Cosmetic Chest x1
- Crimson Leaves Chest x1
- Bellstrike: Umbra Tips x2
- Oscillating Jade x2
- Zhou Coin x3200
- Character XP x4800
Level 4
- Tier 31 Hawkwing Set (Epic) x2
- Still Shore Cosmetic Chest x1
- Crimson Leaves Chest x1
- Bellstrike: Umbra Tips x2
- Internal Art Note: Custom Chest x1
- Oscillating Jade x2
- Zhou Coin x3200
- Character XP x5200
Level 5
- Tier 41 Hawkwing Set (Epic) x2
- Still Shore Cosmetic Chest x1
- Crimson Leaves Chest x1
- Bellstrike: Umbra Tips x2
- Internal Art Note: Custom Chest x1
- Oscillating Jade x2
- Zhou Coin x3200
- Character XP x5600
Level 6
- Tier 51 Hawkwing Set (Epic) x2
- Still Shore Cosmetic Chest x1
- Crimson Leaves Chest x1
- Bellstrike: Umbra Tips x2
- Internal Art Note: Custom Chest x1
- Attunement Stone: Doom x1
- Oscillating Jade x3
- Zhou Coin x3200
- Character XP x6000
Level 7
- Tier 56 Hawkwing Set (Epic) x2
- Still Shore Cosmetic Chest x1
- Crimson Leaves Chest x1
- Bellstrike: Umbra Tips x2
- Internal Art Note: Custom Chest x1
- Attunement Stone: Rhapsody x1
- Oscillating Jade x3
- Zhou Coin x3200
- Character XP x6400
Level 8
- Tier 61 Hawkwing Set (Epic) x2
- Still Shore Cosmetic Chest x1
- Crimson Leaves Chest x1
- Bellstrike: Umbra Tips x2
- Internal Art Note: Custom Chest x1
- Attunement Stone: Gold Inlay x1
- Oscillating Jade x3
- Zhou Coin x3200
- Character XP x6800
Level 9
- Tier 61 Hawkwing Set (Legendary) x2
- Still Shore Cosmetic Chest x1
- Crimson Leaves Chest x1
- Bellstrike: Umbra Tips x2
- Internal Art Note: Custom Chest x1
- Attunement Stone: Doom x1
- Oscillating Jade x3
- Zhou Coin x3200
- Character XP x7000
Level 10
- Tier 71 Hawkwing Set (Legendary) x2
- Gear Echo: Fieryheart x2
- Still Shore Cosmetic Chest x1
- Crimson Leaves Chest x1
- Bellstrike: Umbra Tips x2
- Internal Art Note: Custom Chest x1
- Attunement Stone: Fieryheart x1
- Oscillating Jade x3
- Zhou Coin x3200
- Character XP x7200
Level 11
- Tier 71 Hawkwing Set (Legendary) x2
- Gear Echo: Fieryheart x2
- Still Shore Cosmetic Chest x1
- Crimson Leaves Chest x1
- Bellstrike: Umbra Tips x2
- Internal Art Note: Custom Chest x1
- Attunement Stone: Fieryheart x1
- Oscillating Jade x3
- Zhou Coin x3200
- Character XP x7400
Tips
- Around the edges of the arena, there will be Tombstones that you can hide behind to block Heartseeker’s projectiles and survive her one-shot mechanic once she enters the 2nd phase.
- Parry Her Melee Attacks.
- Use Meridian Touch on Her Projectiles
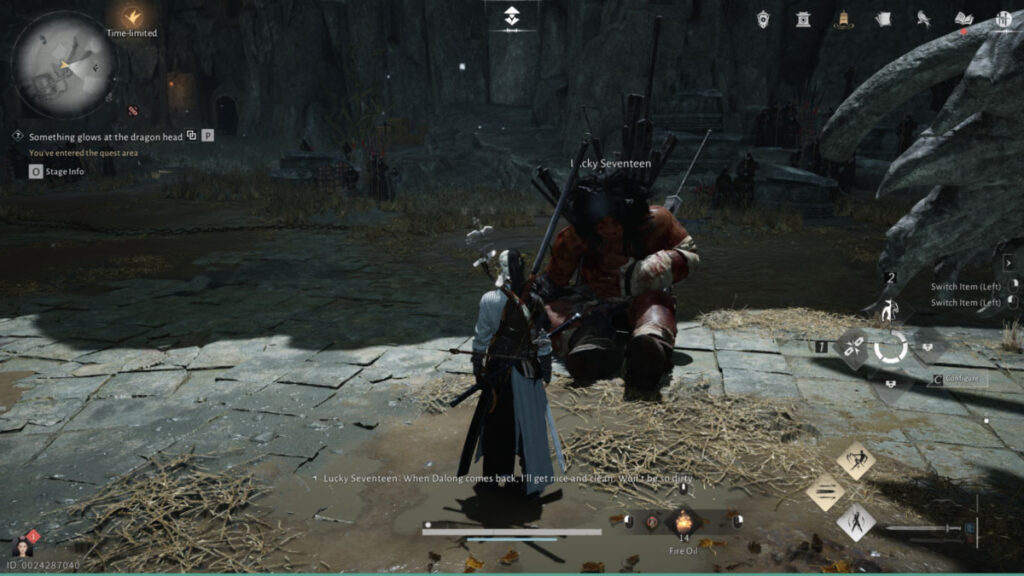
Lucky Seventeen
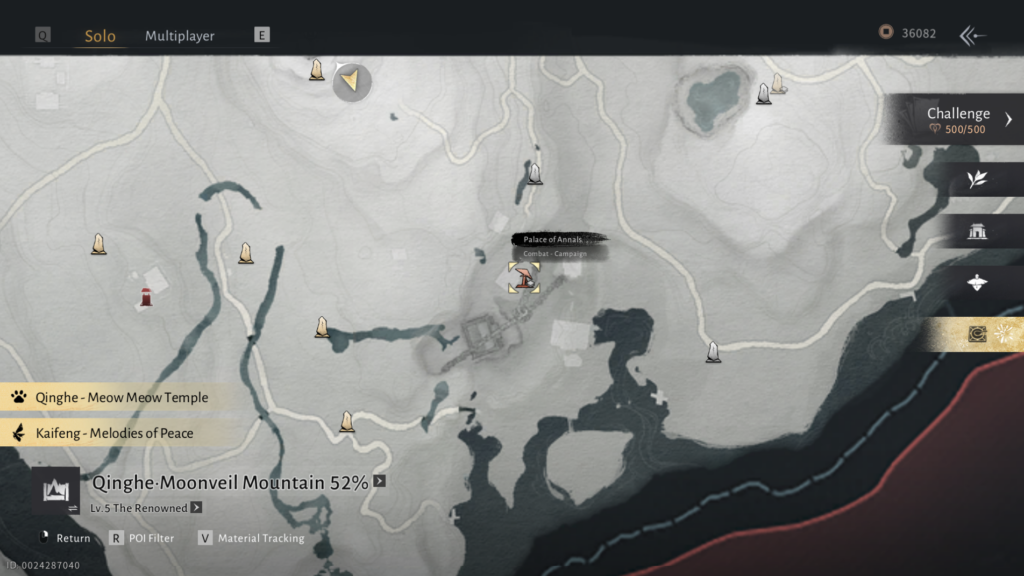
Location
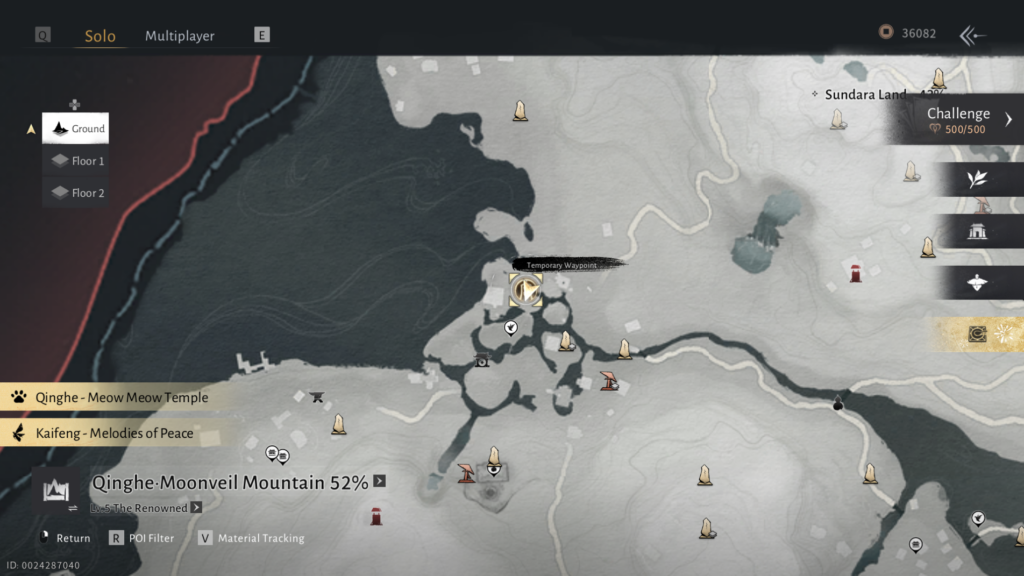
In order to unlock Lucky Seventeen, you will need to complete the Palace of Annals campaign quest to progress further.
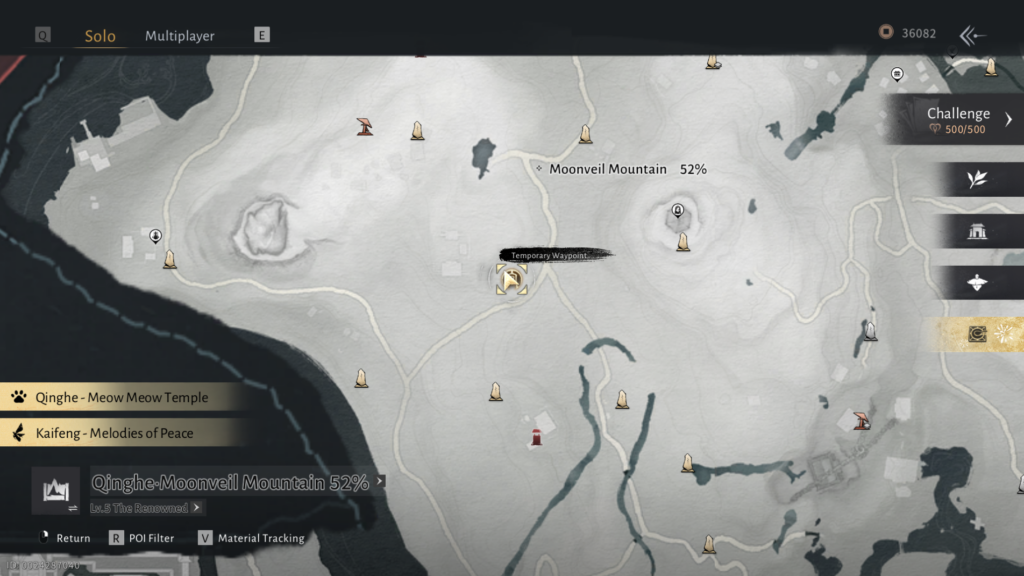
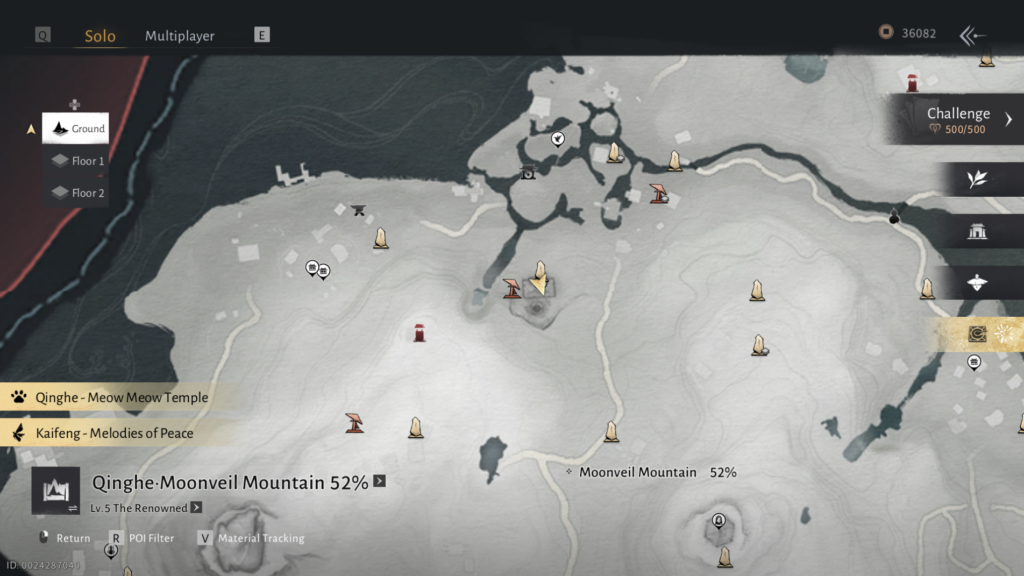
Once you have finished the quest, you can find Lucky Seventeen’s Campaign version at the Moonveil Mountain area in the Qinghe region.
Best Companion
The best companion to bring against Lucky Seventeen would be Yi Dao due to his ability to sustain the fight through tanking and healing. Yi Dao also periodically performs a ground attack that staggers Lucky Seventeen.
Movesets
Phase 1
- The Call: Lucky Seventeen roars before jumping towards his opponent and smashing the ground. This move can be parried and dodged.
- Rage: Lunge: Lucky Seventeen turns red and stomps the ground before jumping towards his opponent and smashing the ground. This move can be parried and dodged.
- Rage: Charge: Lucky Seventeen turns red and stomps the ground before rushing forward and swinging his left hand. This move can be parried and dodged.
- Sweep Combo: Lucky Seventeen sweeps with his left leg and follows it up with two punches from the ground. This move can be parried and dodged.
- Headbutt: Lucky Seventeen rushes forward and headbutts his opponent, staggering them. This move can be parried and dodged.
- Vulcan Touch: Lucky Seventeen charges his fists with a golden glow and flips the ground, causing debris to fly over that direction. This move can only be dodged and not parried.
- Range: Punch: Lucky Seventeen turns red and stomps the ground and punches his opponent twice, staggering them. This move can be parried and dodged.
- Blacksmith Combo: Lucky Seventeen stomps and follows up with a two-handed slam into a spinning jab. This move can be parried and dodged.
- One, Two: Lucky Seventeen rushes forward with a two punch combo, causing staggers with each punch. This move can be parried and dodged.
Phase 2
- The Grand Call: In Phase 2, Lucky Seventeen throws his sword towards his opponent and picks it up as an opening move. This move can be parried and dodged.
- Weapon Combo: Lucky Seventeen swings his weapon and uses it to blunt his opponent. He uses a back swing as a final move. This move can be parried and dodged.
- Vulcan Slam: Lucky Seventeen charges his weapon with a golden glow and smashes it violently into the ground. This move can only be dodged and not parried.
- Red Swing: Lucky Seventeen heavily swings his weapon with a red glow. This move can be perfectly parried to trigger a counterattack and dodged when timed correctly.
- Back Swing: Lucky Seventeen swings his weapon from a backhand, causing a stagger to his opponent. This move can be parried and dodged.
- Tornado Smash: Lucky Seventeen spins toward his opponent and smashes them upon contact. Each attack causes staggering to his opponents. This move can be parried and dodged.
- Sweep Smash: Lucky Seventeen uses his weapon to sweep his opponent and then jumps, smashing his weapon to the ground to cause shockwaves. This move can be parried and dodged.
- Stomp: Lucky Seventeen stomps the ground, causing shockwaves and disrupting his enemies. This move can be parried and dodged.
- Enhancement: Lucky Seventeen spins aways from his opponent and enhances his weapon, causing more damage with each attack. This move can be parried and dodged.
Hero’s Realm
- Dual Swing: Lucky Seventeen swings his hammer twice. We recommend waiting for the attack to end, or dodging backwards to avoid damage.
- Forging Slam: Lucky Seventeen swings his hammer before slamming it in front of him. We recommend dodging to the side to avoid damage.
- Inferno Surge: Seventeen slams his hammer onto the ground, which creates yellow circles on the ground that create flame eruptions after a delay. We recommend constantly moving during this attack to avoid the flames.
- Vulcan Leap: Lucky Seventeen leaps into the air, then slams his hammer, creating a flame AoE on impact. We recommend running away from the landing zone to avoid damage.
- Blaze of the Worthy: Seventeen throws his hammer forward, with the hammer arcing back to him after. We recommend staying behind Lucky Seventeen during this attack.
- Echo Slam: Seventeen slams his hammer in front of him, dealing damage, which also creates a shockwave shortly after. We recommend dodging or parrying the shockwave after dodging the initial slam.
- Earthshaker: Lucky Seventeen leaps into the air, then slams his hammer, damaging the entire arena. We recommend timing your dodge for the shockwave.
- Forge: Lucky Seventeen spawns four swords, gains a shield, and continously hammers away, dealing damage to players near him. Destroy the four swords to cancel this attack.
- Blade Eruption: During the second phase, Lucky Seventeen follows up his Dual Swing with a jump slam that spawns blades from the ground. We recommend dodging to the side to avoid damage.
- Tempering: Lucky Seventeen slams his hammer multiple times, dealing damage to a wide cone in front of him. We recommend staying behind him at all times during this attack to avoid damage.
- Giant Sword: Lucky Seventeen calls forth a giant sword that descends onto the arena, dealing AoE fire damage continuously. We recommend staying away from the swords to minimise their impact.
Rewards
- Echo Jade x50
- Character XP x30000
- Zhou Coin x30000
- Medicinal Tales x1
- Vital Leech: Tome x1
- Oscillating Jade x5
Tips
- Kite and Attack His Rear
- Use Ranged Weapons to Attack from Distance
- Parry his Melee Attacks
Qianye The Witch
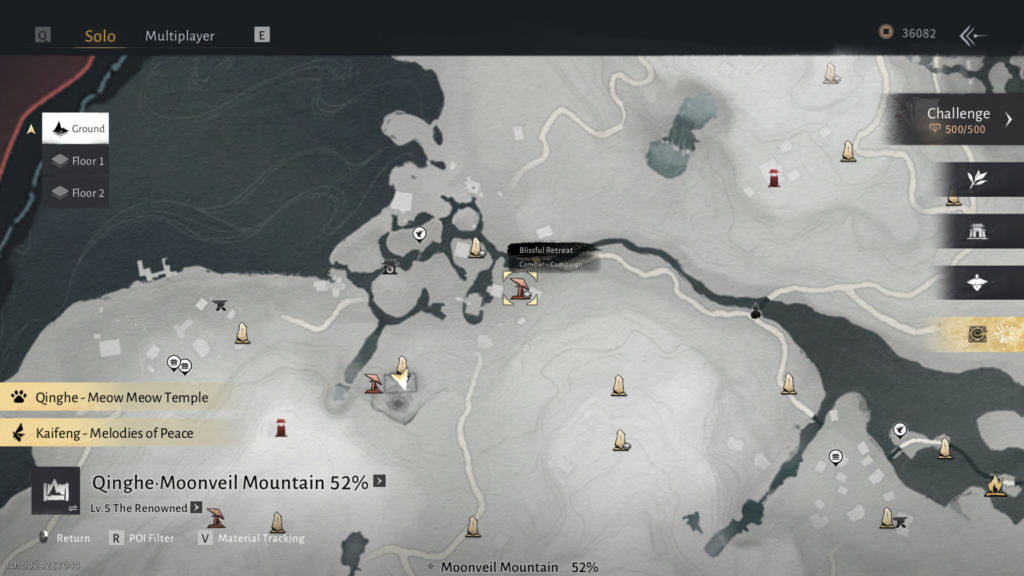
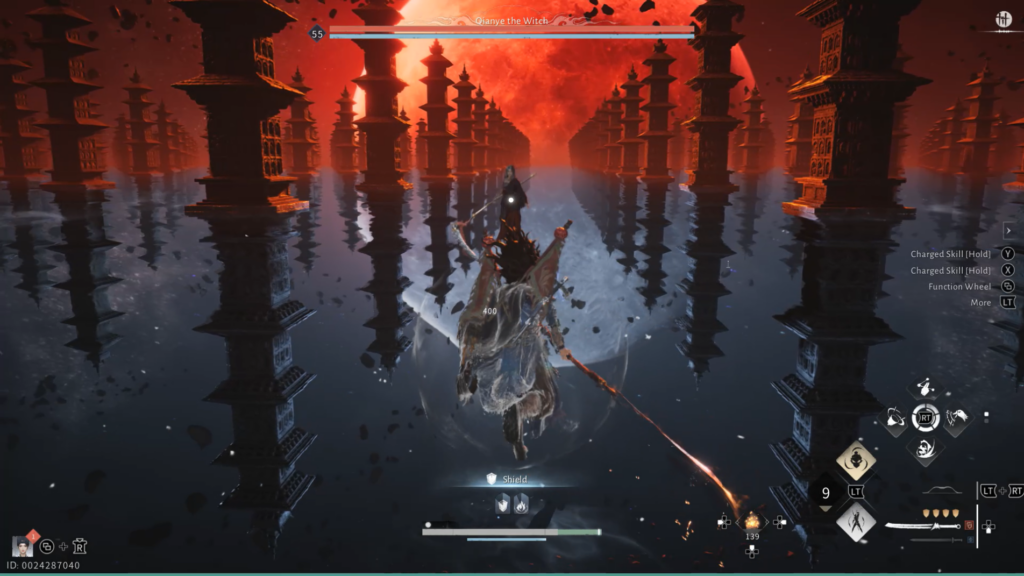
Location
In order to fight Qianye, you first have to progress the Chapter 1 For Whom Does He Return main quest until your next objective is to complete the Blissful Retreat campaign quest and defeat Qianye herself.
Once you have defeated Qianye, her Campaign version will be automatically unlocked in your map where you can spend 20 Energy Points to claim more rewards depending on your World Level.
Martial Arts
- Panacea Fan
Mystic Arts
- Guardian Palm
- Leaping Toad
- Meridian Touch
- Cloud Steps
Movesets
Phase 1
- Upward Slash: Qianye briefly winds up her scythe and dashes forward to execute an upward slash from below. This move can be parried and dodged when timed correctly.
- Sweeping Slash: Qianye charges up her scythe with a red glow and unleashes a wide sweeping slash around her. This move can be perfect parried to trigger a counterattack and dodged when timed correctly.
- Falling Double Wave: Qianye dodges backwards and flies into the air to briefly charge her scythe with a gold glow and unleash two wave lines on the ground. This move cannot be parried, so we recommend dodging to the side to avoid the attack.
- Sweep to Single Wave: Qianye dodges away from you and charges up her scythe with a red glow to unleash a wide sweeping slash around her, followed up by a single wave attack. This move can be perfect parried to trigger a counterattack and dodge when timed correctly.
- Triple Wave: Qianye charges up her scythe with a gold glow to execute 3 wave lines in front of her. This move cannot be parried, so we recommend dodging between the gaps to avoid the attack.
- Double Shadow Strike: Qianye enters a quick stance and disappears from sight. She then reappears in your blind spot to execute a wide slash and disappears again to redo the same wide slash from your blind spot. This move can be parried and dodged when timed correctly. We also recommend standing still and only start parrying when the camera angle changes for good timings.
- Illusion Strike: Qianye enters a quick stance to disappear and send 3 illusions of herself near you to attack while she darts behind you to execute a leaping strike, followed by a wide sweeping slash to finish the combo. This move can be parried and dodged when timed correctly.
- Goddess of Fire: Qianye flies into the air, charges her scythe briefly with a gold glow, and boomerangs her burning double-sided scythe towards you until she slams into the ground and follows up with a wide sweeping slash. The boomerang and slam attack cannot be parried, so we recommend dodging to avoid them, while her follow-up sweeping slash can be parried.
Phase 2
- Horizontal Slash: Qianye executes a short sweeping slash with a 180-degree angle. This move can be parried and dodged when timed correctly.
- 2-hit Combo: Qianye drags her scythe back briefly to execute two slashes on both sides. This move can be parried and dodged when timed correctly.
- Sweep to Leaping Strike: Qianye dashes forward and does a sweeping slash into a leaping strike. This move can be parried and dodged when timed correctly.
- 3-hit Sweeping Combo: Qianye dashes towards you to deal 3 consecutive sweeping slashes. This move can be parried and dodged when timed correctly.
- Faded Double Sweep: Qianye slowly falls to her back until she suddenly dashes mid-way and executes 2 consecutive sweeping slashes. This move can be parried and dodged when timed correctly.
- Sevenfold Combo: Qianye charges her scythe with a red glow and starts doing a series of slashes that ends with a leaping strike. All hits in this move can be blocked, parried, and dodged when timed correctly.
- Quadruple Wave: Qianye dodges away from you and charges the scythe with a gold glow to send out 4 consecutive wave attacks from afar. This move cannot be parried, so we recommend dodging around her to avoid the attack.
- Enter White-form: Qianye leaps into the air and slams the ground to burn it and switch forms with her reflection. This move always starts once you reach the 75% and 40% health threshold in her 2nd phase.
- Shadow Strike (2nd Phase): Qianye vanishes to circle around you and reappears to execute a sweeping slash. This move can be parried and dodged when timed correctly.
- Shadow Leaping Strike: Qianye vanishes to leap into the air and reappears as she slams the ground with her scythe. This move can be parried and dodged when timed correctly.
- Sixfold Shadow Strike: Qianye executes a short sweep slash and vanishes into the air to deal two falling attacks. She vanishes again to execute another two sweep slashes, followed by a final shadow strike at the end. This move can be parried and dodged when timed correctly.
- Illusion Strike (2nd Phase): Qianye jumps in the air and sends out 2 illusions to attack while she slams slams her scythe into the ground. This move can be parried and dodged when timed correctly.
- Reaper’s Slash: Qianye spins her scythe around with a gold glow to hit you with a sweeping slash followed by a short stab attack that can easily one-shot you. This move cannot be parried and can only be dodged when timed correctly so try to keep your distance.
- Divine Eruption: Qianye enters a stance and dashes towards you to deal a short sweep. She then vanishes briefly to leap in the air, charge her scythe with a gold glow, and slam the ground to unleash 6 waves starting from the epicenter. The first hit can be parried, while the slam attack requires you to dodge as it cannot be parried.
- Cyclone Dive: Qianye enters a stance and starts creating a cyclone on her position to fly up in the air and dive towards you.
- Exit White-form: Qianye produces a barrier where she executes multiple slashes across your screen to swap back to her original form. This move starts once her health is low after entering White-form a second time during her 2nd phase.
Rewards
- Echo Jade x20
- Qinghe Exploration x10
- Zhou Coin x15000
- Character XP x22500
- Enlightment Point x1500
- Echoes of Oblivion: Tome x1
- Ferrying Mortality x1
- Clip-clop Horse Mount x1
Campaign Rewards
Upgrading your World Level as you level up and progress will also provide higher quality rewards whenever you take on Campaign Bosses. Make sure to manage your Energy consumption to claim all the rewards you can get from Qianye.
Level 1
- Tier 16 Swallowcall Set (Uncommon) x2
- Blissful Retreat Cosmetic Chest x1
- Crimson Leaves Chest x1
- Bamboocut: Wind Tips x2
- Oscillating Jade x2
- Zhou Coin x3200
- Character XP x4000
Level 2
- Tier 16 Swallowcall Set (Epic) x2
- Blissful Retreat Cosmetic Chest x1
- Crimson Leaves Chest x1
- Bamboocut: Wind Tips x2
- Oscillating Jade x2
- Zhou Coin x3200
- Character XP x4400
Level 3
- Tier 16 Swallowcall Set (Epic) x2
- Blissful Retreat Cosmetic Chest x1
- Crimson Leaves Chest x1
- Bamboocut: Wind Tips x2
- Oscillating Jade x2
- Zhou Coin x3200
- Character XP x4800
Level 4
- Tier 31 Swallowcall Set (Epic) x2
- Blissful Retreat Cosmetic Chest x1
- Crimson Leaves Chest x1
- Bamboocut: Wind Tips x2
- Internal Art Note: Custom Chest x1
- Oscillating Jade x2
- Zhou Coin x3200
- Character XP x5200
Level 5
- Tier 41 Swallowcall Set (Epic) x2
- Blissful Retreat Cosmetic Chest x1
- Crimson Leaves Chest x1
- Bamboocut: Wind Tips x2
- Internal Art Note: Custom Chest x1
- Oscillating Jade x2
- Zhou Coin x3200
- Character XP x5600
Level 6
- Tier 51 Swallowcall Set (Epic) x2
- Blissful Retreat Cosmetic Chest x1
- Crimson Leaves Chest x1
- Bamboocut: Wind Tips x2
- Internal Art Note: Custom Chest x1
- Attunement Stone: Doom x1
- Oscillating Jade x3
- Zhou Coin x3200
- Character XP x6000
Level 7
- Tier 56 Swallowcall Set (Epic) x2
- Blissful Retreat Cosmetic Chest x1
- Crimson Leaves Chest x1
- Bamboocut: Wind Tips x2
- Internal Art Note: Custom Chest x1
- Attunement Stone: Rhapsody x1
- Oscillating Jade x3
- Zhou Coin x3200
- Character XP x6400
Level 8
- Tier 61 Swallowcall Set (Epic) x2
- Blissful Retreat Cosmetic Chest x1
- Crimson Leaves Chest x1
- Bamboocut: Wind Tips x2
- Internal Art Note: Custom Chest x1
- Attunement Stone: Gold Inlay x1
- Oscillating Jade x3
- Zhou Coin x3200
- Character XP x6800
Level 9
- Tier 61 Swallowcall Set (Legendary) x2
- Blissful Retreat Cosmetic Chest x1
- Crimson Leaves Chest x1
- Bamboocut: Wind Tips x2
- Internal Art Note: Custom Chest x1
- Attunement Stone: Gold Inlay x1
- Oscillating Jade x3
- Zhou Coin x3200
- Character XP x7000
Level 10
- Tier 71 Swallowcall Set (Legendary) x2
- Gear Echo: Fieryheart x2
- Blissful Retreat Cosmetic Chest x1
- Crimson Leaves Chest x1
- Bamboocut: Wind Tips x2
- Internal Art Note: Custom Chest x1
- Attunement Stone: Fieryheart x1
- Oscillating Jade x3
- Zhou Coin x3200
- Character XP x7200
Level 11
- Tier 71 Swallowcall Set (Legendary) x2
- Gear Echo: Fieryheart x2
- Blissful Retreat Cosmetic Chest x1
- Crimson Leaves Chest x1
- Bamboocut: Wind Tips x2
- Internal Art Note: Custom Chest x1
- Attunement Stone: Fieryheart x1
- Oscillating Jade x3
- Zhou Coin x3200
- Character XP x7400
Tips
- Use the Panacea Fan for Health Sustain
- Anticipate and Dodge Her First Wave Attack Forward
- Infernal Blades Can Easily Sustain Health During 2nd Phase
- Use Meridian Touch To Cancel Her Attacks
- Keep Attacking and Deflecting When She Swaps to White-form
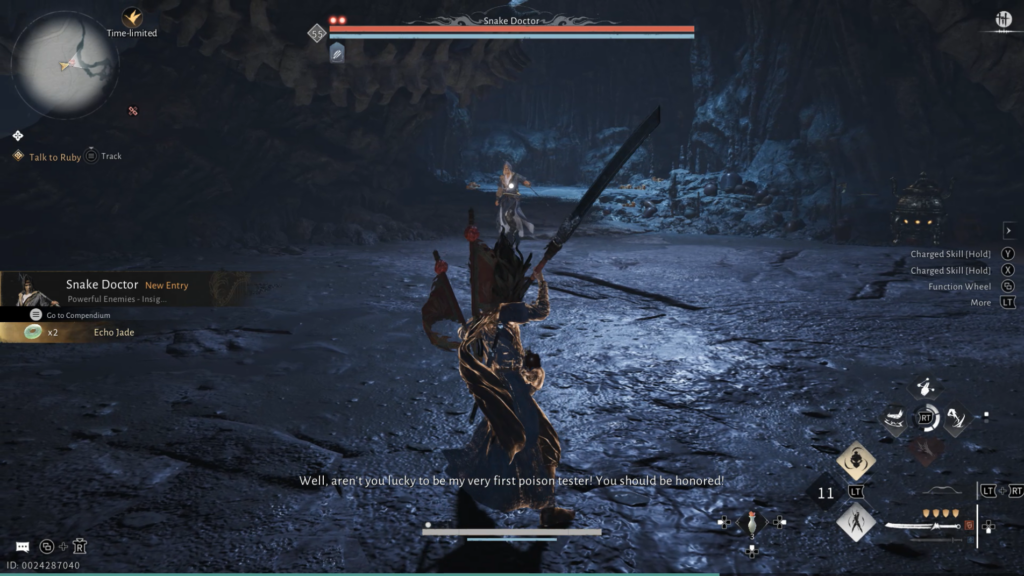
Snake Doctor
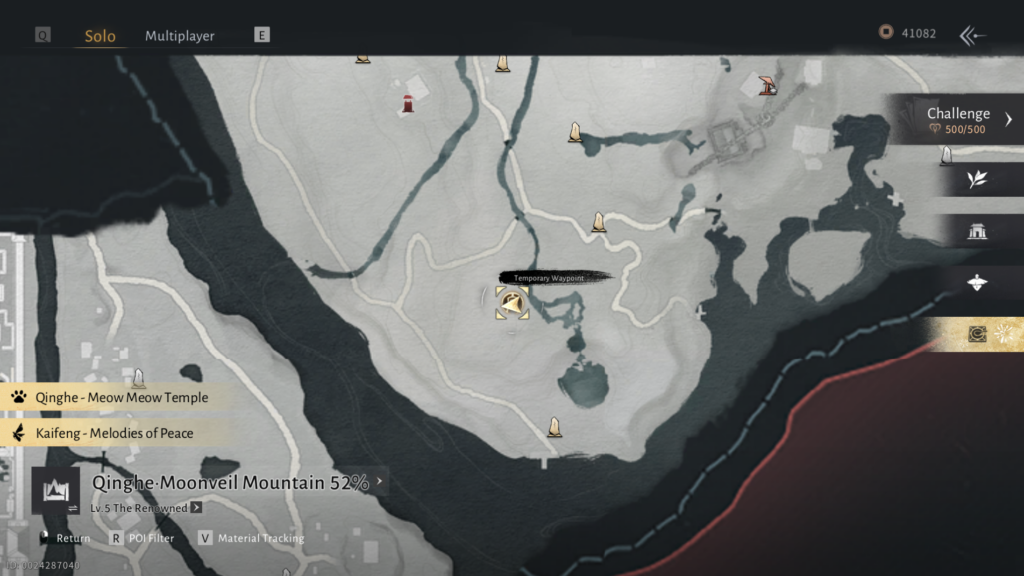
Location
The Snake Doctor can be found inside an underground cave full of snakes under the Encircling Lake area to the south of the Qinghe region. You can find the entrance to the west of the Boss pin in your map.
Martial Arts
- Panacea Fan
- Thundercry Blade
Mystic Arts
- Cloudsteps
- Golden Body
Best Companion
The best companion to bring against the Snake Doctor would be Yuan Jin’Gang due to his ability to deal Qi Damage from a safe distance. Yuan Jin’Gang’s ranged attacks is also capable of staggering the boss to cancel his attack animations for better openings.
Movesets
Phase 1
- Snake Rush: Snake Doctor winds up his staff and rush towards you with a single strike. This move can be parried and dodged when timed correctly.
- Venom Combo: Snake Doctor charges his staff with a red glow and performs an overhead slam into a wide swing, and retreats to throw three poison flasks into another overhead slam. This move can be perfectly parried to trigger a counterattack and dodged when timed correctly.
- Viper Strike: Snake Doctor retreats and sends out three snakes towards you at range to inflict you with poison. This move cannot be parried but can bedodged when timed correctly.
- Spinning Roundhouse Kick: Snake Doctor dash towards you and sweeps you with a roundhouse kick. This move can be parried and dodged when timed correctly.
- Double Sweep: Snake Doctor brielfy winds up his staff to execute two sweeping attacks with his staff for both sides. This move can be parried and dodged when timed correctly.
- Cobra Tail: Snake Doctor attacks you with a sweep into an uppercut, and then retreats away while doing another sweep attack. This move can be parried and dodged when timed correctly.
- Poison Fang: Snake Doctor executes a sweep attack and retreats away from you while throwing a poison flask only to dash back for an overhead strike. This move can be parried and dodged when timed correctly.
Phase 2
- Hidden Cobra Strike: Snake Doctor throws out three poison flasks in front of him and hides behind the smoke until he charges his staff with a red glow to rush at you with an uppercut. This move can be perfect parried to trigger a counterattack and dodged when timed correctly.
- Red Snake Fang: Snake Doctor winds up his staff with a red glow rush towards you to execute an upward strike into a jumping downward slam. This move can be perfect parried to trigger a counterattack and dodged when timed correctly.
- Poison Flask Throw: Snake Doctor throws out a single poison flask in front of him at the straight line. This move can be parried and dodged when timed correctly.
- Striking Tail Whip: Snake Doctor winds up his staff and spins toward you to consecutively hit you twice, then immediately follows up with a thrusting strike. This move can be parried and dodged when timed correctly.
- Venom Retreat: Snake Doctor backflips to retreat and throw three poison darts at you while mid-air. This move can be parried and dodged when timed correctly.
Rewards
- Echo Jade x20
- Qinghe Exploration x50
- Character EXP x8000
- Coin x8000
- Bone Shedding x1
- Star Reacher: Tome x1
- Medicinal Tales x3
Tips
- Stay in Melee Range and Exhaust Him Often
- Parry His Red Attacks for Qi Damage
The Void King
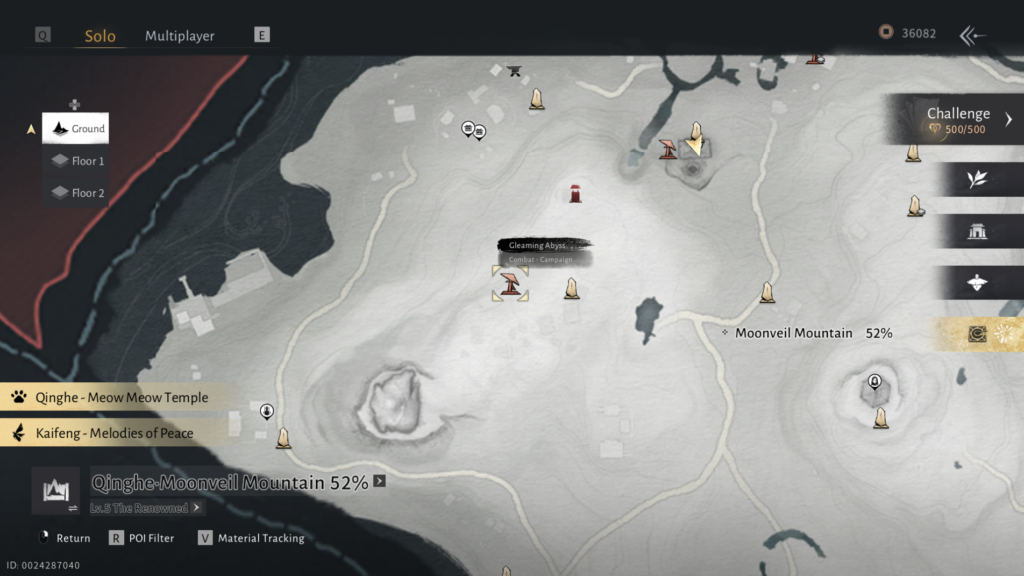
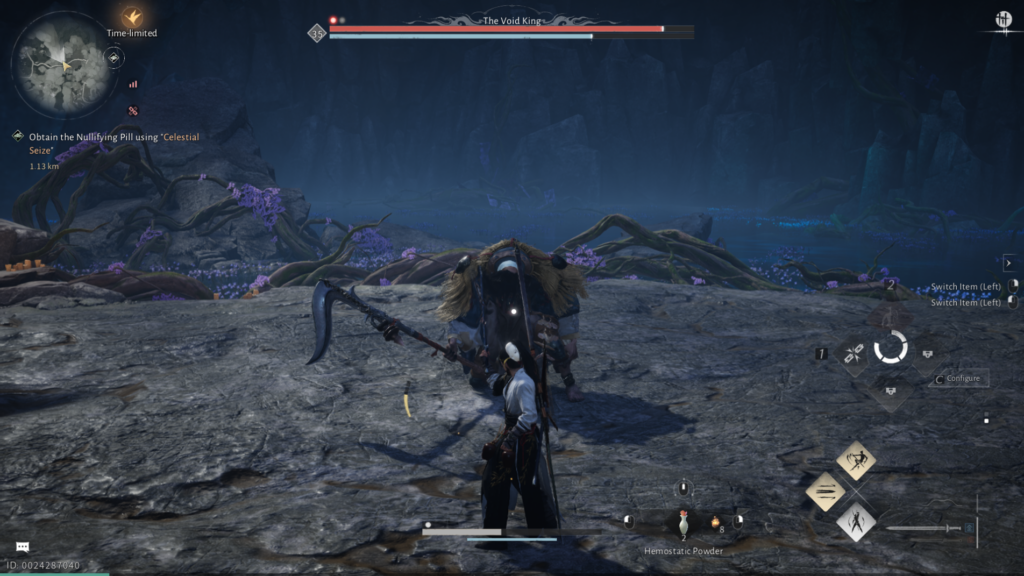
Location
In order to unlock The Void King, you will need to complete the Gleaming Abyss campaign quest to progress further.
Once you have finished the quest, you can find The Void King’s Campaign version at the Moonveil Mountain area in the Qinghe region.
Martial Arts
- Panacea Fan
Mystic Arts
- Morale Chant
- Royal Remedy
Best Companion
The best companion to bring with against The Void King would be Elder Gongsun due to his ability to stagger and knock down enemies for crowd control. He can draw aggro and stun-lock the The Void King with ease, giving you huge openings for burst damage and a chance to recover your health.
Movesets
Phase 1
- Berserking Scythe: The Void King charges his Scythe with a red glow and lunges forward, swinging his Scythe with rage. This move can be perfectly parried to trigger a counterattack and dodged when timed correctly.
- Ice Storm: The Void King jumps with a golden glow and shoots three ice projectiles from range. This move can only be dodged and not parried.
- Abyssal Spin: The Void King rages and swings his scythe in quick succession. This move can be parried and dodged.
- Void Swing: The Void King goes up while imbuing his scythe with the winder cold and lunges forward. This move can be parried and dodged.
- Heavy Slam: The Void King suddenly charges his scythe before slamming it heavily onto the ground, causing shockwaves. This move can be parried and dodged.
- Snow Claw: Imbuing his hand with the winter cold, The Void Kings slashes his opponent with full force. This move can be parried and dodged.
- Up Slash: The Void King quickly slashes with his scythe in an upward motion while spinning back to stance. This move can be parried and dodged.
- Turtle Swing: From his back, The Void King swings his scythe heavily against his opponent. This move can be parried and dodged.
- Horizon Slash: The Void King slashes horizontally in one hand and immediately goes back to stance. This move can be parried and dodged.
Phase 2
- Ebony’s Dance: The Void King performs a three-hit swing combo where he suddenly violently swings his scythe. This move can be parried and dodged.
- Sleight of Slash: The Void King jumps forward and hides his slash with his back before slashing upwards. This move can be parried and dodged.
- Sinister Swing: Charging his scythe with a red glow, The Void King imbues his scythe and jumps forward to swing it. This move can be perfectly parried to trigger a counterattack and dodged when timed correctly.
- Wrathful Roar: The Void King firms his stance and roars toward his opponent, staggering them backwards. This move can be parried and dodged.
- Formless Winter: The Void King indiscriminately swings his ice-imbued scythe four times, causing stagger to his opponents. This move can be parried and dodged.
Hero’s Realm
- Roaring Wind: Void King lets out a mighty roar, damaging everything around him multiple times. We recommend staying away during this attack to avoid it.
- Awakening Wind: Void King slams his weapon, then performs a spinning combo. We recommend dodging backwards twice to avoid all of the attacks.
- Cyclone Sweep: Void King spins his weapon, dealing damage to a wide radius around him. We recommend dodging or parrying.
- Reaping Strike: Void King performs an upward and downward swing. We recommend staying behind Void King to avoid damage.
- Howling Wind: Void King does a prolonged roar, dealing multiple instances of damage to everything around him. We recommend staying out of the attack range and healing up during this time.
- Whirlwind Frenzy: Void King performs a combo by spinning around violently, dealing damage to players around and in front of him. We recommend running away during this attack.
- Gale Blade: Void King charges up and leaps into the air, before slamming his weapon onto the ground, indicated by a red circle. Group up with your team and stay in the red circle to parry the attack to deal Qi Damage, or stay away from Void King to avoid damage altogether.
- Windfall: Void King marks one player, indicated by an orange circle, then throws a wind projectile after a short delay. We recommend staying away from the marked player or parrying the projectile if you are the marked player.
- Formless Storm: Void King moves to the centre of the arena before slamming his staff and dealing AoE damage. A wall of wind will also appear, dealing continuous damage to players passing through it. We recommend moving away from Void King during the attack and staying inside the wind arena to avoid unnecessary damage.
- Windchaser: Void King marks three players, then leaps into the air and launches three projectiles, with the third projectile spawning a lasting tornado on impact. We recommend staying away from marked players and being mindful of the spawned cyclones to avoid damage.
Rewards
- Echo Jade x50
- Medicinal Tales x1
- Zhou Coin x30000
- Longevity Fruit Seed x1
- Divine Roulette: Tome x1
- Oscillating Jade x5
Campaign Rewards
Level 1
- Tier 16 Swallowcall Set (Uncommon) x2
- Blissful Retreat Cosmetic Chest x1
- Crimson Leaves Chest x1
- Bamboocut: Wind Tips x2
- Oscillating Jade x2
- Zhou Coin x3200
- Character XP x4000
Level 2
- Tier 16 Swallowcall Set (Epic) x2
- Blissful Retreat Cosmetic Chest x1
- Crimson Leaves Chest x1
- Bamboocut: Wind Tips x2
- Oscillating Jade x2
- Zhou Coin x3200
- Character XP x4400
Level 3
- Tier 16 Swallowcall Set (Epic) x2
- Blissful Retreat Cosmetic Chest x1
- Crimson Leaves Chest x1
- Bamboocut: Wind Tips x2
- Oscillating Jade x2
- Zhou Coin x3200
- Character XP x4800
Level 4
- Tier 31 Swallowcall Set (Epic) x2
- Blissful Retreat Cosmetic Chest x1
- Crimson Leaves Chest x1
- Bamboocut: Wind Tips x2
- Internal Art Note: Custom Chest x1
- Oscillating Jade x2
- Zhou Coin x3200
- Character XP x5200
Level 5
- Tier 41 Swallowcall Set (Epic) x2
- Blissful Retreat Cosmetic Chest x1
- Crimson Leaves Chest x1
- Bamboocut: Wind Tips x2
- Internal Art Note: Custom Chest x1
- Oscillating Jade x2
- Zhou Coin x3200
- Character XP x5600
Level 6
- Tier 51 Swallowcall Set (Epic) x2
- Blissful Retreat Cosmetic Chest x1
- Crimson Leaves Chest x1
- Bamboocut: Wind Tips x2
- Internal Art Note: Custom Chest x1
- Attunement Stone: Doom x1
- Oscillating Jade x3
- Zhou Coin x3200
- Character XP x6000
Level 7
- Tier 56 Swallowcall Set (Epic) x2
- Blissful Retreat Cosmetic Chest x1
- Crimson Leaves Chest x1
- Bamboocut: Wind Tips x2
- Internal Art Note: Custom Chest x1
- Attunement Stone: Rhapsody x1
- Oscillating Jade x3
- Zhou Coin x3200
- Character XP x6400
Level 8
- Tier 61 Swallowcall Set (Epic) x2
- Blissful Retreat Cosmetic Chest x1
- Crimson Leaves Chest x1
- Bamboocut: Wind Tips x2
- Internal Art Note: Custom Chest x1
- Attunement Stone: Gold Inlay x1
- Oscillating Jade x3
- Zhou Coin x3200
- Character XP x6800
Level 9
- Tier 61 Swallowcall Set (Legendary) x2
- Blissful Retreat Cosmetic Chest x1
- Crimson Leaves Chest x1
- Bamboocut: Wind Tips x2
- Internal Art Note: Custom Chest x1
- Attunement Stone: Gold Inlay x1
- Oscillating Jade x3
- Zhou Coin x3200
- Character XP x7000
Level 10
- Tier 71 Swallowcall Set (Legendary) x2
- Gear Echo: Fieryheart x2
- Blissful Retreat Cosmetic Chest x1
- Crimson Leaves Chest x1
- Bamboocut: Wind Tips x2
- Internal Art Note: Custom Chest x1
- Attunement Stone: Fieryheart x1
- Oscillating Jade x3
- Zhou Coin x3200
- Character XP x7200
Level 11
- Tier 71 Swallowcall Set (Legendary) x2
- Gear Echo: Fieryheart x2
- Blissful Retreat Cosmetic Chest x1
- Crimson Leaves Chest x1
- Bamboocut: Wind Tips x2
- Internal Art Note: Custom Chest x1
- Attunement Stone: Fieryheart x1
- Oscillating Jade x3
- Zhou Coin x3200
- Character XP x7400
Tips
- Stay Close to Parry Red Attacks
- Dodge His Projectile Attacks
Yi Dao
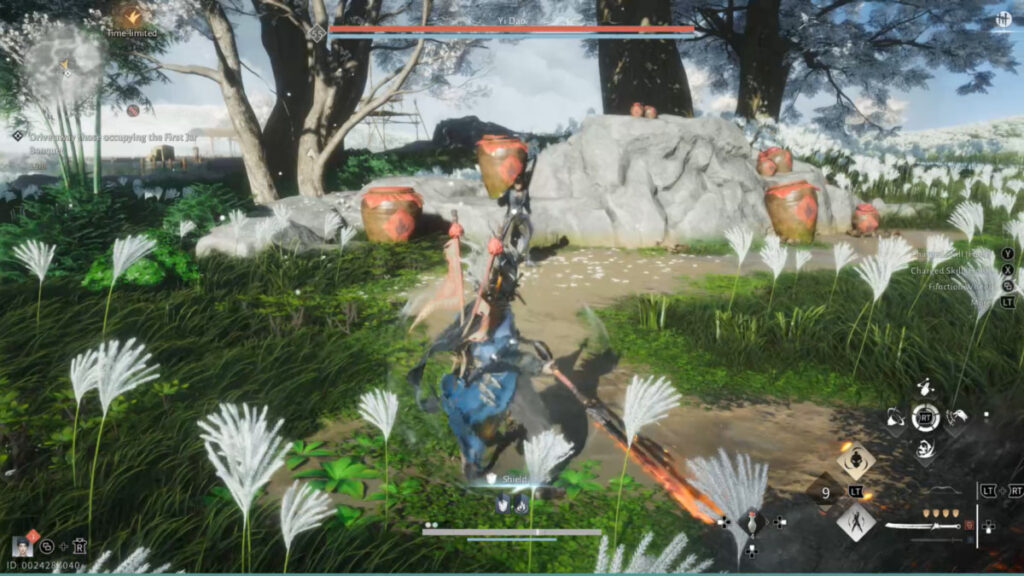
Location
You can find Yi Dao by touching the sword next to the tree near the burned building at Blissful Retreat in the Qinghe region.
This will transport you to a different map called Dreamscape: Blissful Retreat, where you will have to take on the Dream in Flames lost chapter to find Yi Dao at the end of the quest.
Mystic Arts
- Heavenly Snatch
Infernal Arts
- Evening Snow
Best Companion
The best companion to bring against Yi Dao would be Yuan Jin’Gang due to his ability to deplete the enemy’s Qi Bar from a safe distance. Yuan Jin’Gang will be outside Yi Dao’s reach and will be able to stagger the boss with his ranged attacks.
Movesets
- Overhead Slash: Yi Dao swings his sword behind him to jump and slash downward with a red glow. This move can be perfect parried to trigger a counterattack and dodged when timed correctly.
- Triple Sweeping Slash: Yi Dao charges his sword behind him with a red aura to execute three consecutive slashes in front of him. This can be parried, dodged, and cancelled with Celestial Seize.
- Blade Slam: Yi Dao leaps forward and slams his sword on the ground while generating three sword illusions. This move can be parried and dodged when timed correctly.
- Triple Wave Slash: Yi Dao sends out three consecutive wave attacks at range. This move can be parried and dodged when timed correctly.
- Downward Slash: Yi Dao brings his sword behind him and slashes forward. This move can be parried and dodged when timed correctly.
- Double Swing: Yi Dao performs two consecutive roundhouse slashes while moving towards you. This move can be parried and dodged when timed correctly.
- Sword Combo: Yi Dao slashes you once and then elbows you to follow up with two roundhouse slashes. This move can be parried and dodged when timed correctly.
- Triple Overhead Slam: Yi Dao brings his sword over his head and starts slamming it on the ground three consecutive times. This move can be parried and dodged when timed correctly.
- Blade Flurry Rush: Yi Dao charges his blade with a golden glow and unleashes a flurry of sword attacks in front, followed by a dash attack with a red glow. The flurry attack cannot be parried but can be dodged when timed correctly, while the dash attack can be perfectly parried to trigger a counterattack.
- Bladewave Slam: Yi Dao charges his sword with a red aura and slams it on the ground to create a wave line with a quick follow-up. This move can be parried and dodged when timed correctly.
- Double Blade Rush: Yi Dao quickly dashes twice towards you while slashing at immense speed. This move can be parried and dodged when timed correctly.
- Triple Illusion Strike: Yi Dao plunges his sword into the ground and sends out three illusions to attack you three times. This move can be parried and dodged when timed correctly.
Rewards
- Echo Jade x20
- Qinghe Exploration x50
- Character EXP x8000
- Coin x8000
- Bone Shedding x1
- Star Reacher: Tome x1
- Medicinal Tales x3
Tips
- Focus on Parrying and Dodging
- Use Celestial Seize to Cancel His 3-hit Sweep
Demon Goose
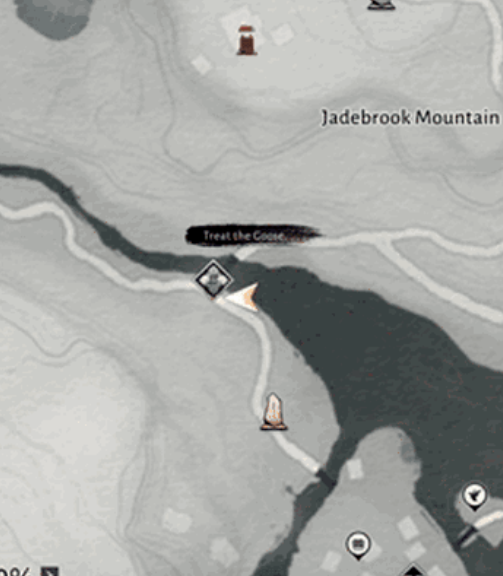
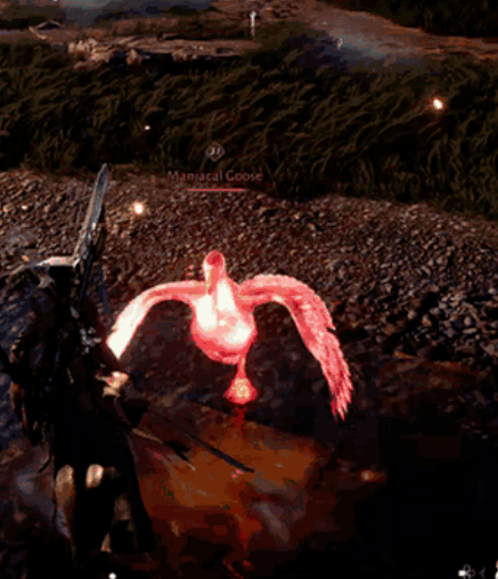
Location
You can find the first Demon Goose by the bridge near West Heaven’s Pier in the Qinghe region by tracking the To Heal or Not to Heal Exploration Mission.
The second Demon Goose can be found near Heaven’s Pier in the Qinghe region, North of the Moonveil Mountain Wayfarer.
Mystic Arts
- Tai Chi
Movesets
- Dual Peck: Demon Goose pecks forward twice in rapid succession. This attack can be parried and dodged.
- Goose Tai Chi: Demon Goose performs a three-hit martial combo. This attack can be parried and dodged.
Rewards
- Goose Slayer Achievement
- Deranged Goose Egg: Once you have defeated the Demon Goose, you will be able to summon him as a Temporary Pet by Hatching the Deranged Goose Egg you will receive as a reward.
- Defeating the White-browed Goose unlocks it as a Companion, which can aid you in combat.
- Similar to how it is during your fight, the Giant Goose companion deals fast, hard-hitting attacks, making it an excellent Sub-DPS Companion.
- Goose-Buster Achievement
Tips
- To easily defeat the Demon Goose and earn the Goose Slayer Achievement, you can use Tai Chi to throw the Goose into the Lake, instantly defeating it.
- Keep in mind that the Demon Goose must be thrown into the deeper part of the Lake to ensure that it is instantly defeated.


Another high quality guide, thanks for all the info as always 👍
nice guide, thanks
Thanks for the guide
You told that some bosses roam around the world. Are these bosses more stationary as your pointing out their location or do they have some differing size of an area where they should be looked for at the name location?
This is such a high quality guide, full of any information one would want, great work!!
Quite comprehensive and elaborate guide. Thanks!
I finally managed to defeat them, thanks a lot!
Thank you for the moveset breakdown