Want to see Raider King content first? Add us as a preferred source.
One of the most fun parts of playing LEGO games is getting all the collectibles, since not only it’s fun, but it is alwas rewarding as well. Collectibles give you certain rewards, such as character outfits or, in this case, different pallettes for current outfits. In this guide I will give a walkthrough of how to get all collectibles in the Story Mode of LEGO Batman: Legacy of the Dark Knight.
There are different types of collectibles for each map. You have the specific collectibles, which will be something related to the region of the story (i.e. surfboards in the Docks area), the Red Bricks (which give you extra looks options) as well as Wayne Caches (which contain chips that help you upgrade your Batcave).
I will explain how to get all of them in the order of which you encounter them as to make it easier to follow along.
Prologue
Infiltration
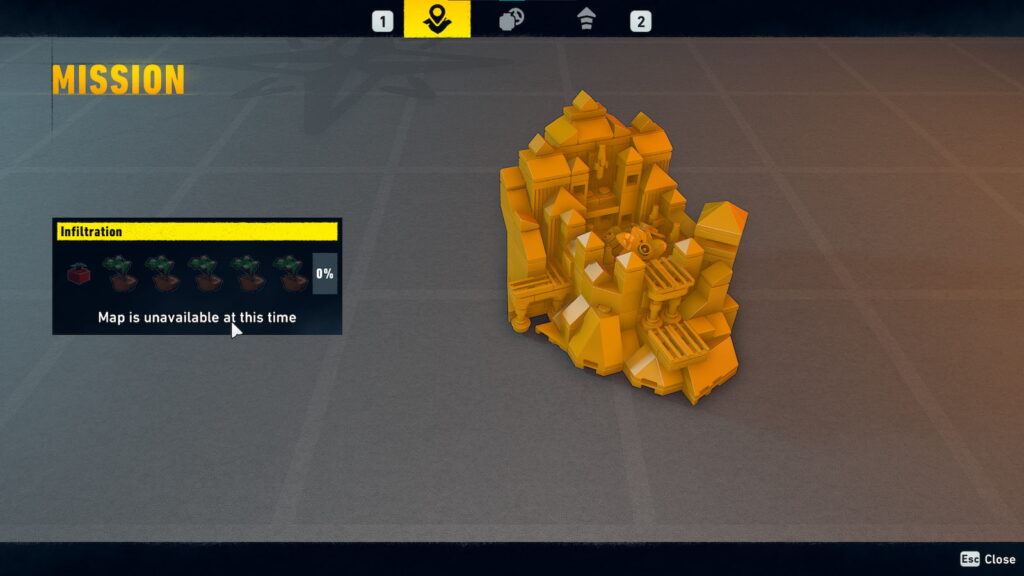
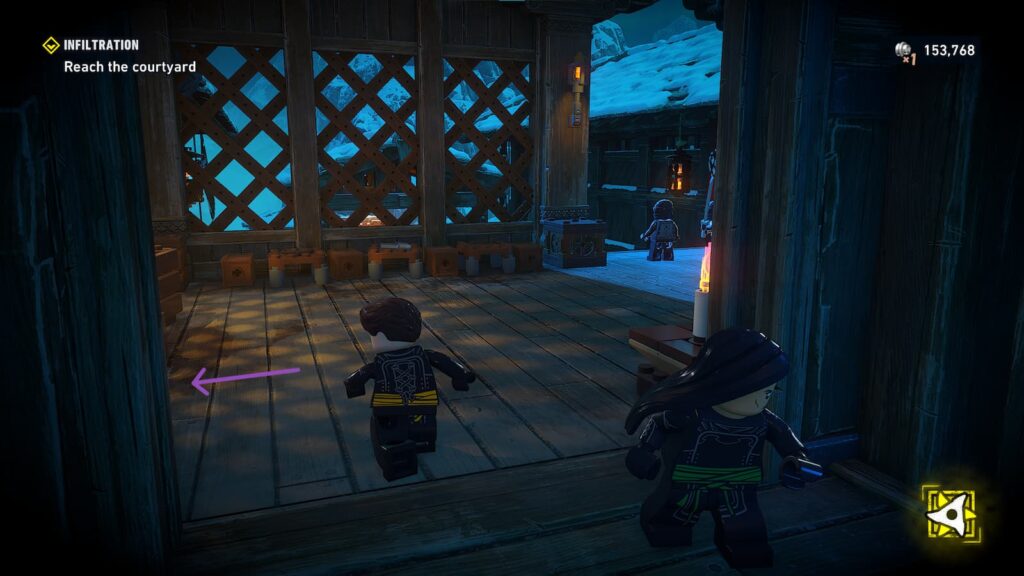
The collectibles for the Prologue are only in the mission Infiltration, where you go along with Talia to discover her fathers plans for Gotham. The collectibles are 5 Bonsai trees that need to be destroyed + a Red Brick. The first one is part of the tutorial/mission, as you have to get rid of it to go through some vents.
Bonsai 1
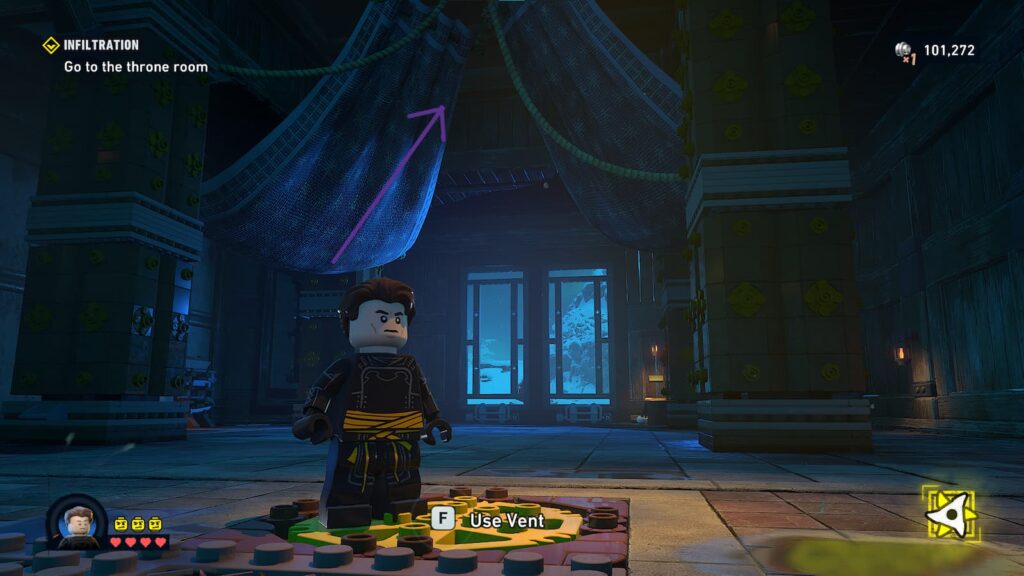
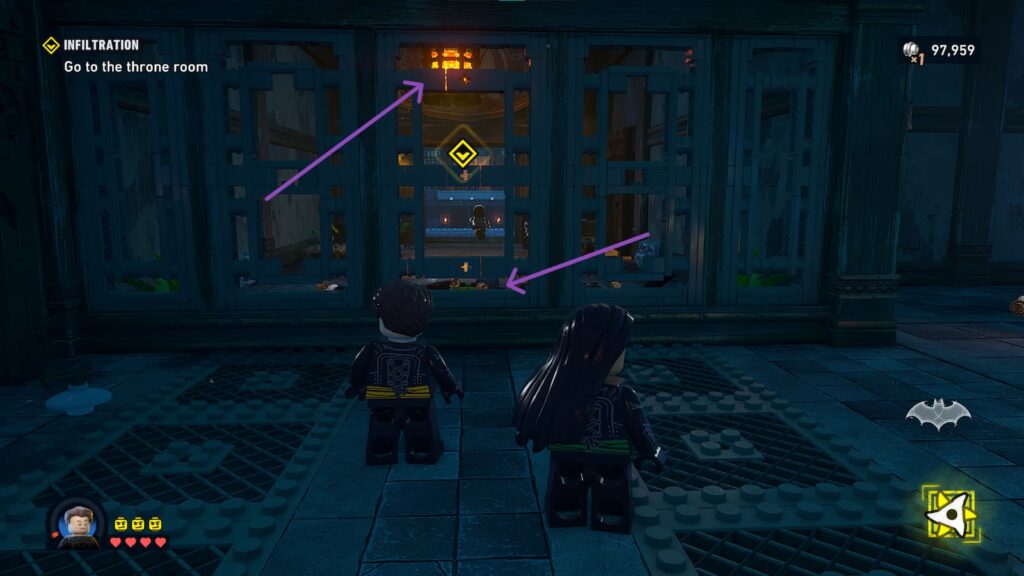
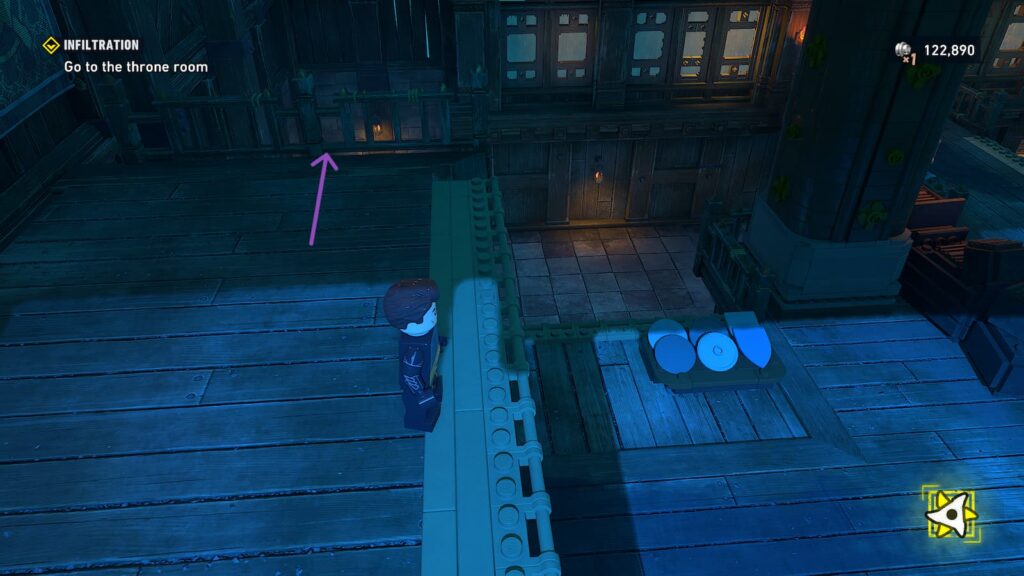
Since the vent you need to go through is blocked by the bonsai, there will be two chandelier: one in this room which you find yourself in, and one in the room you need to get to. There will be two points for to hit with your ninja tools near the first chandelier. Each one makes a chandelier fall. That will get you your 1st collectible.
Bonsai 2

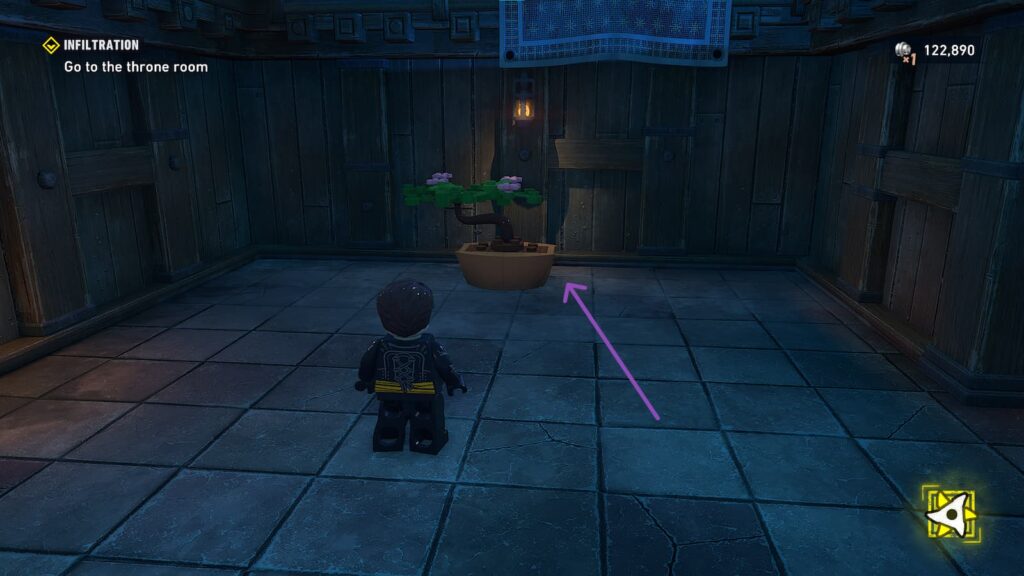
If you go through the vent to the next room, continue forward. You will get to this ledge which if you jump off has 4 corners where you can jump off again. To find the 2nd bonsai, you have to go to the one directly left from where you are before you jump. If you get lost just go through all the little corner chambers anyway.
The tree will be right next to the outer wall.
Bonsai 3
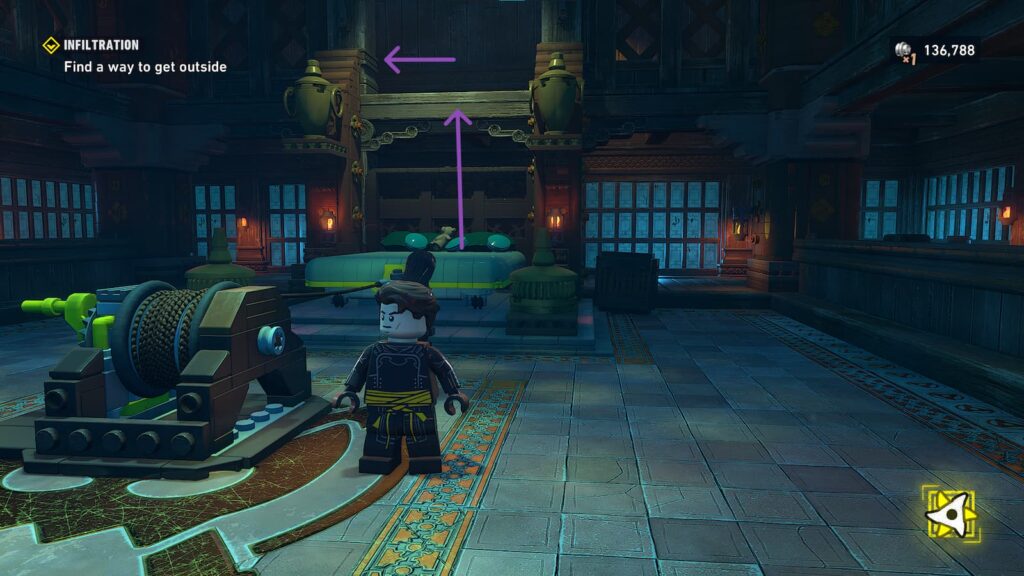
As part of the mission, you will eventually find a room where you need to build a bed out of the broken objects around you. Jump up and then go through the left corridor. The bonsai tree will be at the end of the hall.
Red Brick

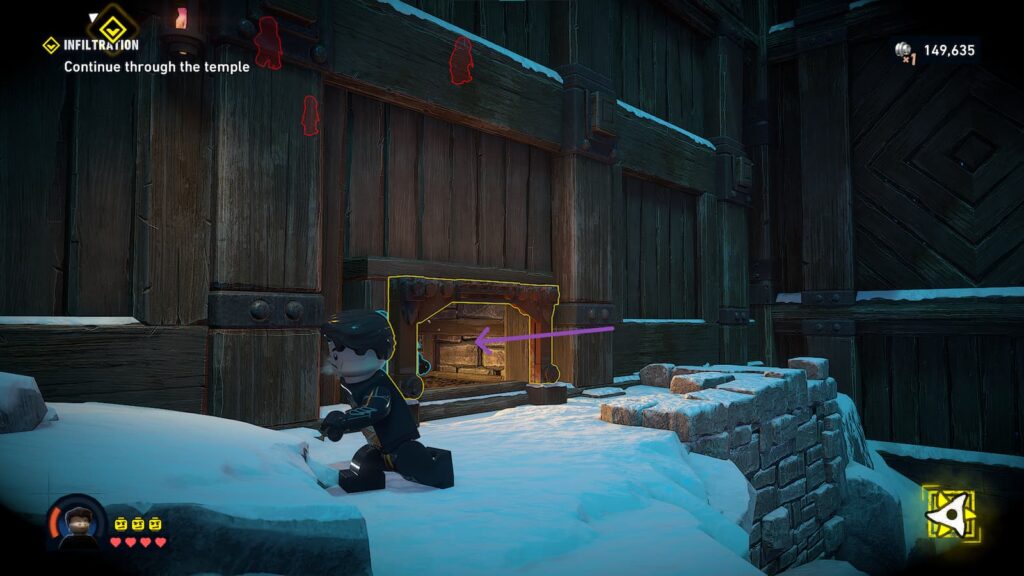
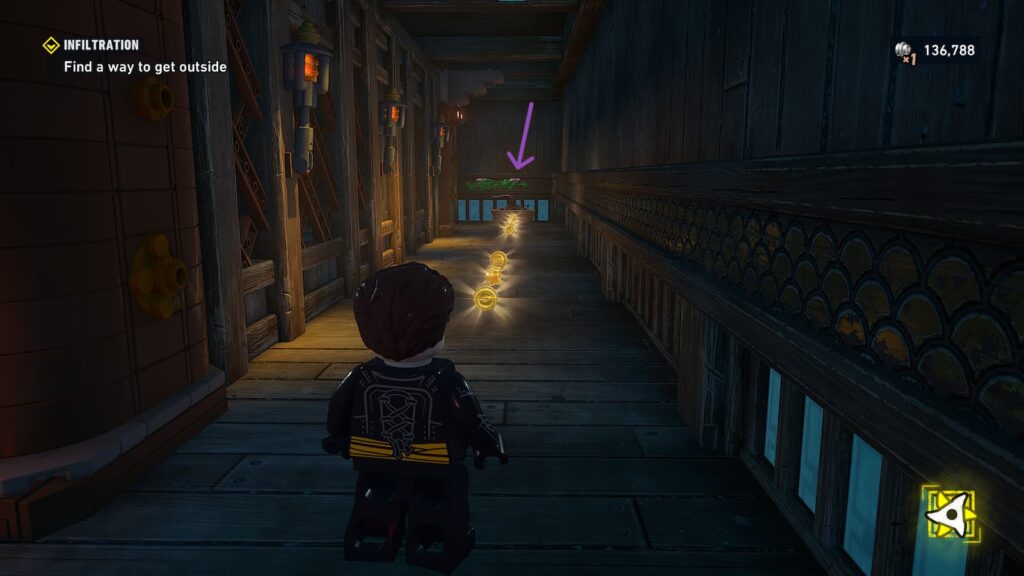
As you go through the mission, after crossing a bridge you make through a crossbow, you will hang from a ledge again. Instead of going up right away, follow the coins down and go through the tunnel.
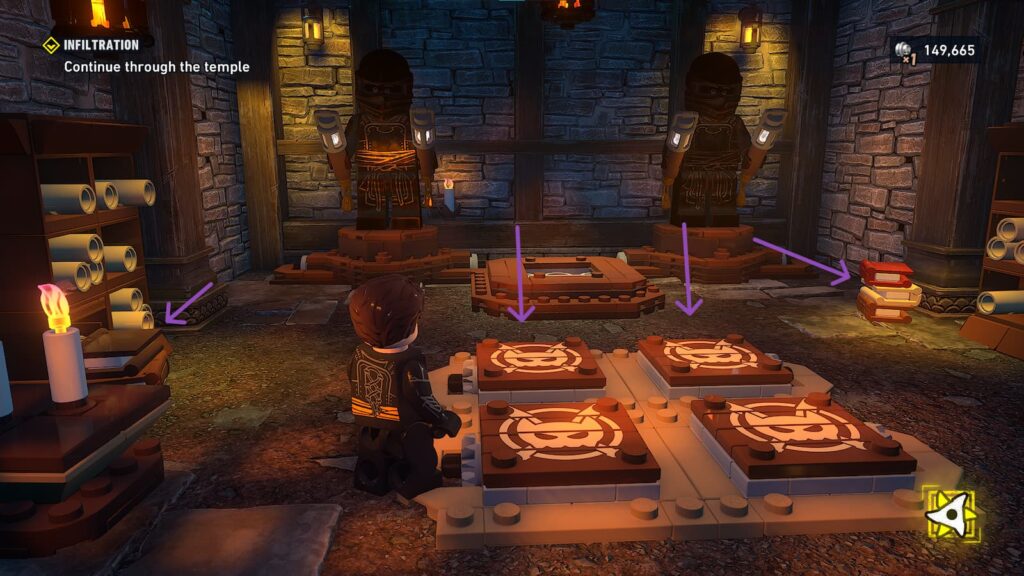
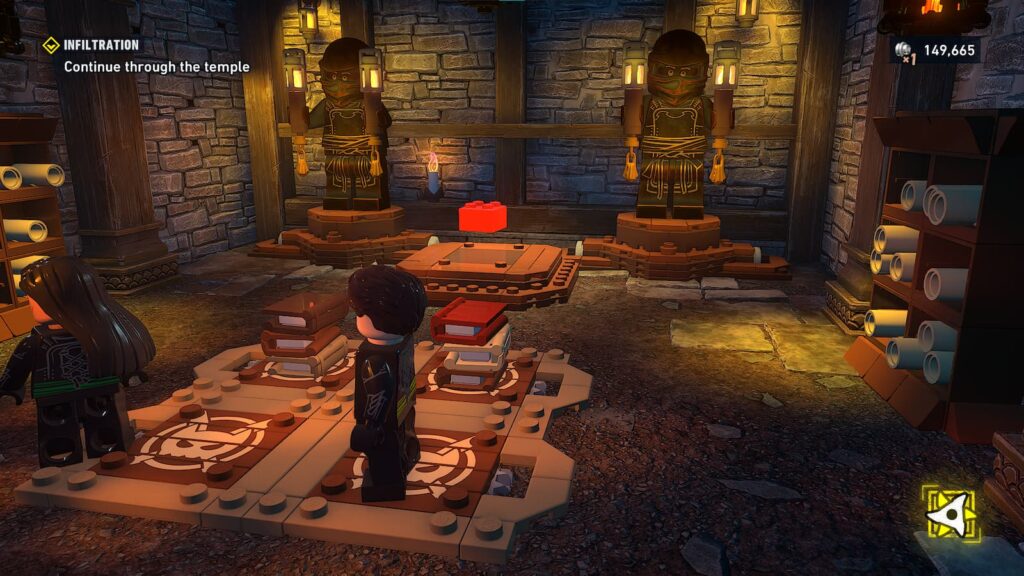
You will enter a room with two statues. There is a puzzle where there are 4 pressure plates. There are 2 book sets on the right and the left side which you can use, along with yourself and Talia to push the pressure plates, which will unlock the red brick for you.
Bonsai 4
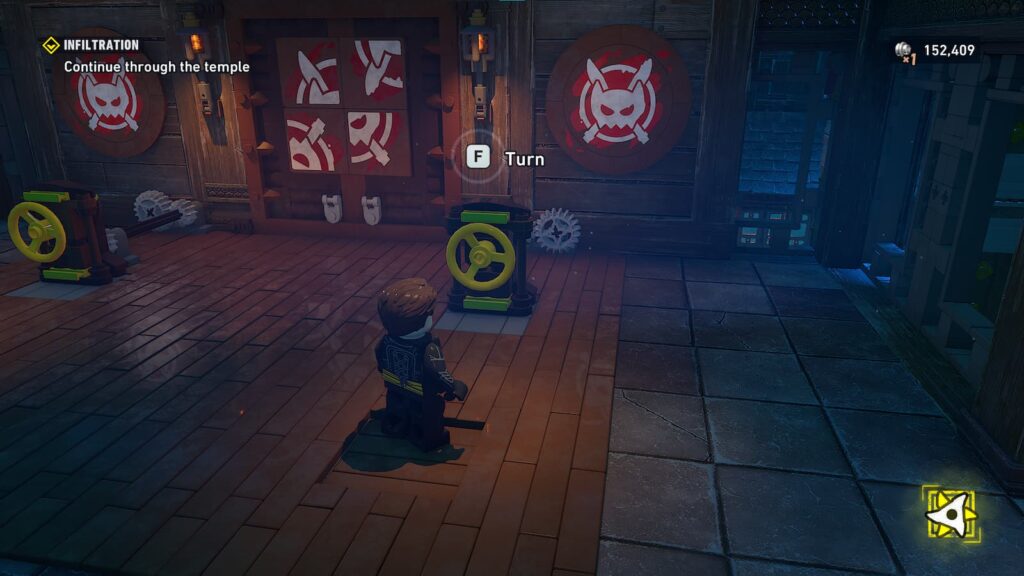
After passing through this puzzle door and another tunnel, you will fall into a hallway.
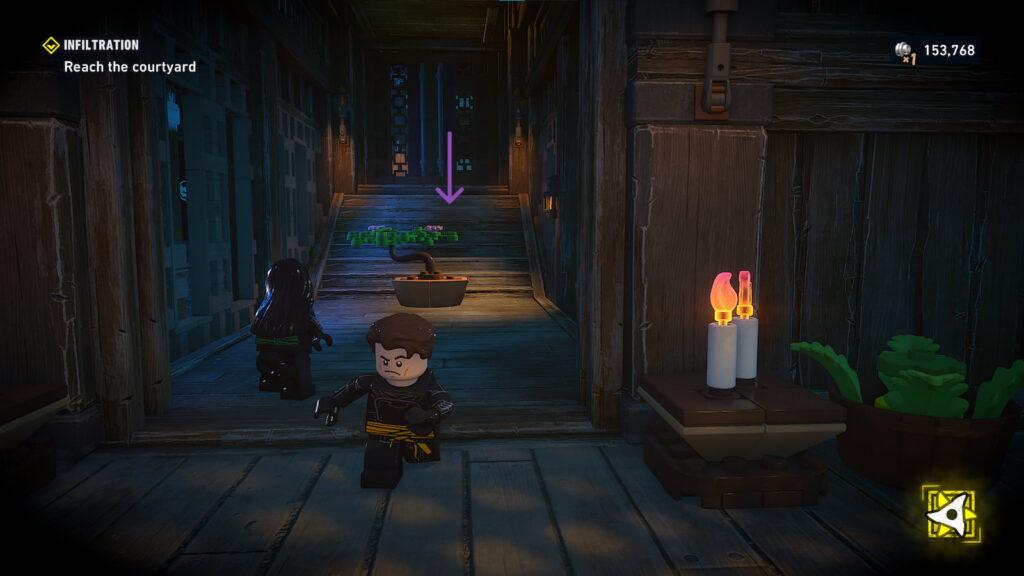
Turn left. You might have to break some stuff to open up the way but there should be your next bonsai tree.
Bonsai 5
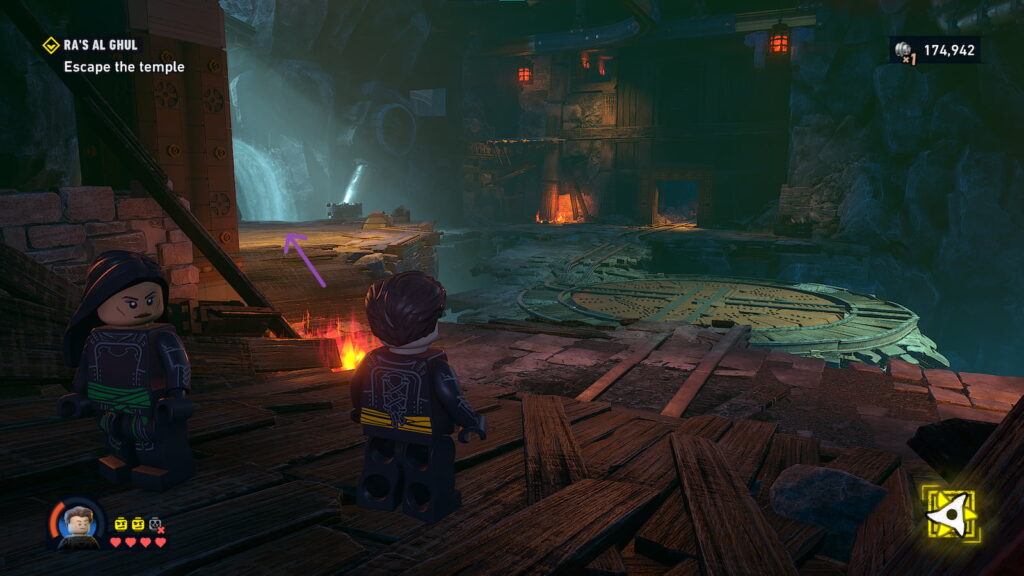

The last bonsai is after you get a mini boss battle with Ra’s al Ghul. It will take you into a new region after the temple starts collapsing. Go to your left, towards the other wooden platfrom, where the last collectible is on this map.
Chapter 1
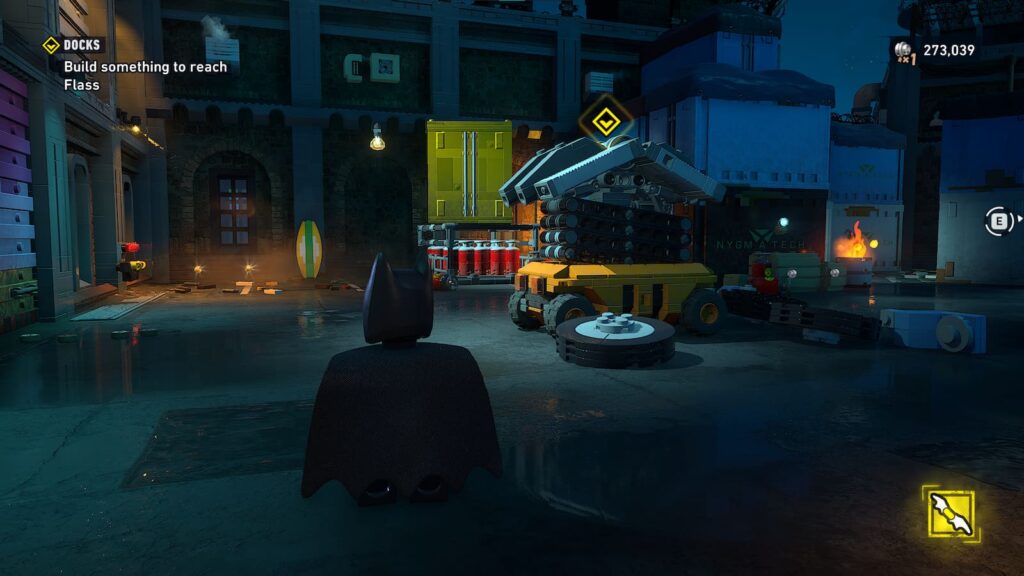
New Beginnings, Docks
The collectibles for this mission are 5 Surfboards and a Red Brick.
Surfboard 1
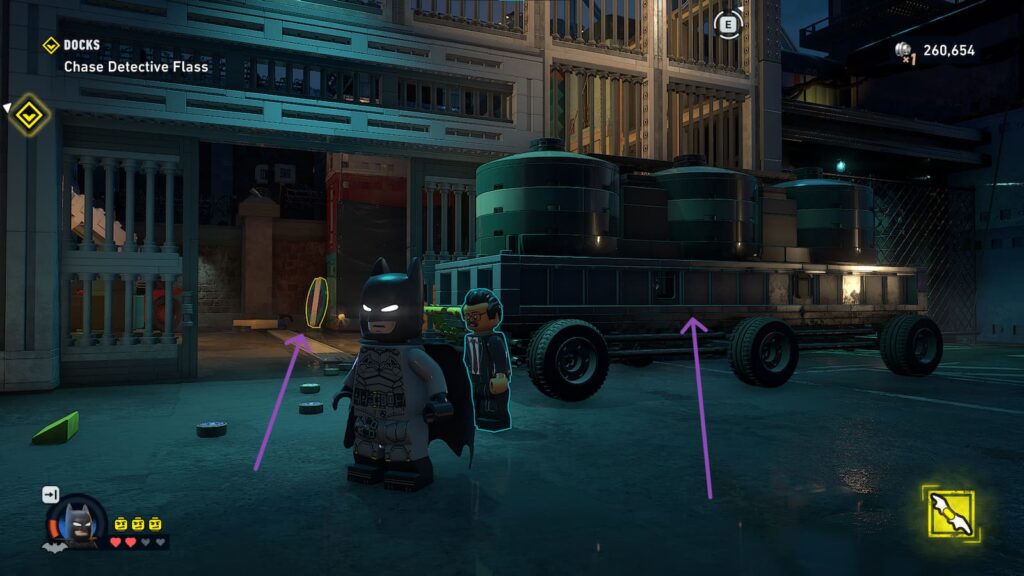
After using the Foam ability Gordon has for the first time, there is this blue trolley you will need to move. The surfboard will be right next to it. Make sure to destroy it.
Surfboard 2
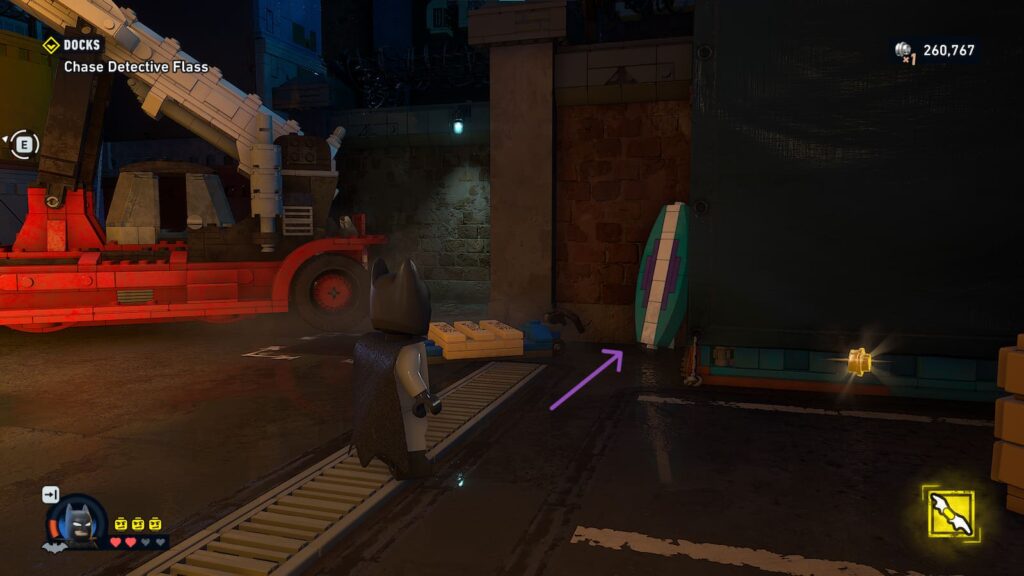
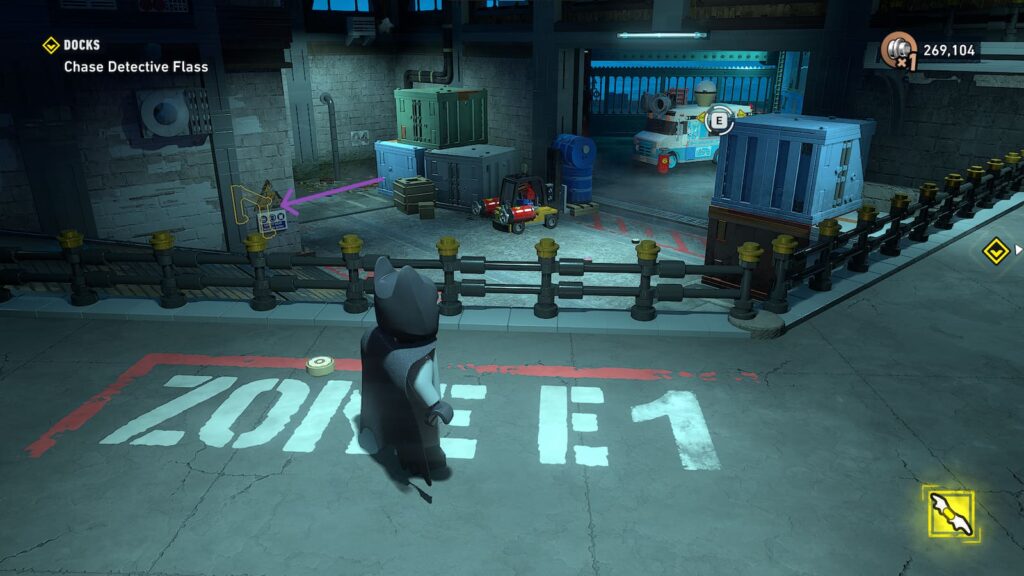
As you continue the mission, you will have to construct this contraption that holds 3 barrels. That should give you the hint that a sufrboard is nearby. If you go through the grated gate, you will find the surfboard near the covered container.
Surfboard 3
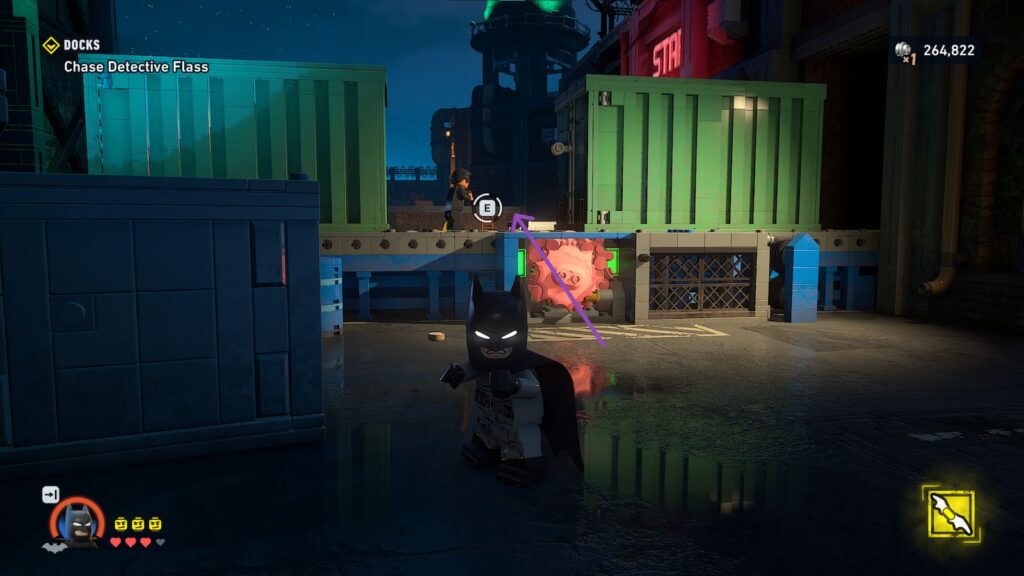
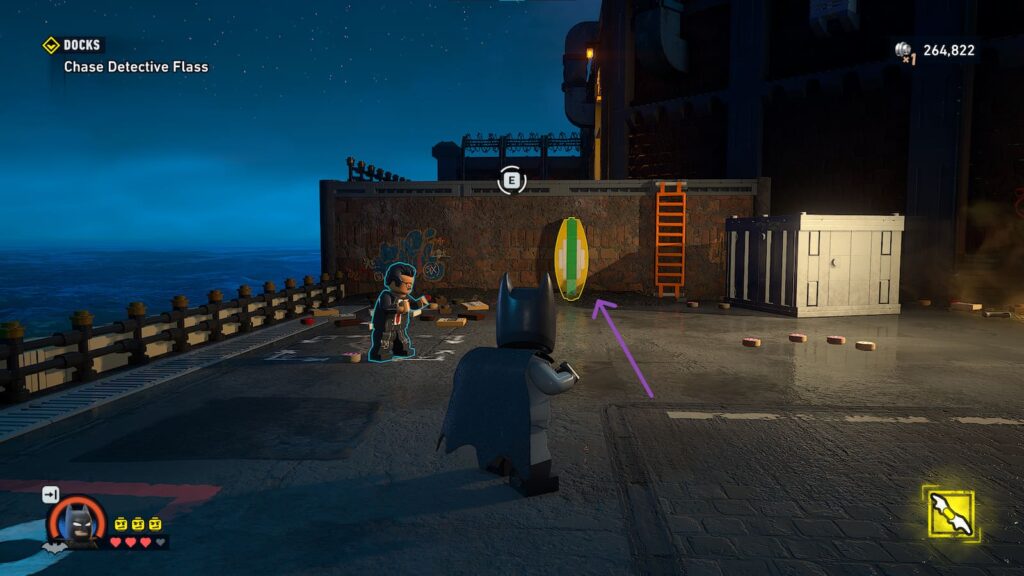
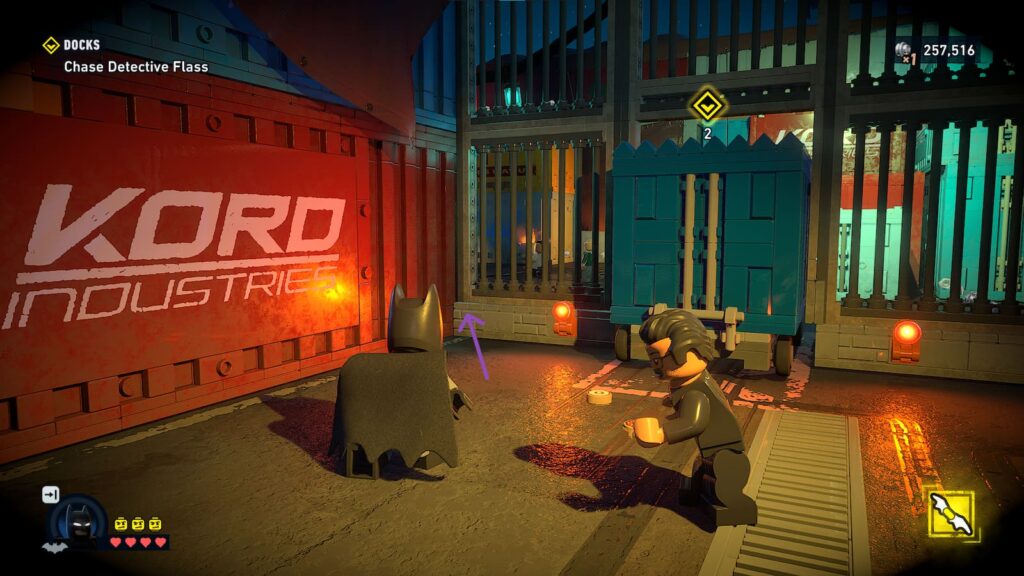
To continue the mission you will have to stop the moving containers to pass. First, use Batman to break the lock, foam the break with Gordon. Walk through and you will find the next surfboard near the orange ladder.
Surfboard 4
After you pass through those moving containers from Step 3, you will end up in this chamber where you’ll fight a bunch on NPCs. When youre done, there’s a tunnel in the left corner that will take you directly yo the 4th Surfboard, which is located right next to the wall on the left.
Red Brick
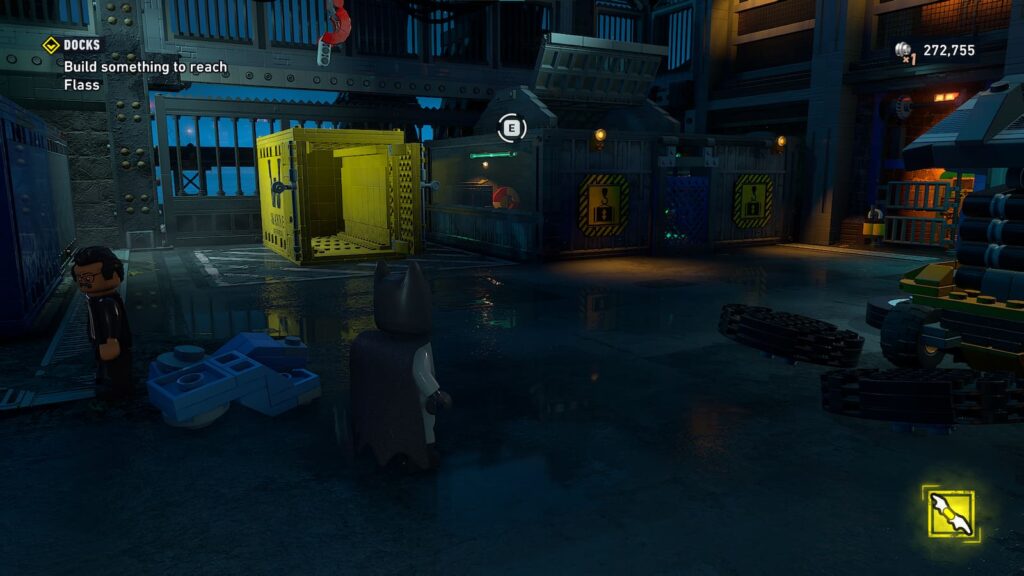
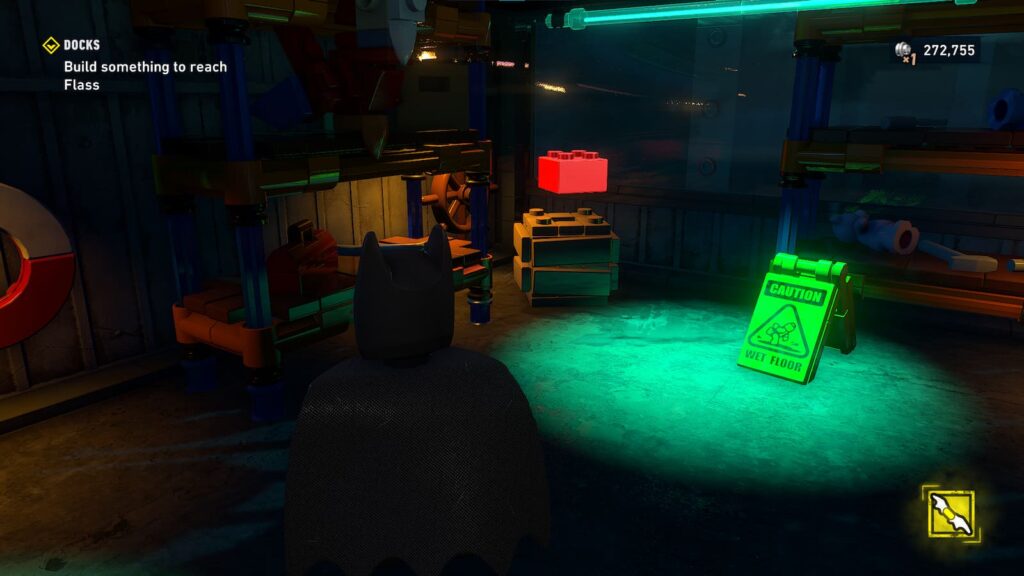
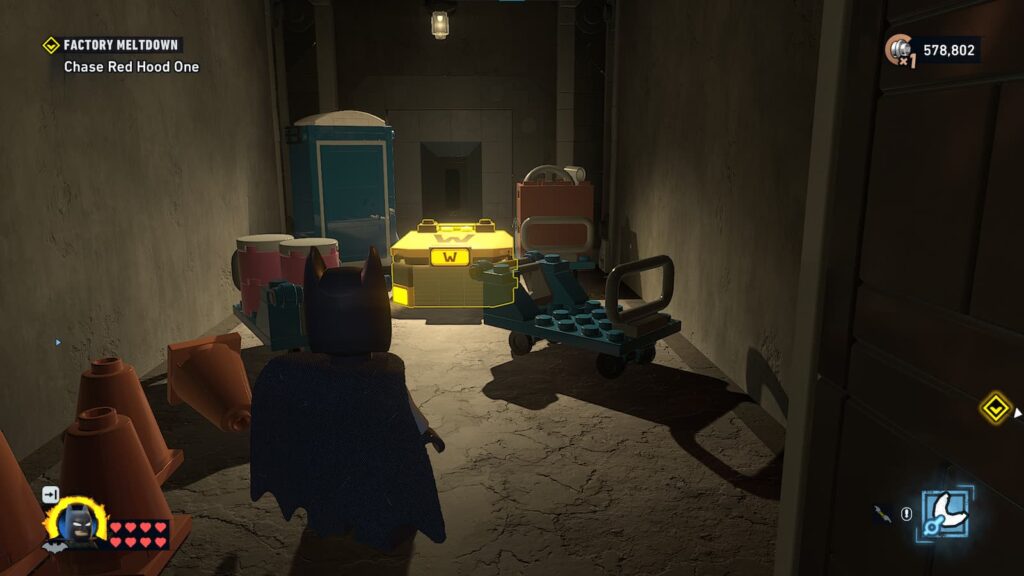
There is a factory you will have to infiltrate. After you’re done finishing off the enemies, you will have to build another contraption. Left of it there is a chamber next to a yellow container which can be entered through the roof, where the Red Brick will be.
Srufboard 5
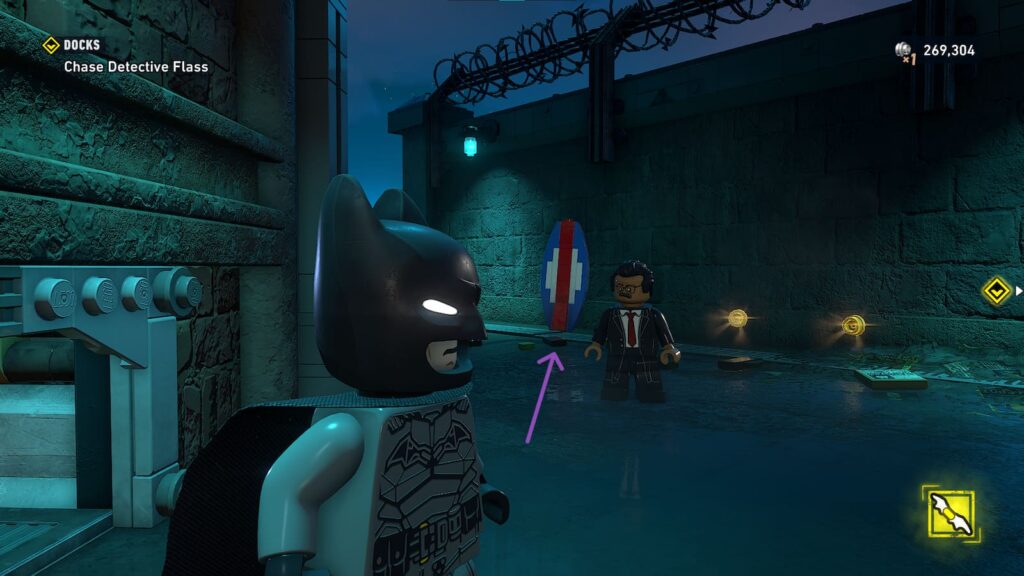
The 5th surfboard will be in the same sorroundings to the red brick, just on the opposite end.
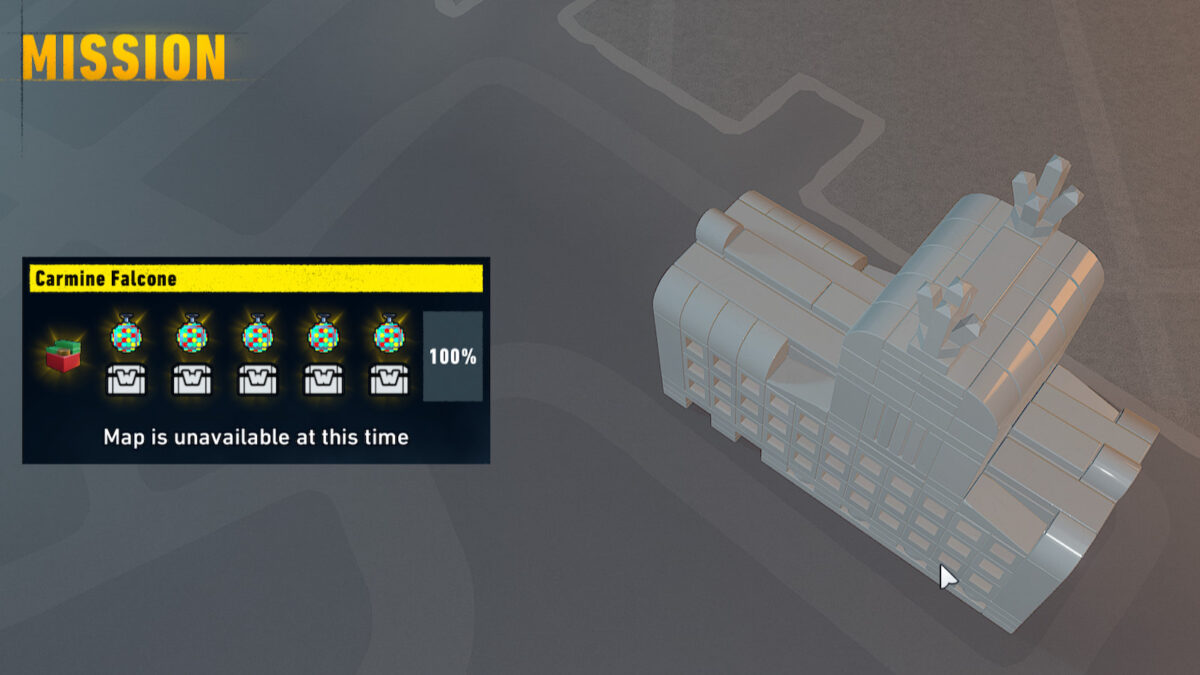
Carmine Falcone, Iceberg Lounge

For this mission you will need to collect more stuff than before. There are 5 Disco Balls, 5 Wayne Tech Caches and 1 Red Brick.
Disco Ball 1
At the beginning of the quest you will have to on these stage lights. On the right side of where yoou need to go, right next to a tunnel, will be the first disco ball.
Wayne Tech Cache 1
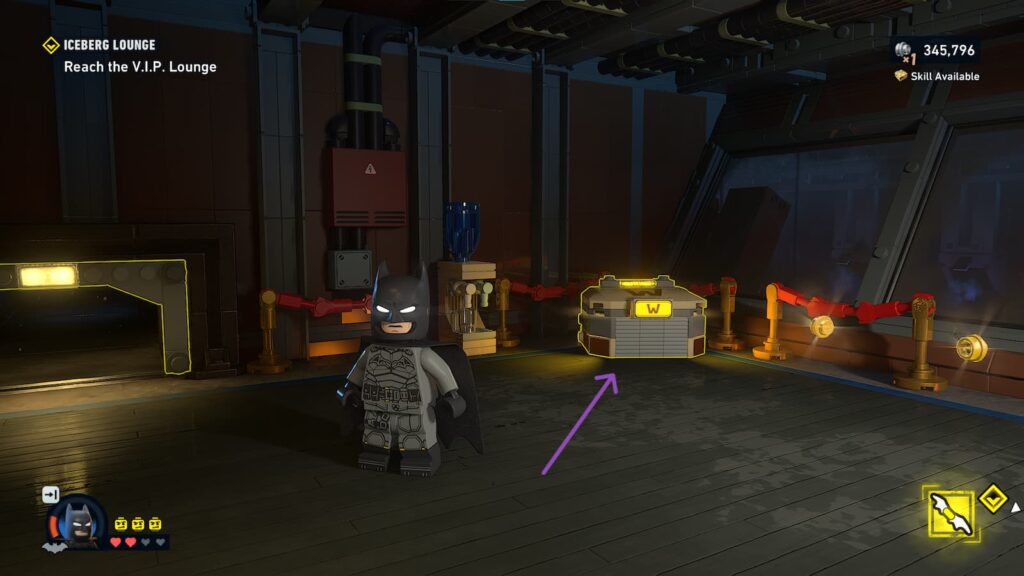
Go through the tunnel and as you go into the room, the Wayne Cache will be directly on your left.
Disco Ball 2
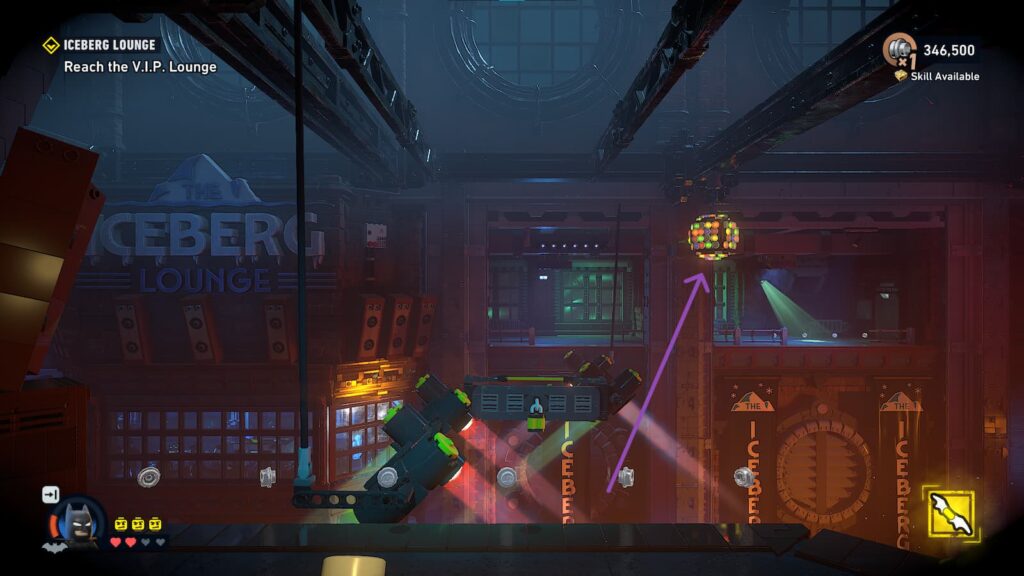
As you continue onward, you will encounter another set of stage light you will need to pass through. above them, on the right side, will be the next disco ball.
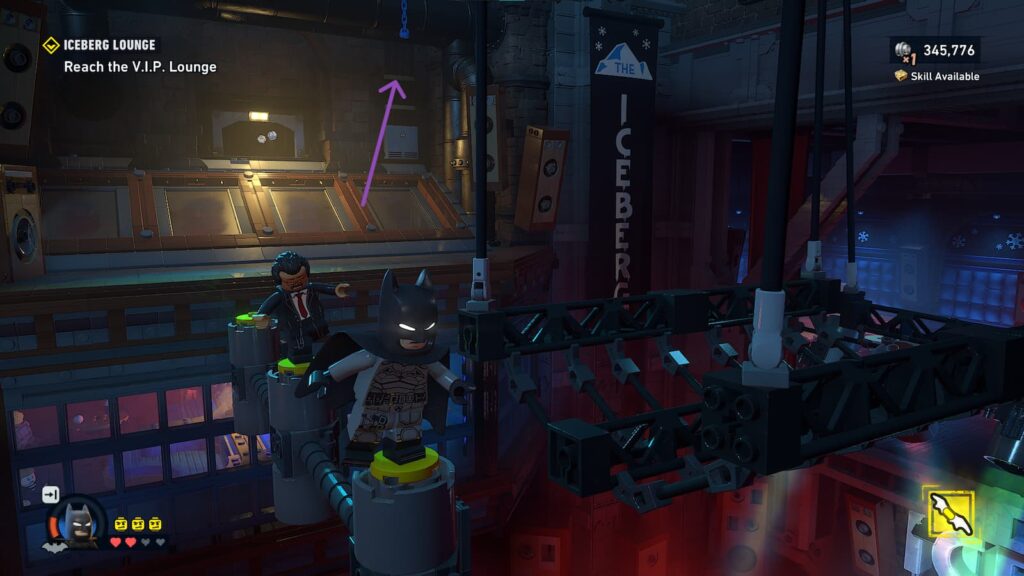
Disco Ball 3
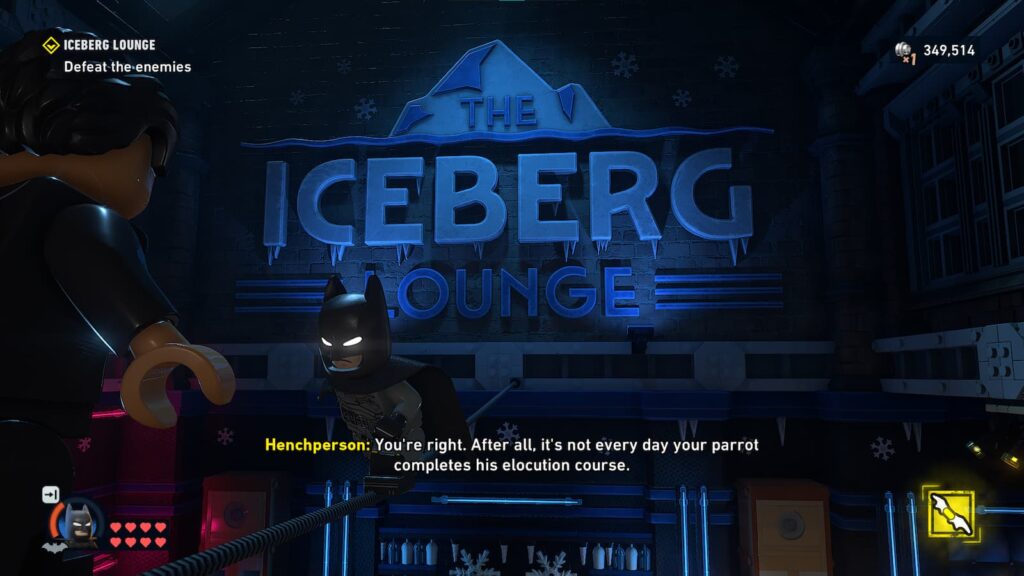
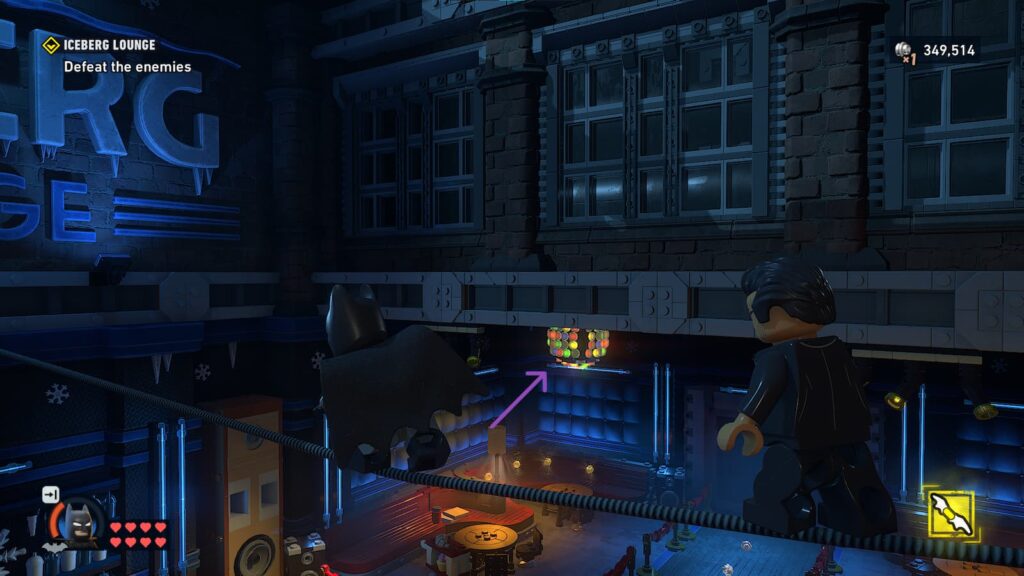
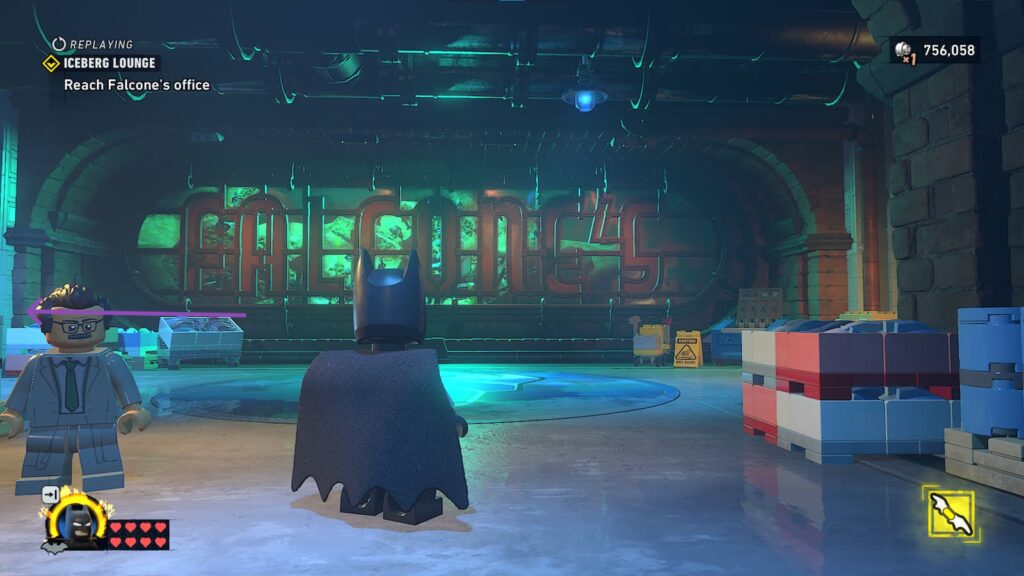
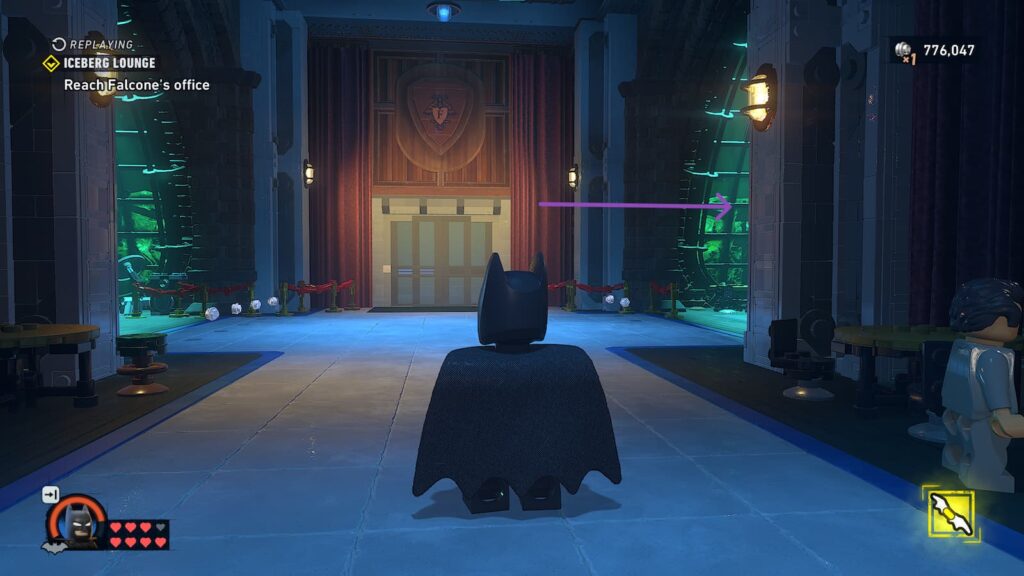
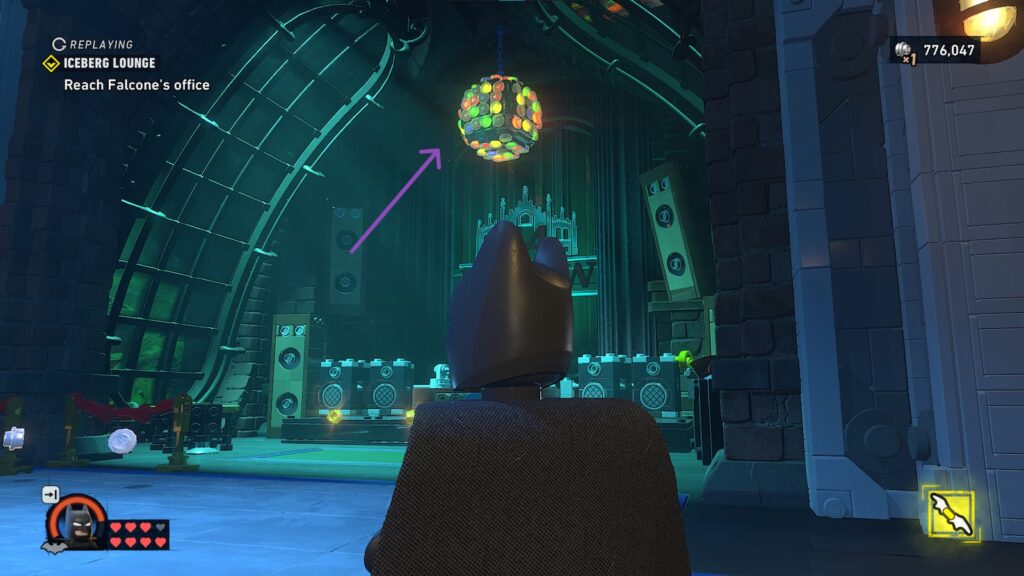
You will eventually enter a room where there is a big sign saying The Iceberg Lounge. Walk on the wire and on your right there will be the 3rd disco ball.
Red Brick
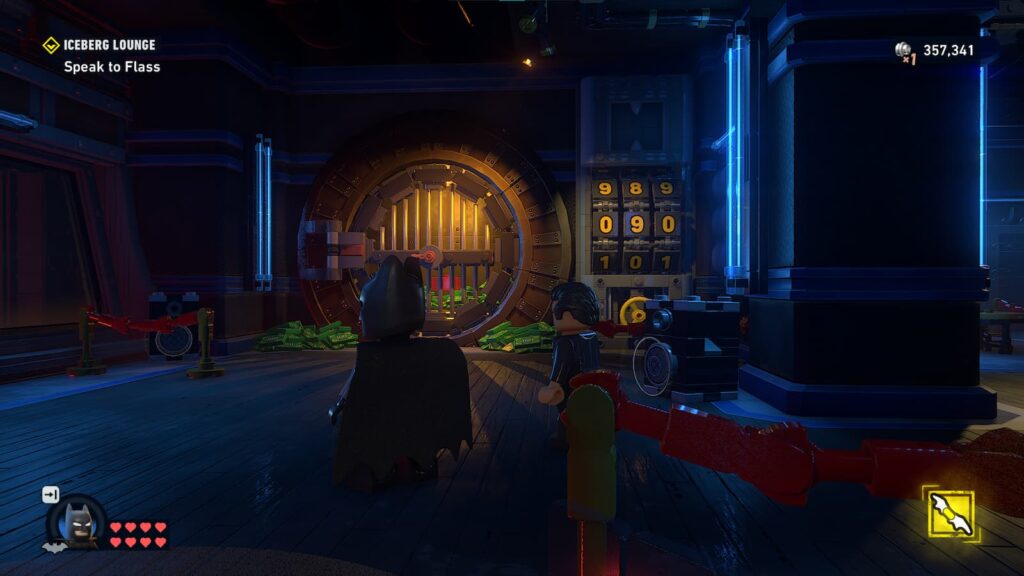
Stay in the Iceberg Lounge. Pointing from where we originally started, walk through the room opposite the Iceberg ounge sign. There, you will a sort of safe room. On your right you will see the red brick.
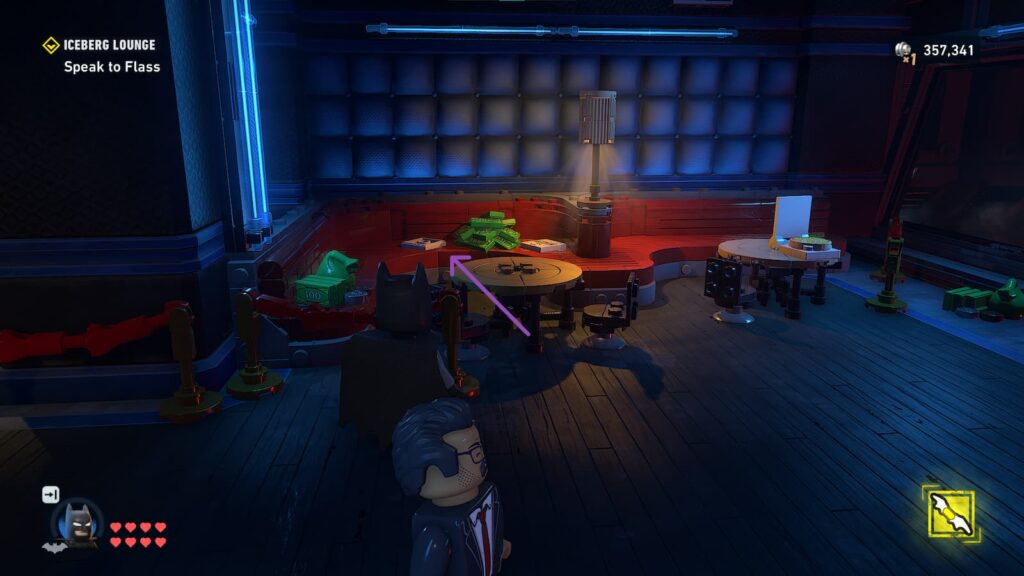
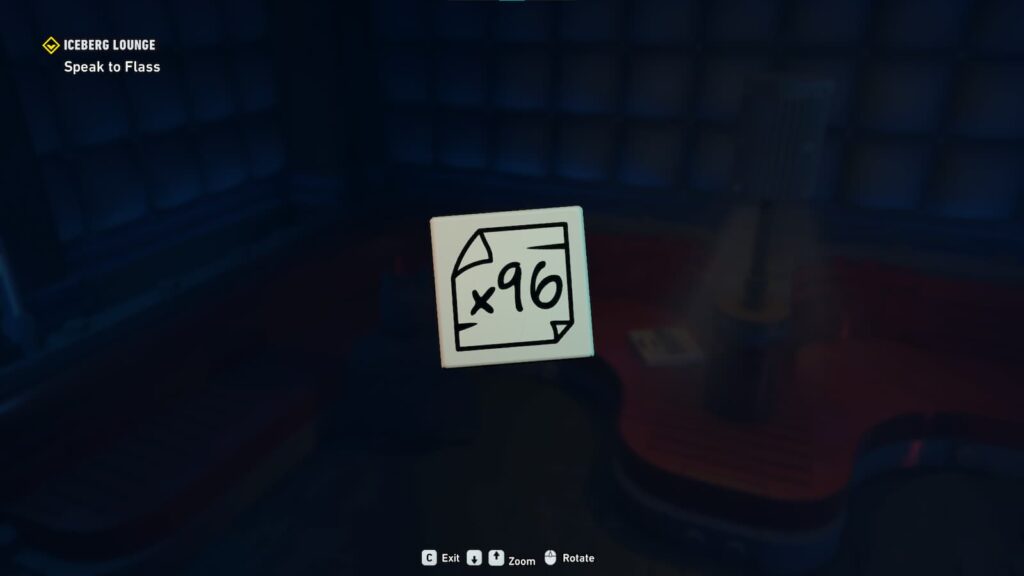
From where you entered the room, on your left, there will be a white lefo piece. You can destroy all the stuff in the way if it’s easier. When you interact with it, turn it around and it will say x96 on it.
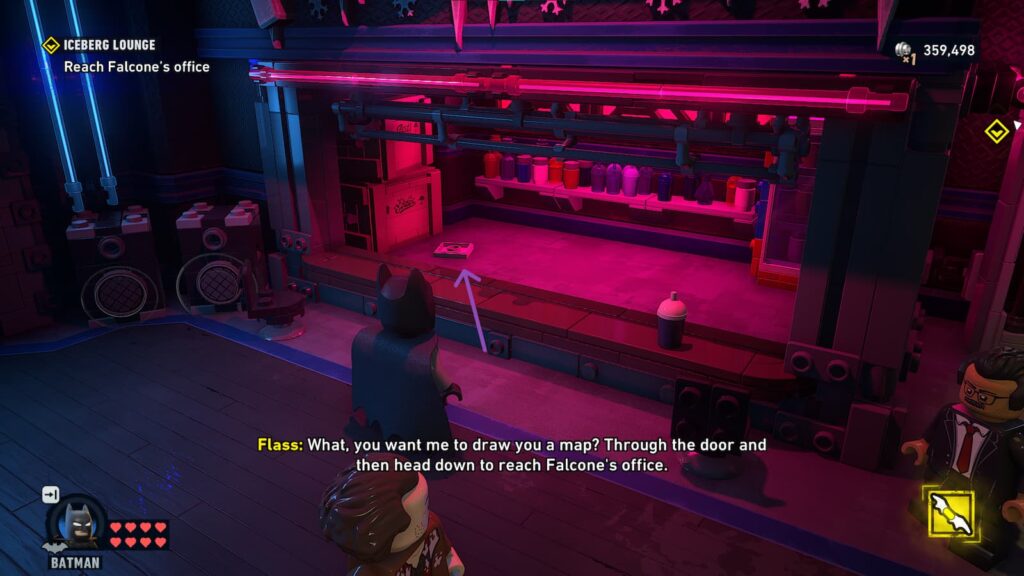
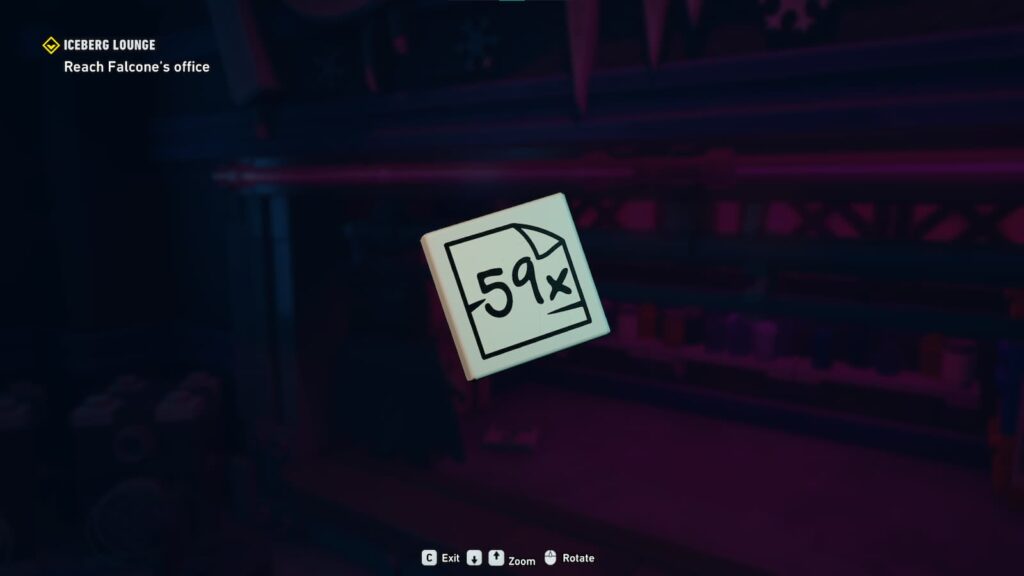
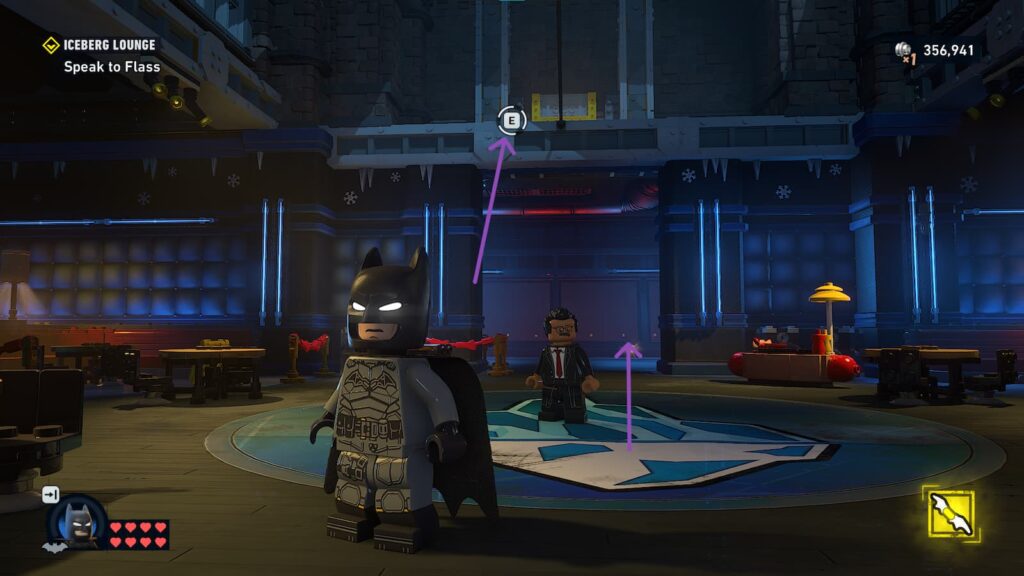
You can only do this next step after talking to Flass in the room first. After doing that, you will be able to go behind Selina’s bar, where there is another lego piece with a number, saying 59x.
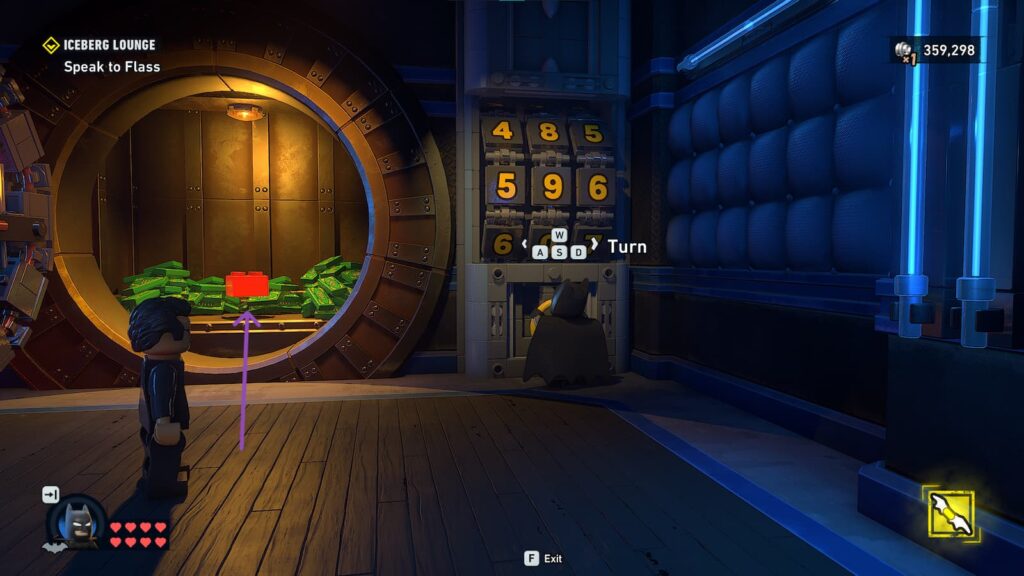
Turn the numbers around unti you get 596 and the safe will open and you can grab the red brick.
Wayne Tech Cache 2
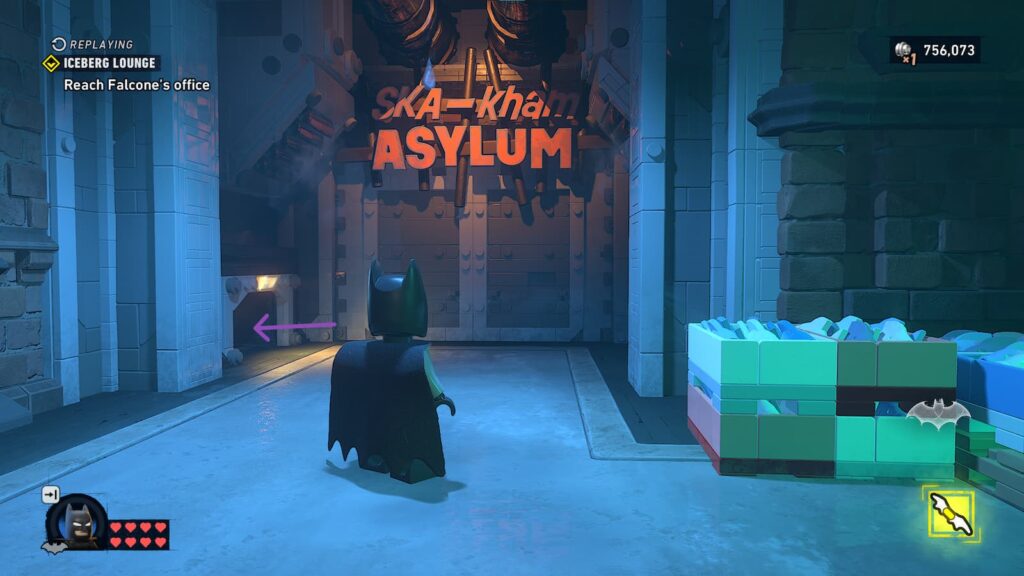
There is a section where you need to prepare some food for Falcone. After that, you will go down an elevator and reach this section. Go left, where it says Ska-kham Asylum, and go through the vent.
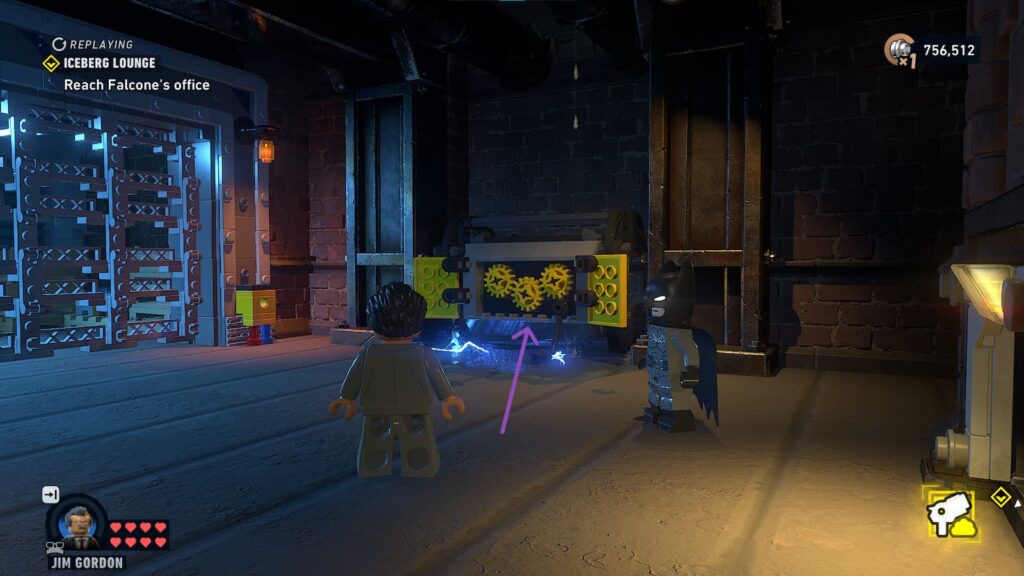
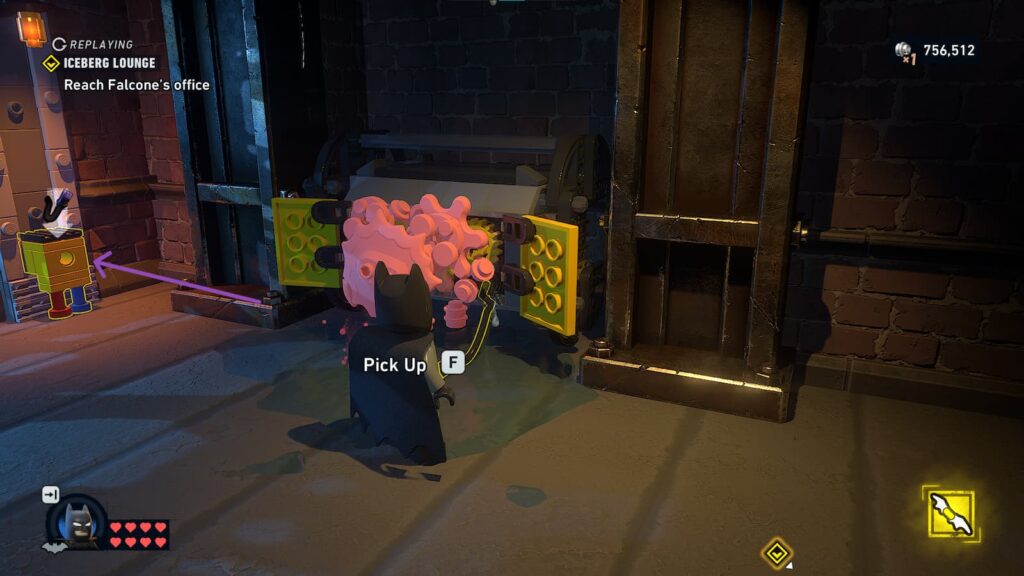
You will then enter a room where the Wayne Cache is behind some bars. To opent hem, you first have to goam up the water and electrical current so you can grab the cord. After you do that, insert it into the space next to the gate, after which destroy the foam. That way, the gate will open up and you can access the cache.
Wayne Tech Cache 3
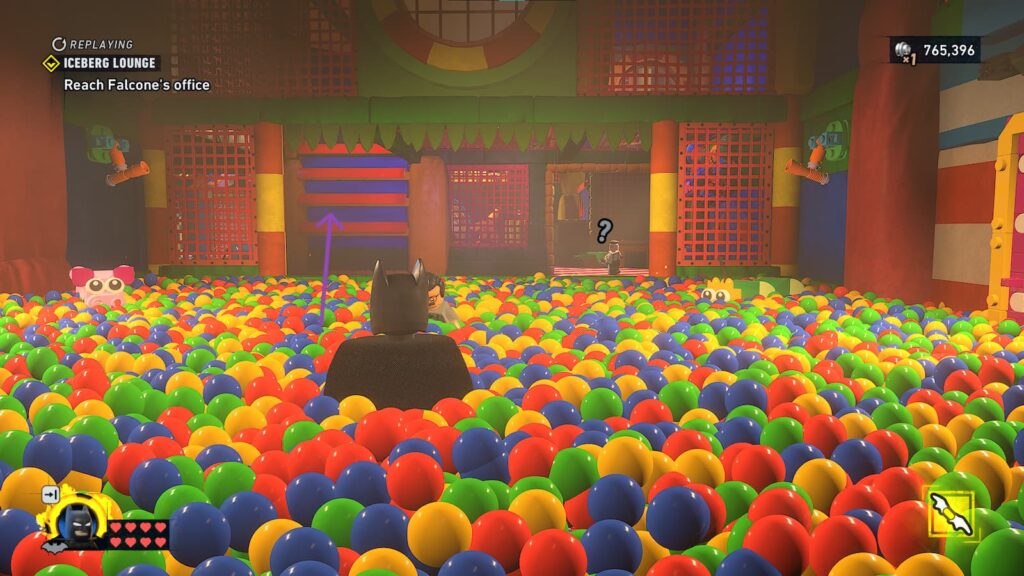
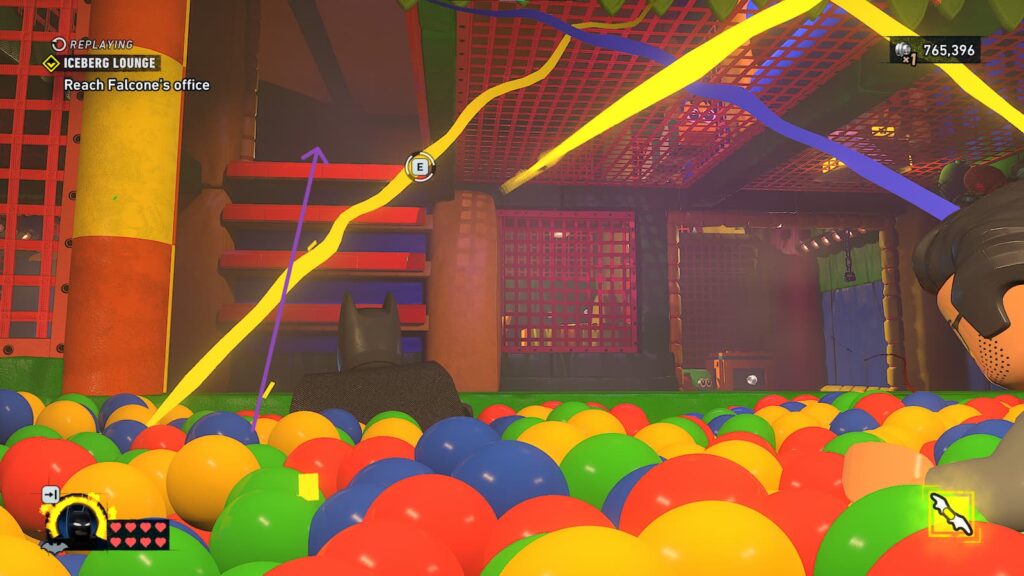
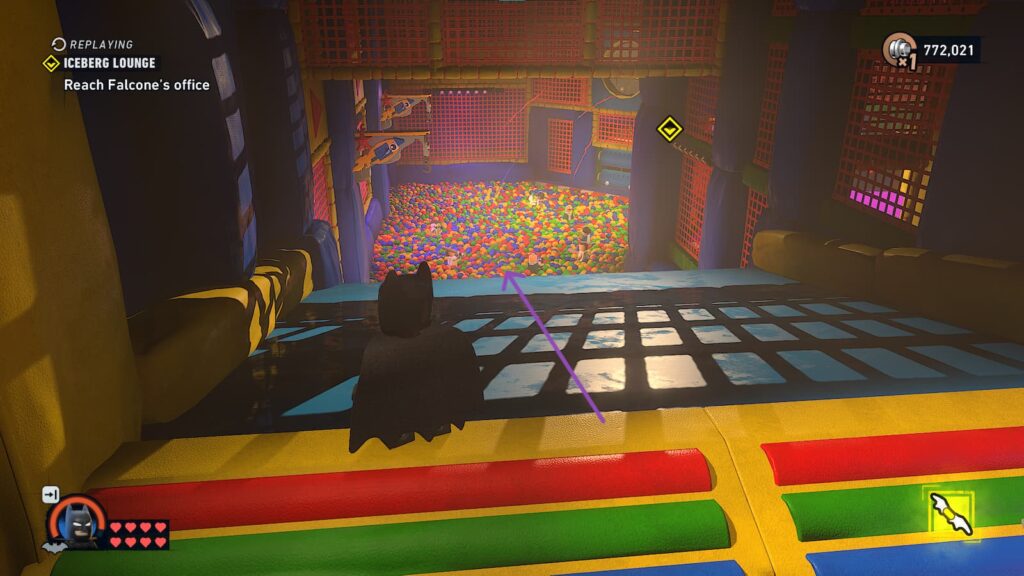
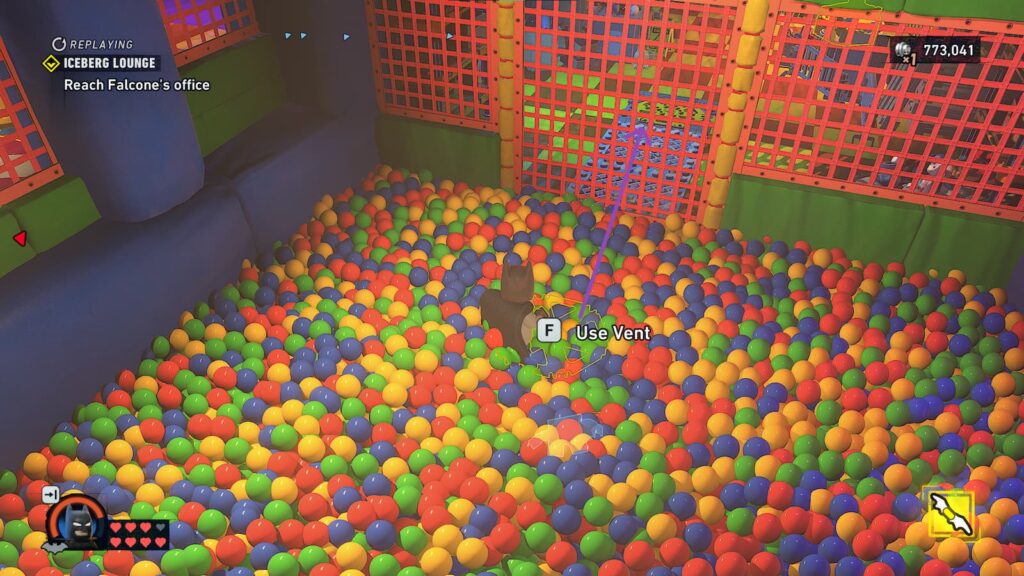
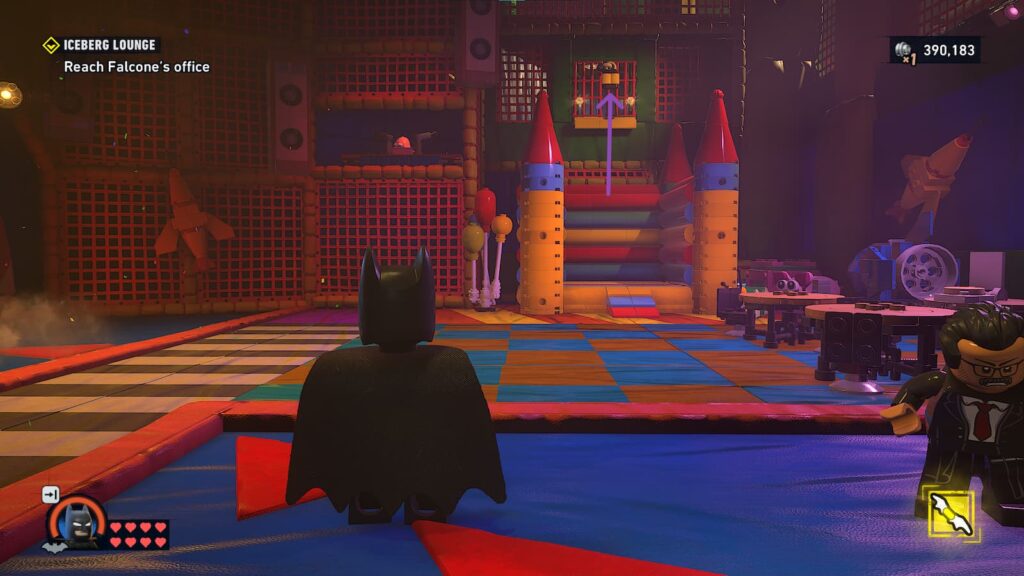
Eventually, you will end up into a huge playground. In the first chamber, go through the opening in the front, left, and up.
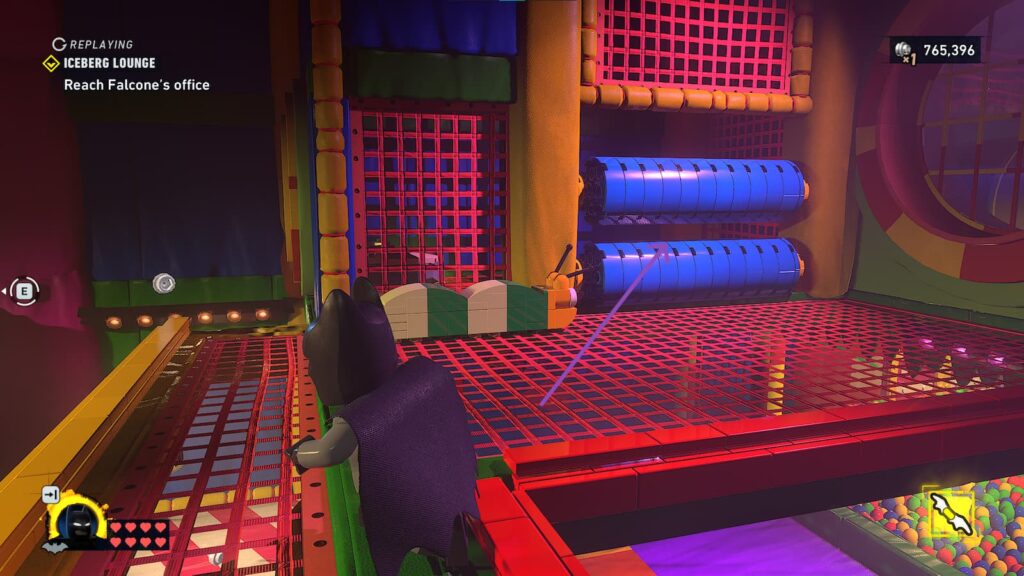
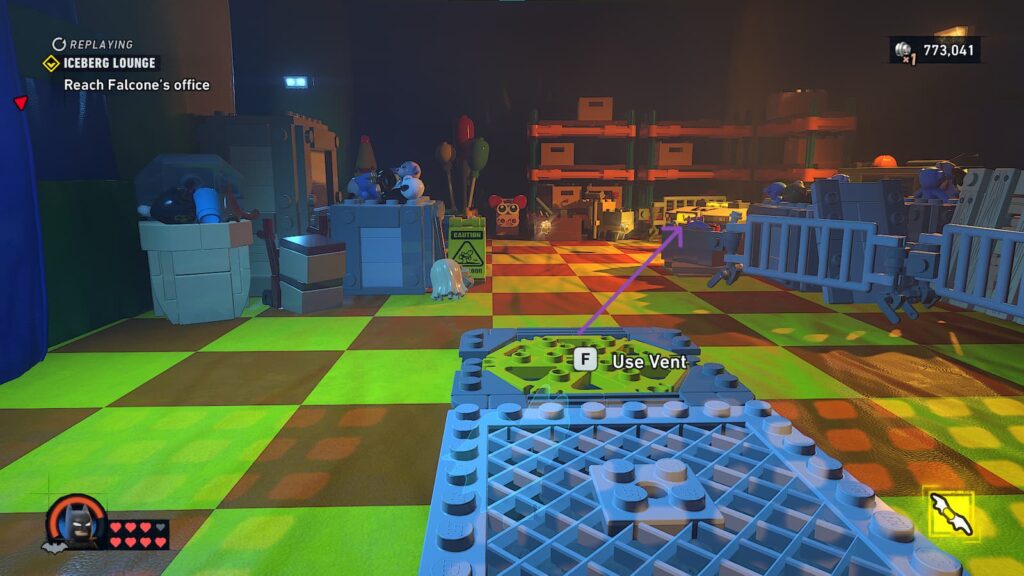
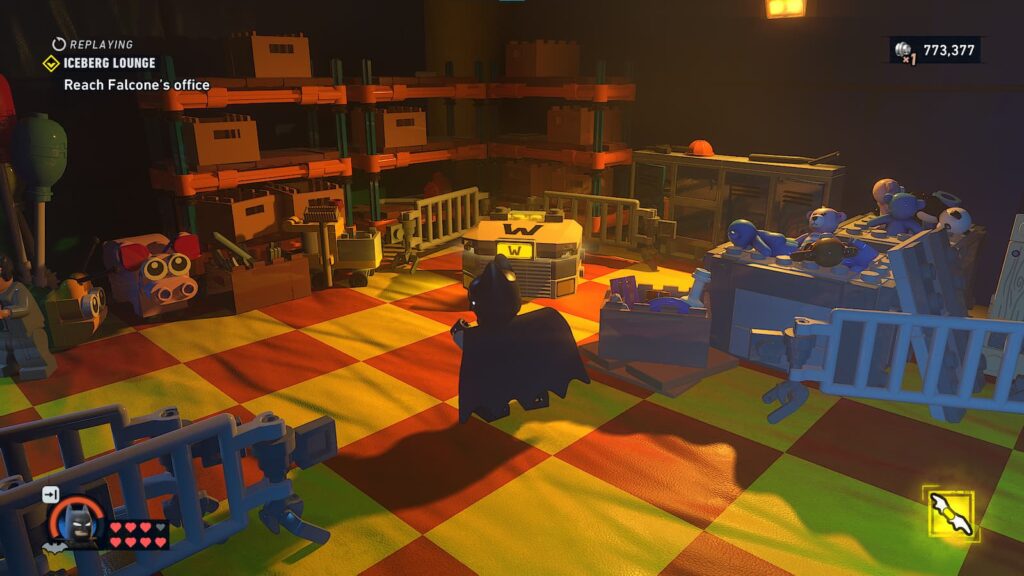
Go through the blue rollers and the Wayne Cache will be inside.
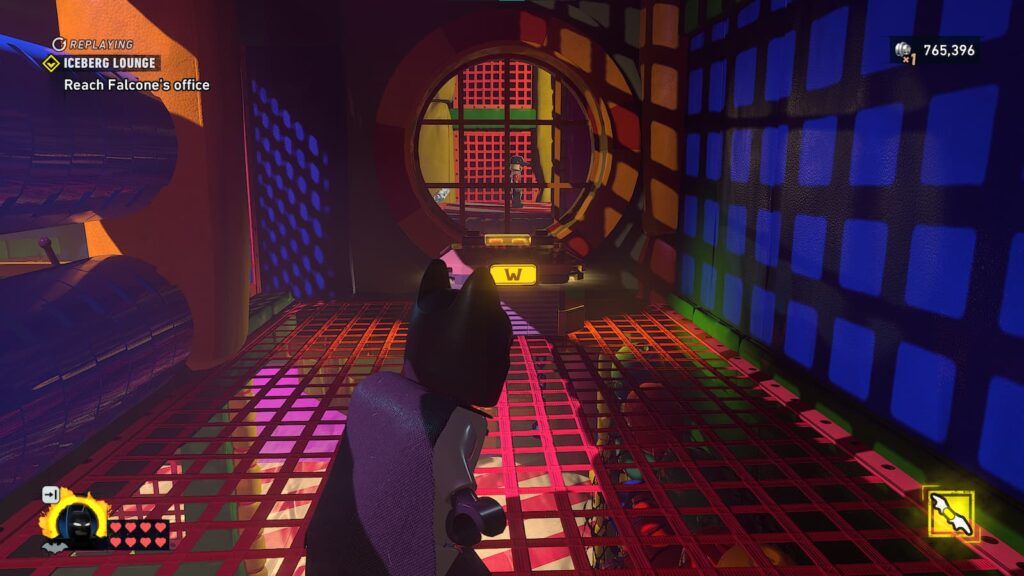
Disco Ball 4
As you continue through, there will once again be some blue rollers. Go through and you will end up in a room where the disco ball will be right across from you.
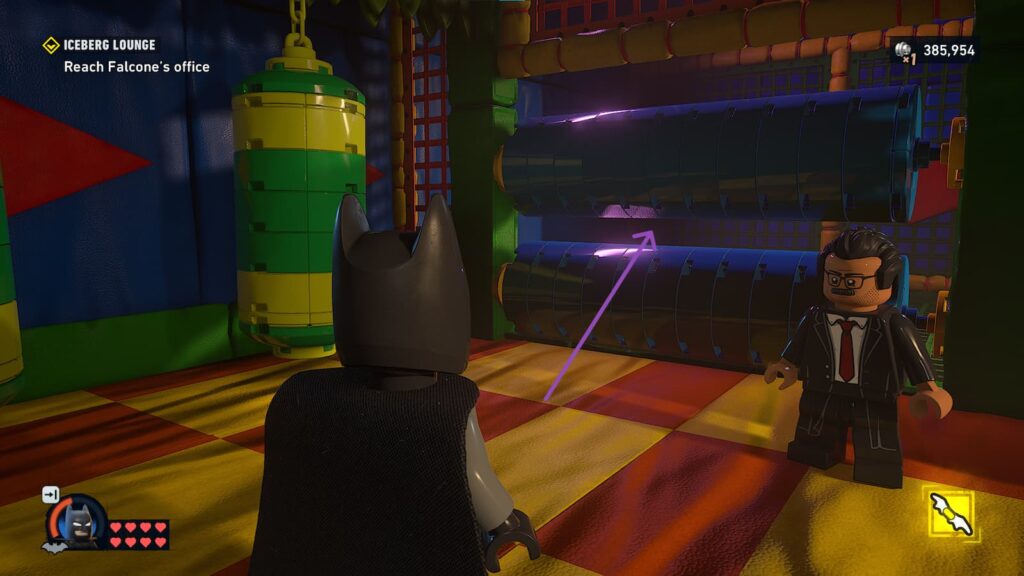
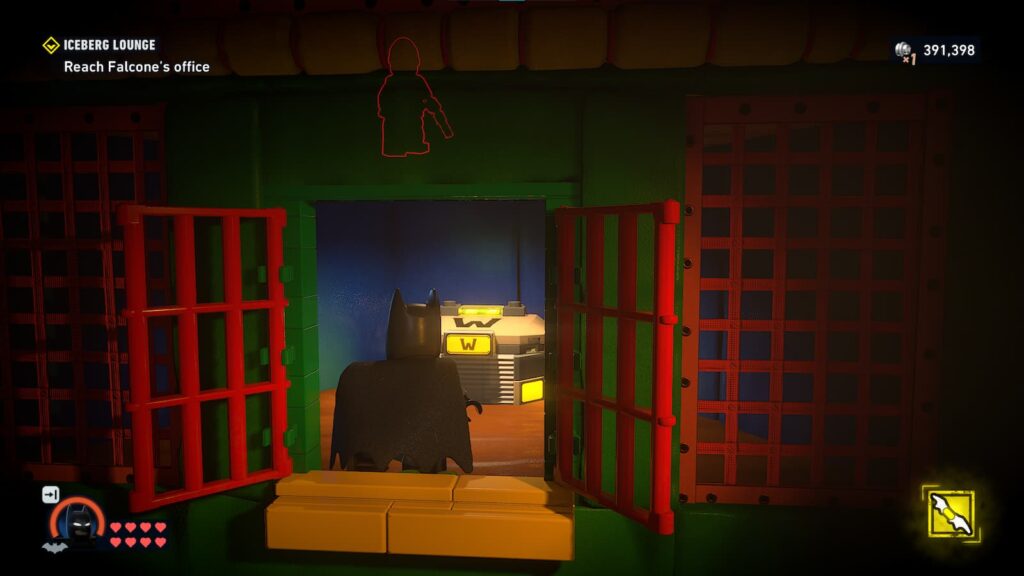
Wayne Tech Cache 4
There will eventually be a chamber where there are a bunch of enemies in a circle, with 2 places where you can hang from to stealth attack them. If you use your special vision skill, you should be able to see a vent near where you fell down when you entered the room.
As you go through the vent, the cache will be forward, on the right corner.
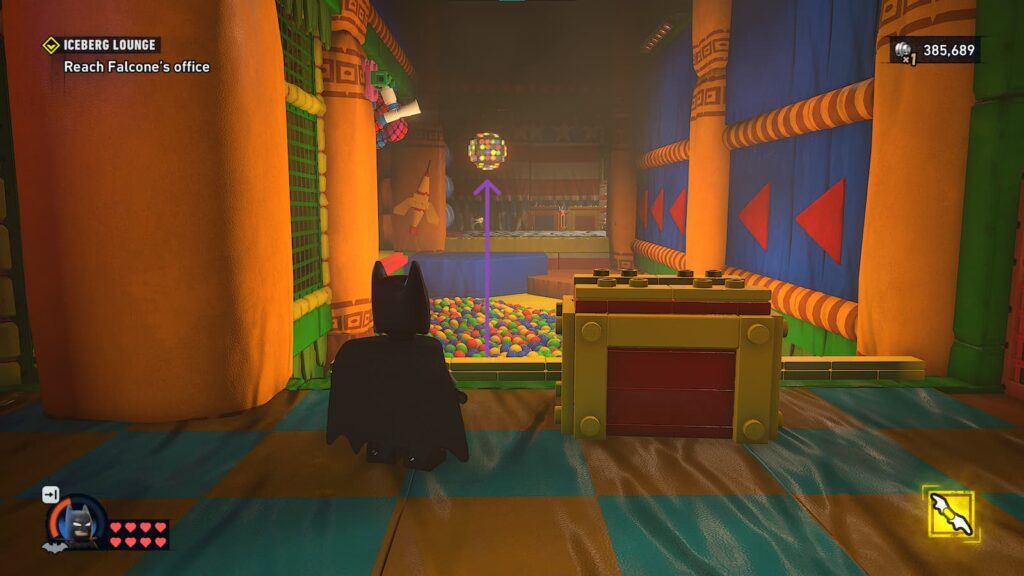
Wayne Tech Cache 5
At a certain point, you will enter a room with very loud music. Don’t worry if you don’t know which one it is, Batman will mention the music and you won’t be able to pass through unless you stop it, so you’ll know. The cache is behind a locked gate. Break it with the Batarang and then do a high jump on the castle to reach the cache.
Disco Ball 5
There is a scene where you will see Red Hood enter an elevator. On the right side of the chamber, you will find the last disco ball.
The Red Hood Gang, Ace Chemicals
Wayne Tech Cache 1
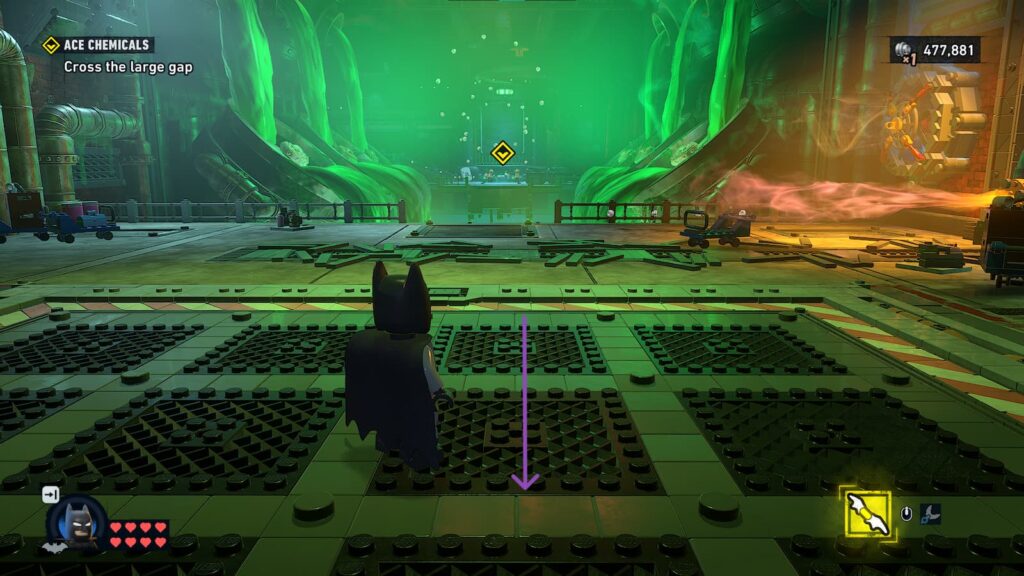
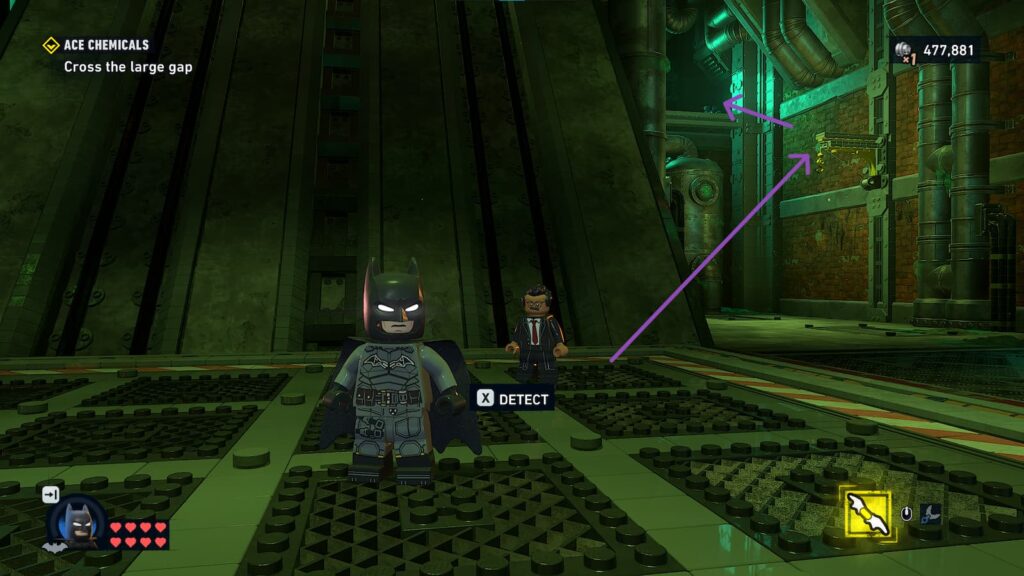
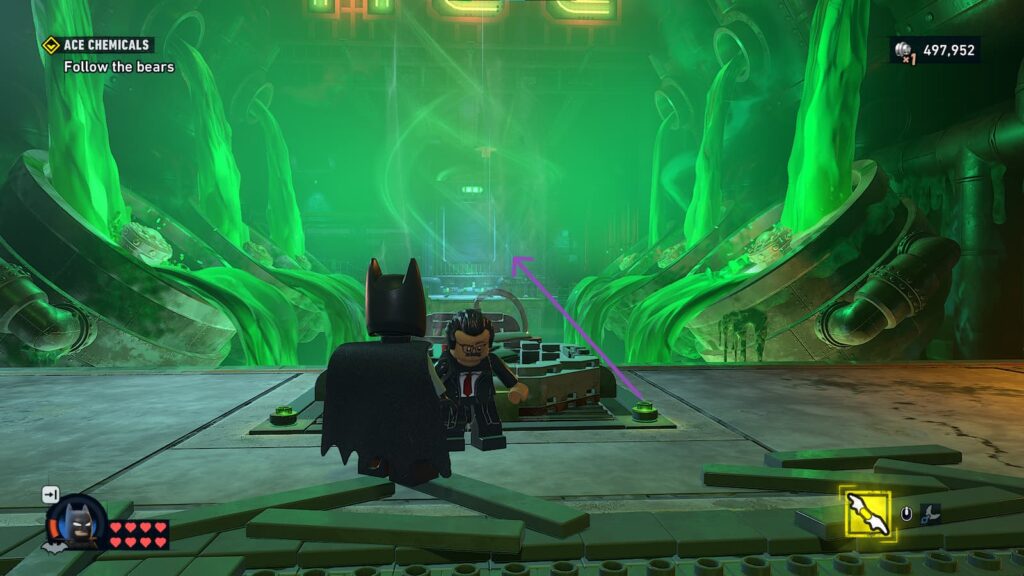
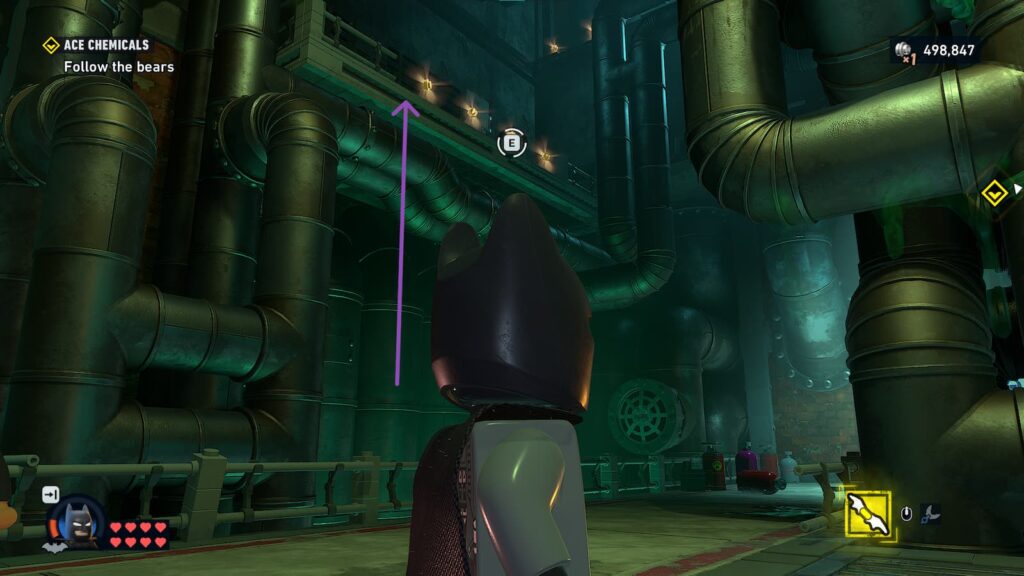
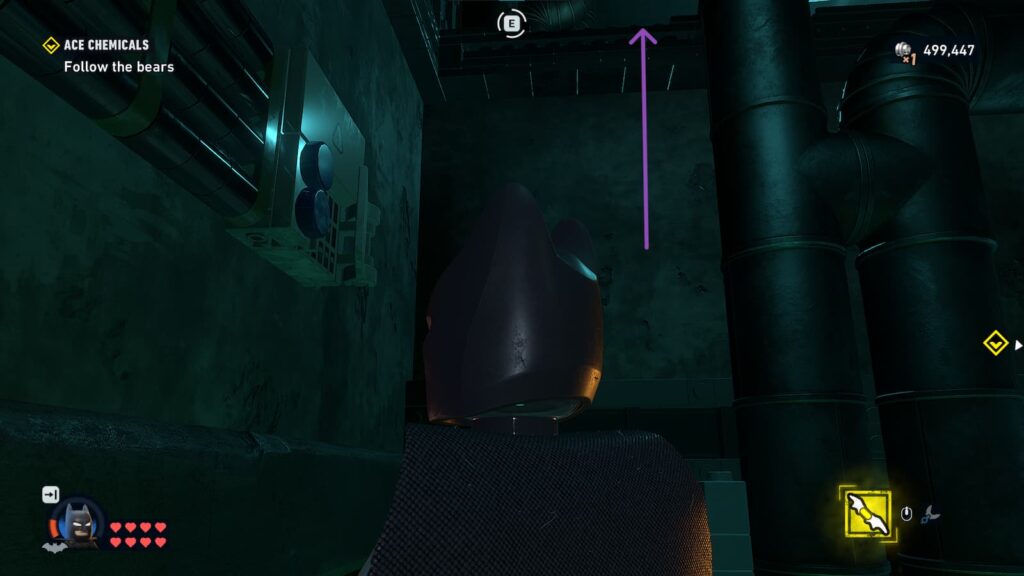
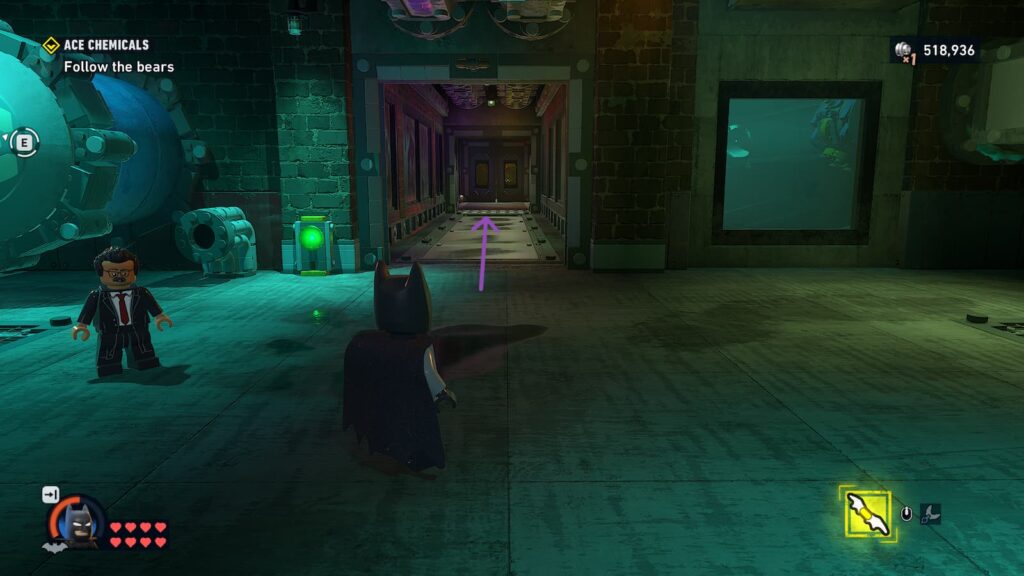
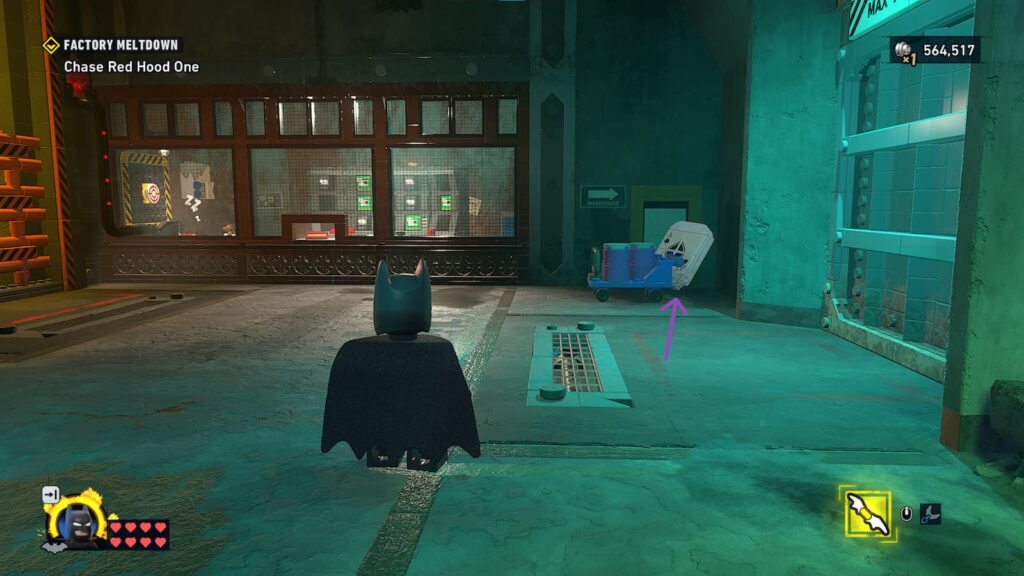
After you have a fight with a giant NPC, a lift will take you to this location. Before continuig forwards, turn around and go up, on the right hallway.
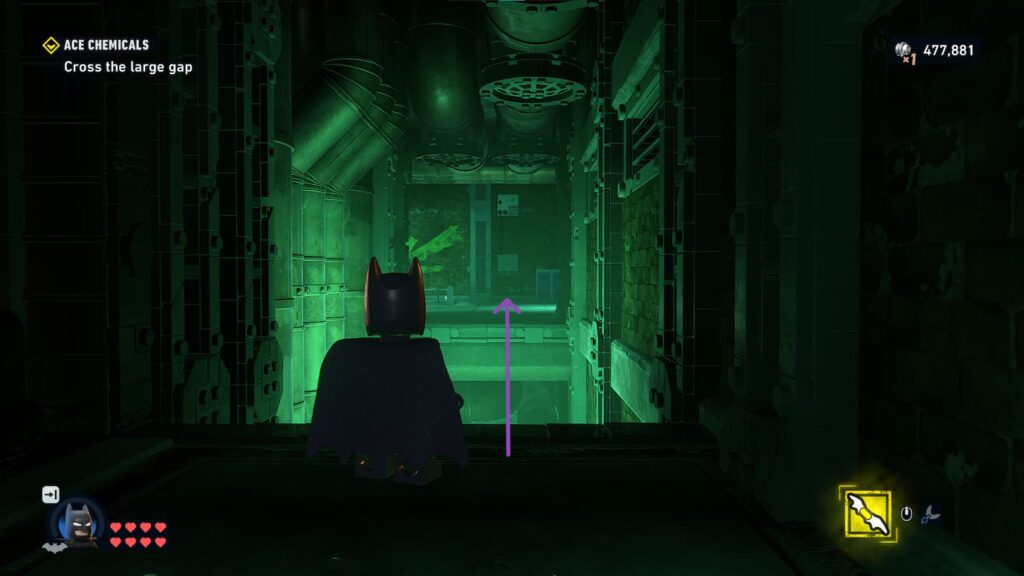
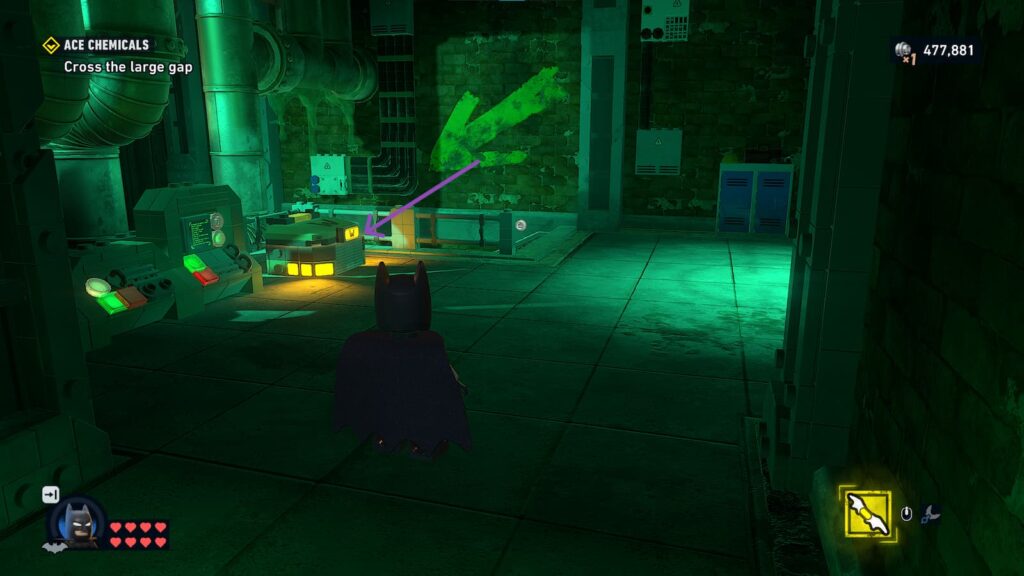
You will have to glide to the other side and then on your left, next to some stairs, will be the first Wayne Cache.
Ace Card 1
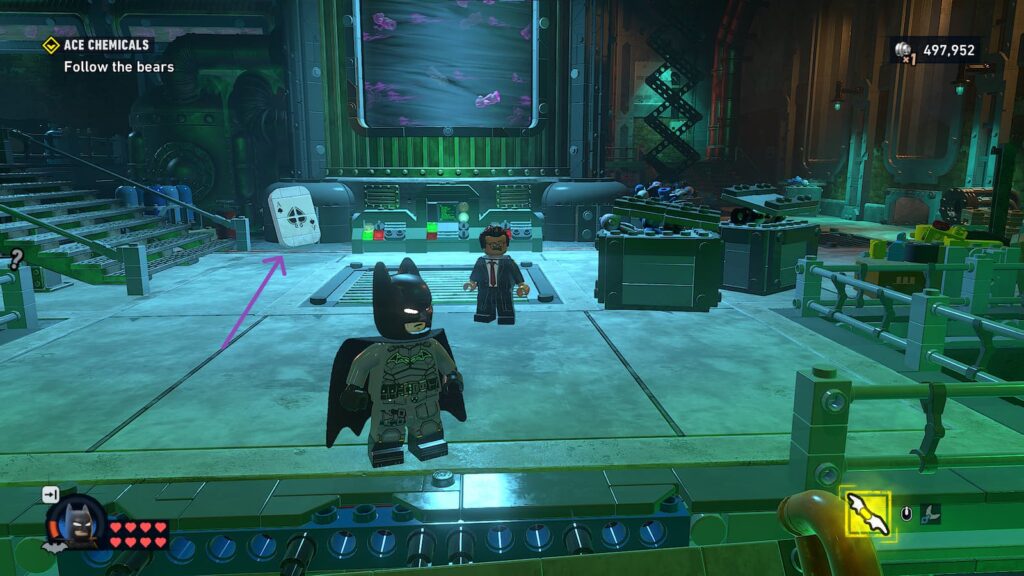
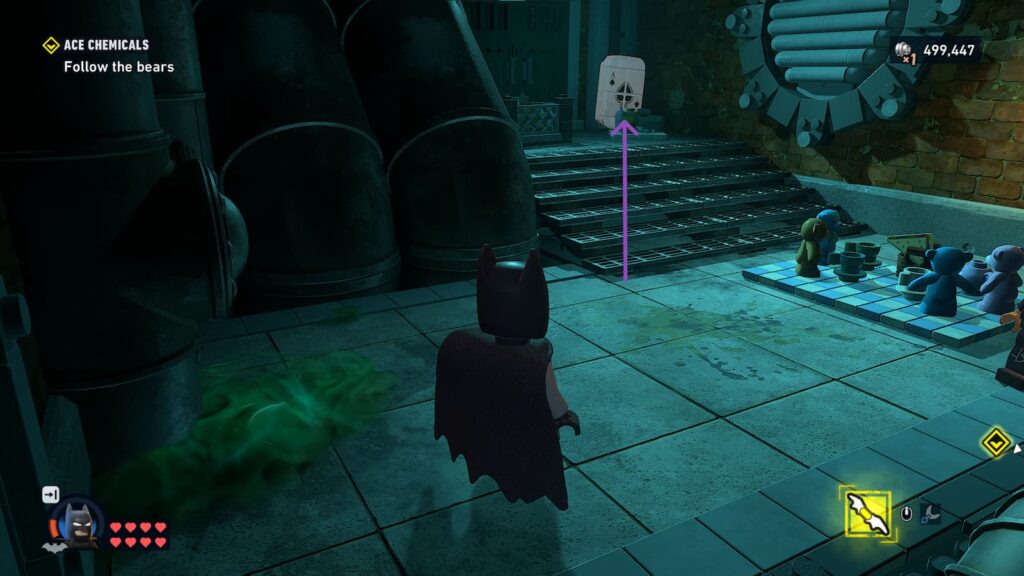
Go back to your original location, and you will have to build a sort of vent that blasts air so you can fly through to the other side. The first Ace Card will be right at the front, next to the stairs leading to your left.
Wayne Tech Cache 2
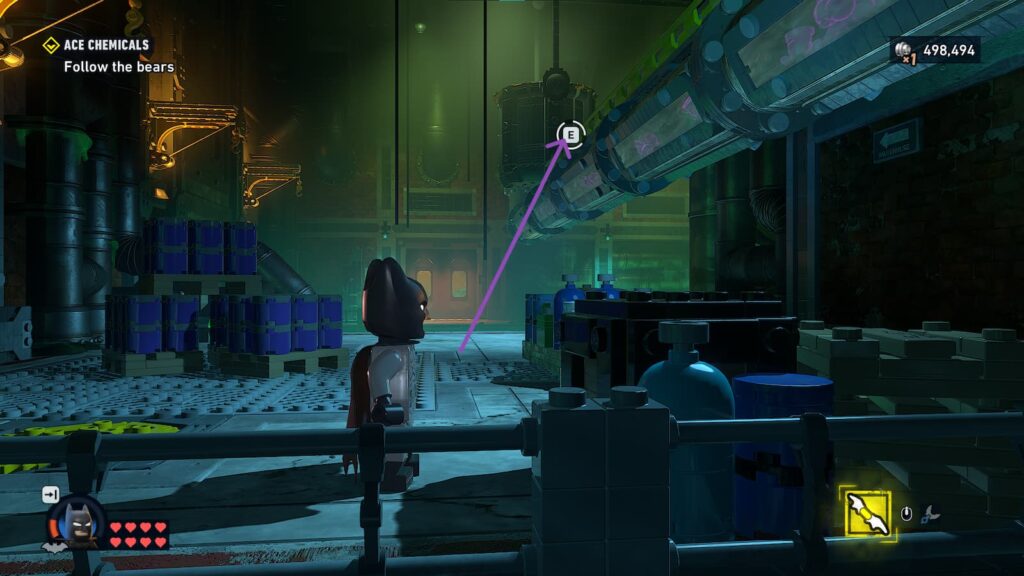
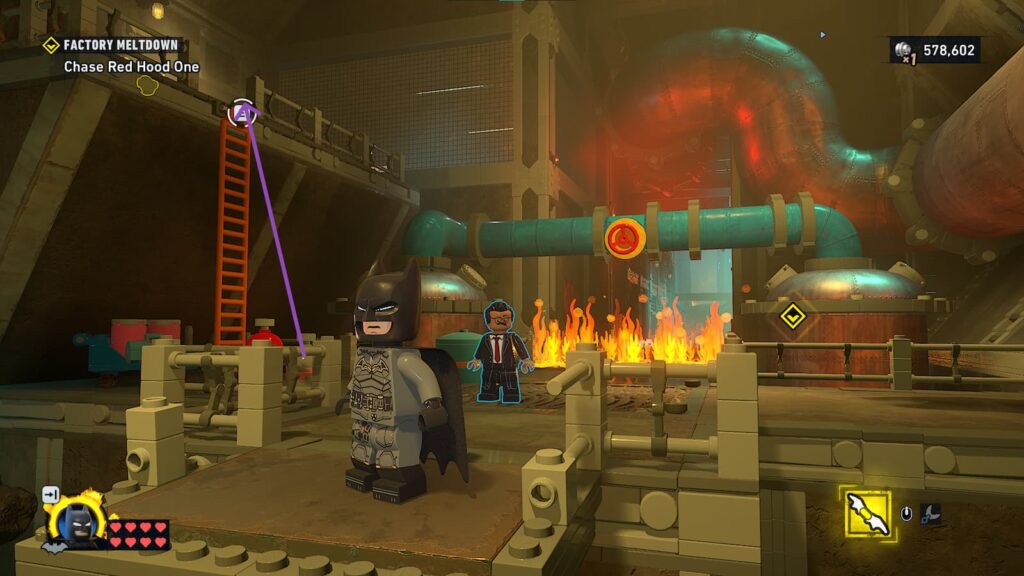
As you continue goings up those stairs from the previous location, the will be these huge pipes, and then cauldrons with the toxic liquid. Climb over them and go right after the second one.
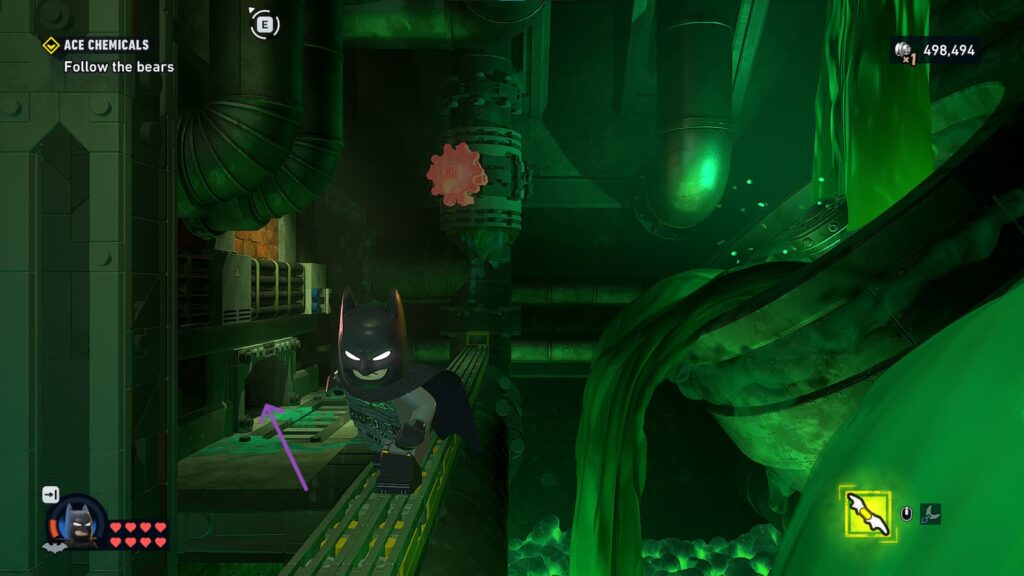
There will be stuff leaking out, so after you use Gordon to foam it up, jump over to where the tunnel is. After you go through, you will find the next Wayne Cache.
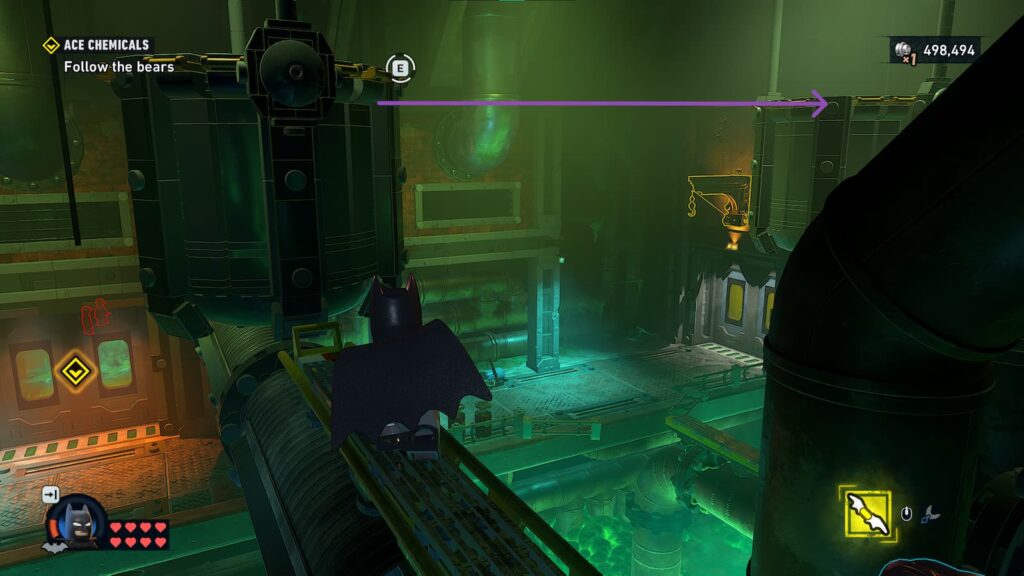
Ace Card 2
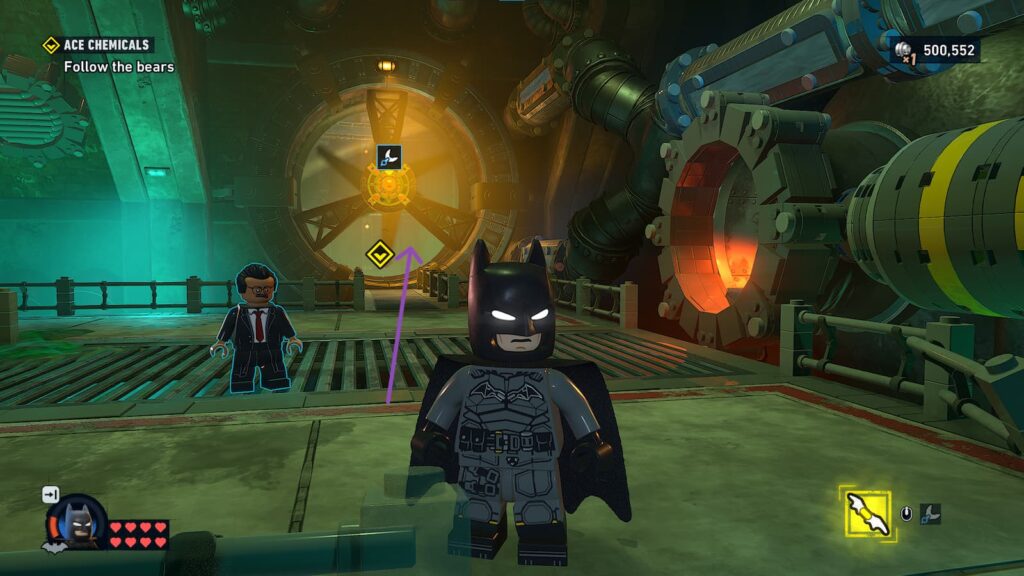
You will eventually enter a room with a big fan. Don’t go through yet. Turn left and then go up the ledge.
Go up once more, and the 2nd card should be up a small set of stairs.
Ace Card 3
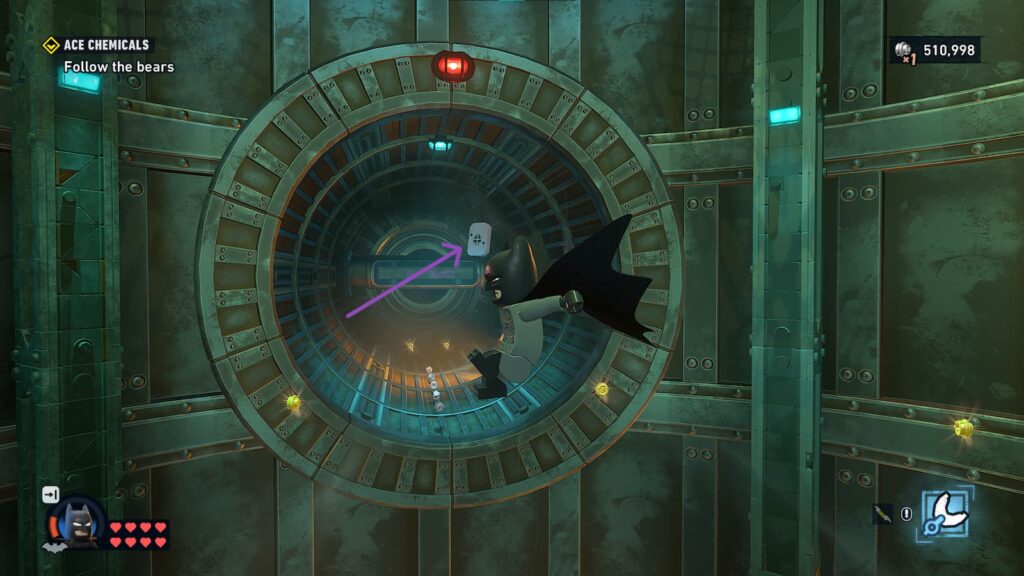
To go through the massive fan, you will first have to use Batman’s claw, and then Gordon to use foam to stop it from moving. There will be air coming from below keeping you floating. If you look around, you should see an opening, where the next Ace Card will be.
Wayne Tech Cache 3
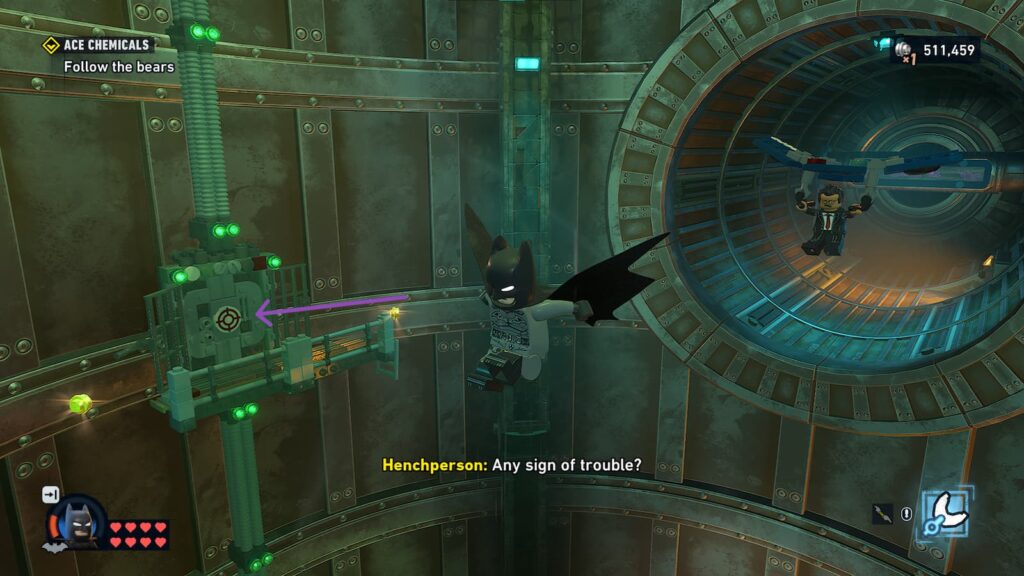
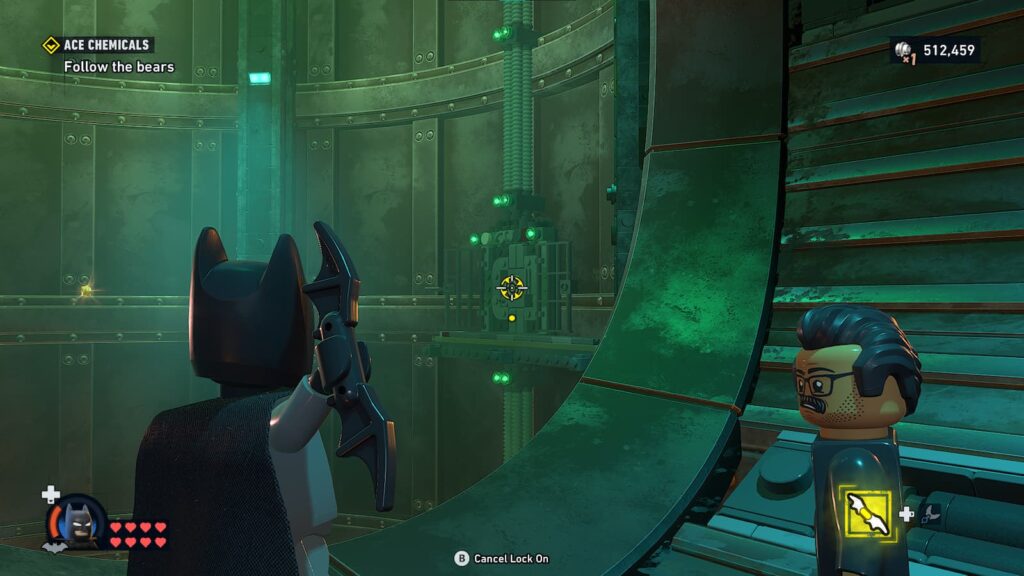
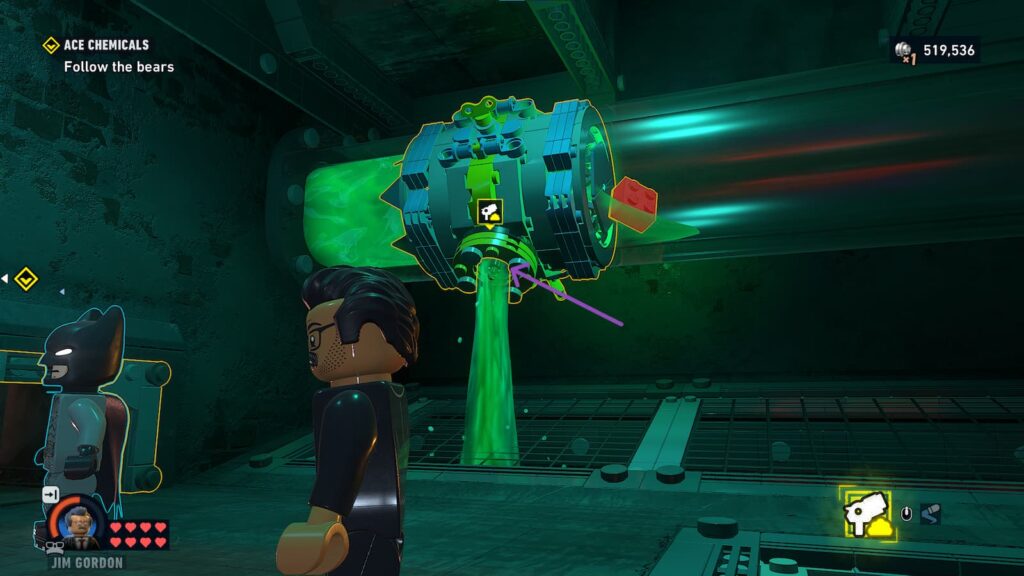
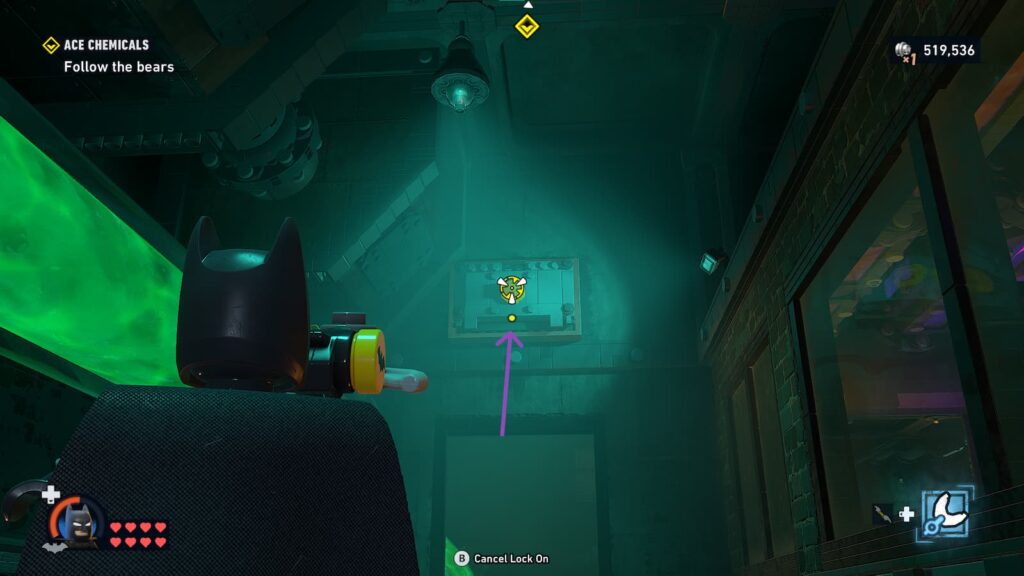
The next Wayne Tech Cache is below. To stop the wind air flow, you will have to sit on the opening and aim at the target. That will stop the wind and you should be able to jump down. After getting the Wayne Tech Cache, you can press the red button left of it to restart the air flow.
Wayne Tech Cache 4
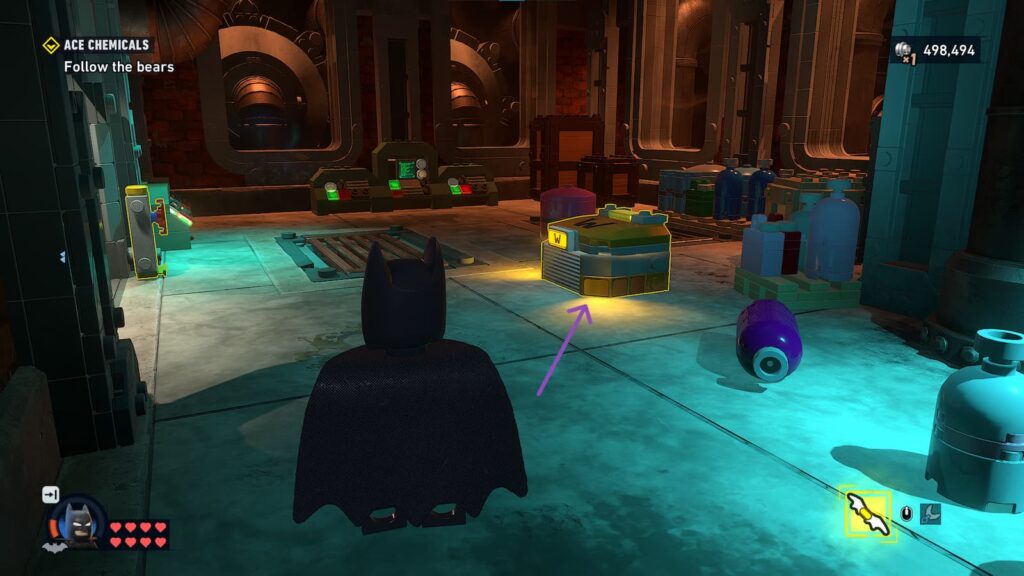
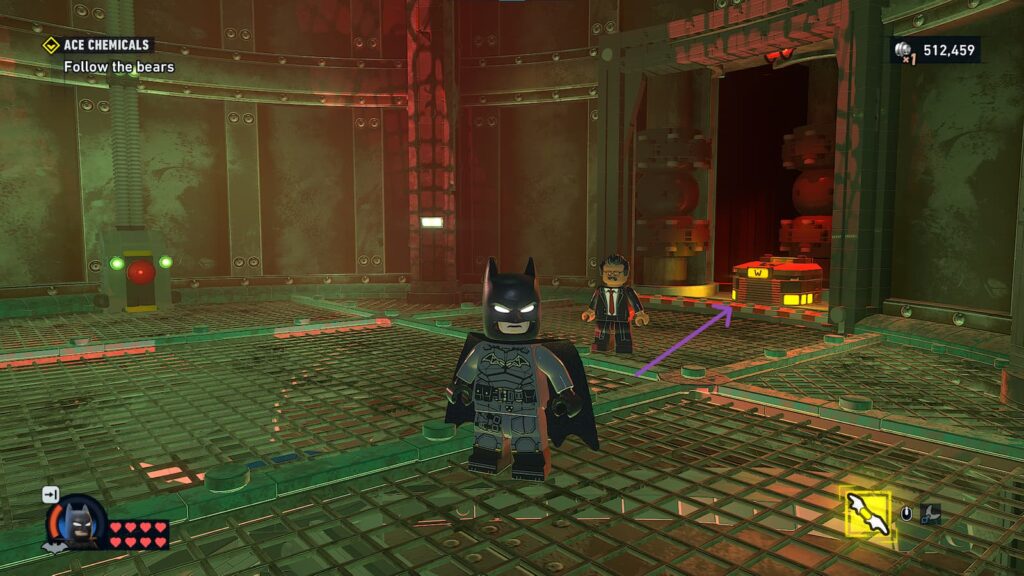
Continuing with the plot, you will reach this chamber. The next Wayne Tech Cache is in the front left corner. Eliminate the enemies first. You can reach it also either by keeping high altitude with the grappling gun or going through the vents.
Red Brick
After finishing off the enemeis in that big area, you will have to go through this hallway to advance the plot. However, there is a room on the right where the Red Brick is located. To reach it, cross the hallway, then turn right. There should be a vent which will let you go through. After that, to access the red brick, you need to use Gordon to cover up tw holes in the liquid tube.
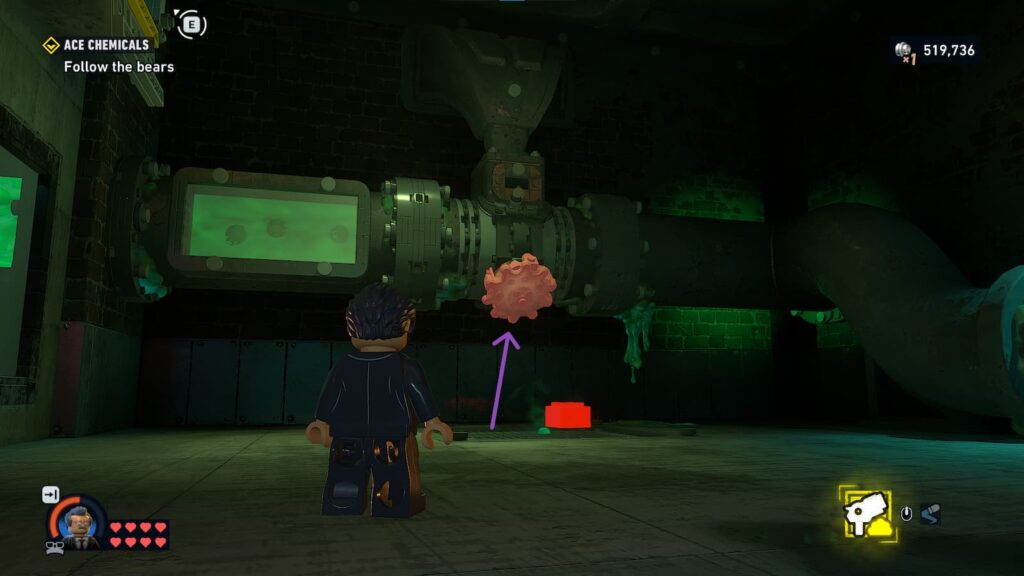
After that, latch out that closed vent. Climb up and through the tunnel to reach the other side. You will need Gordon to once again foam up a hole which will give you access to the red brick.
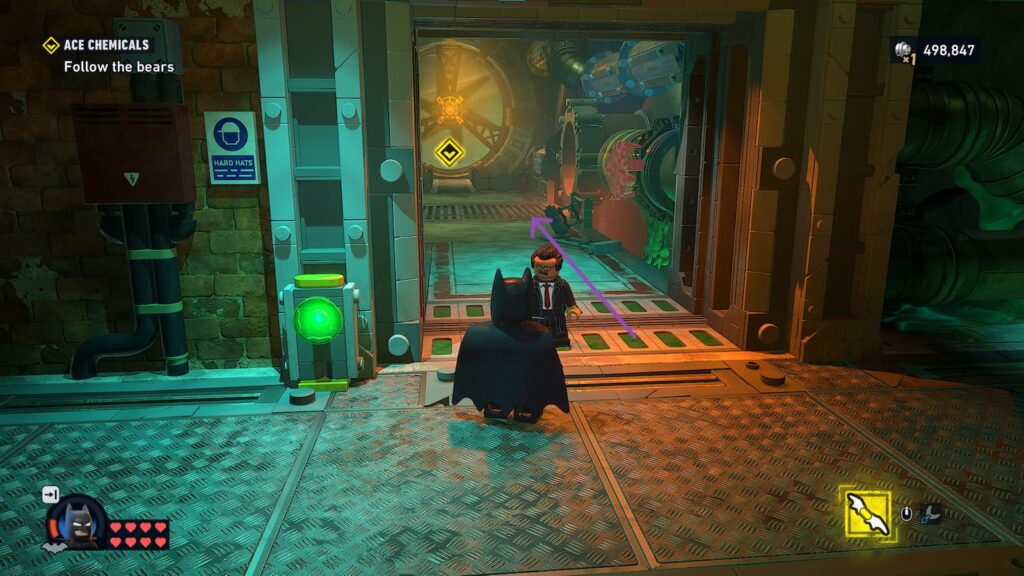
Ace Card 4
After a semi boss fight with Red Hood where he shoots rockets at you, there will be a new area of the laboratory/hideout. Cover up the fire on the right with Gordon , then go through and you should find the next Ace Card in the right corner.
Wayne Tech Cache 5
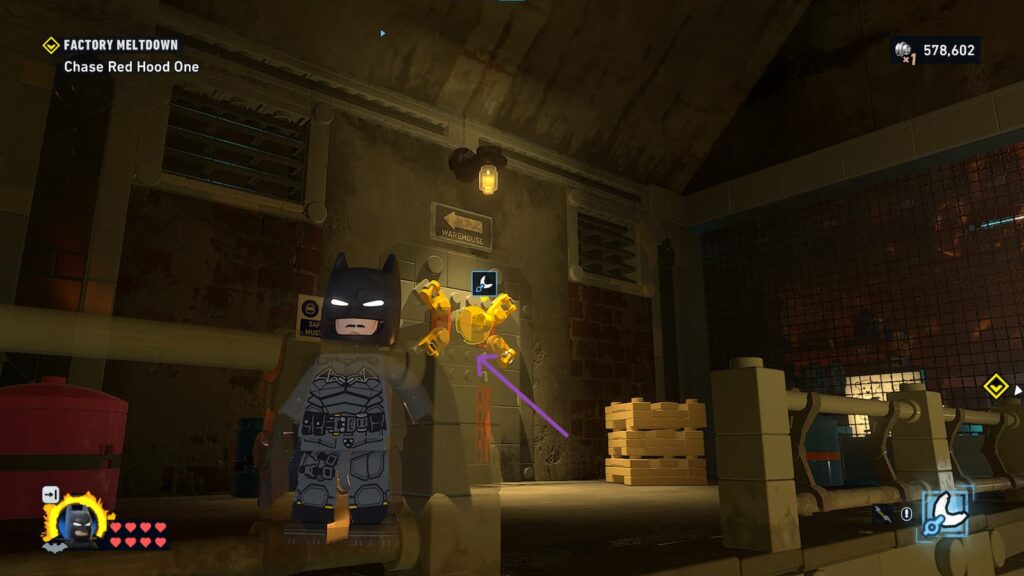
As you contiue along, you will find yourself in this area covered by pipes and fire. Go up the ladder on your left and get rid of the obstacle with Batman. After going through, you will find the last Wayne Tech Cache on this map.
Ace Card 5
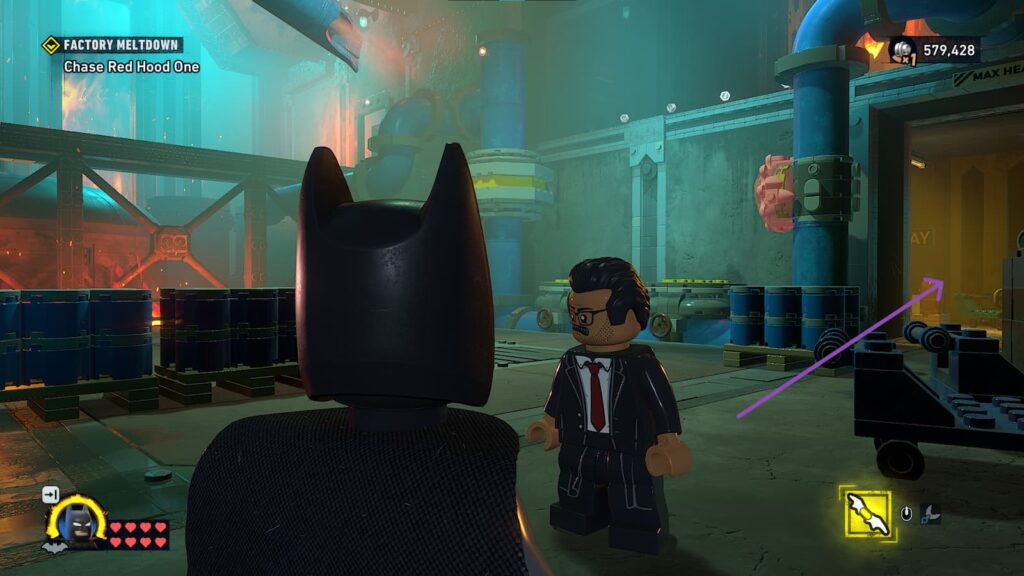
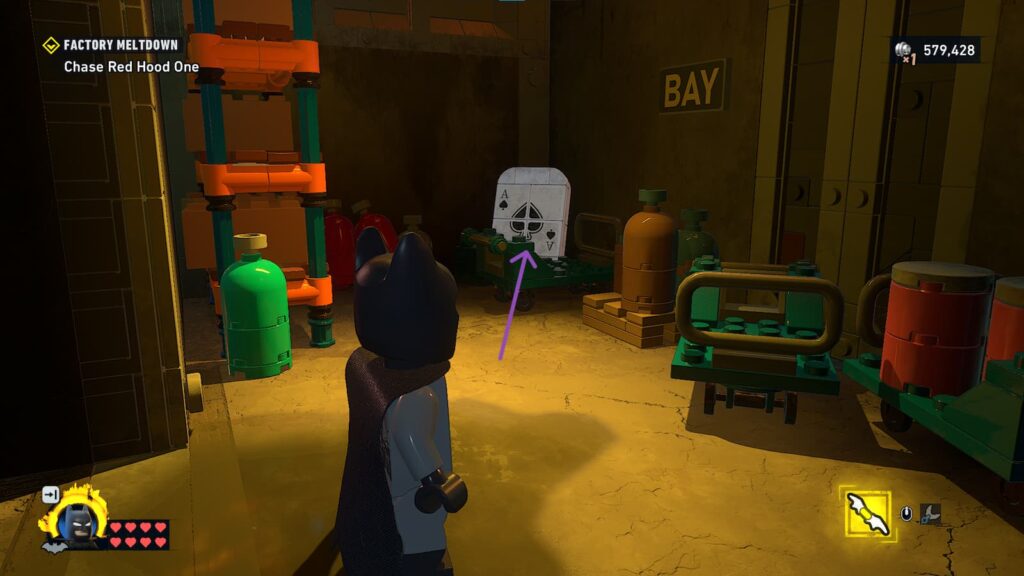
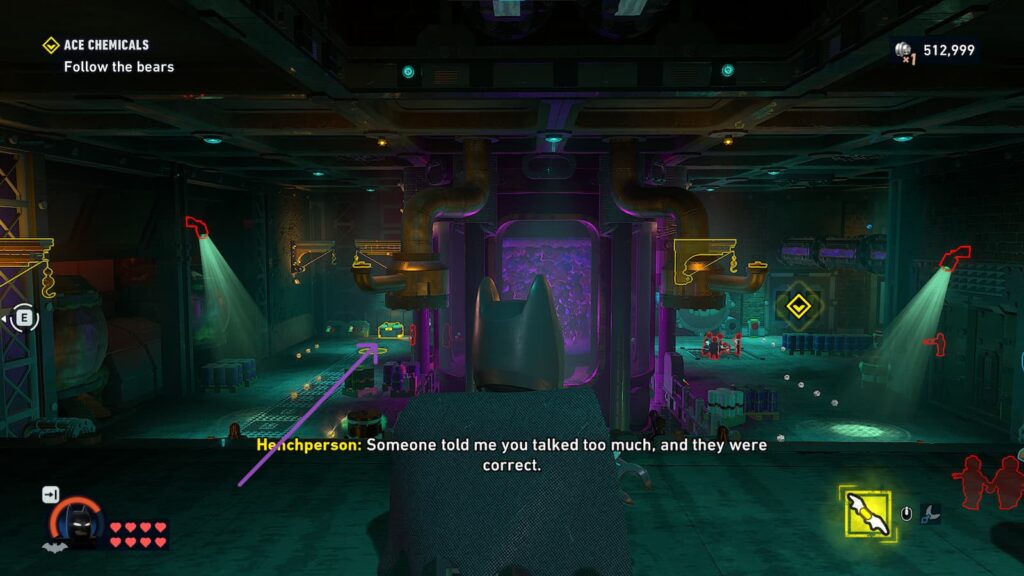
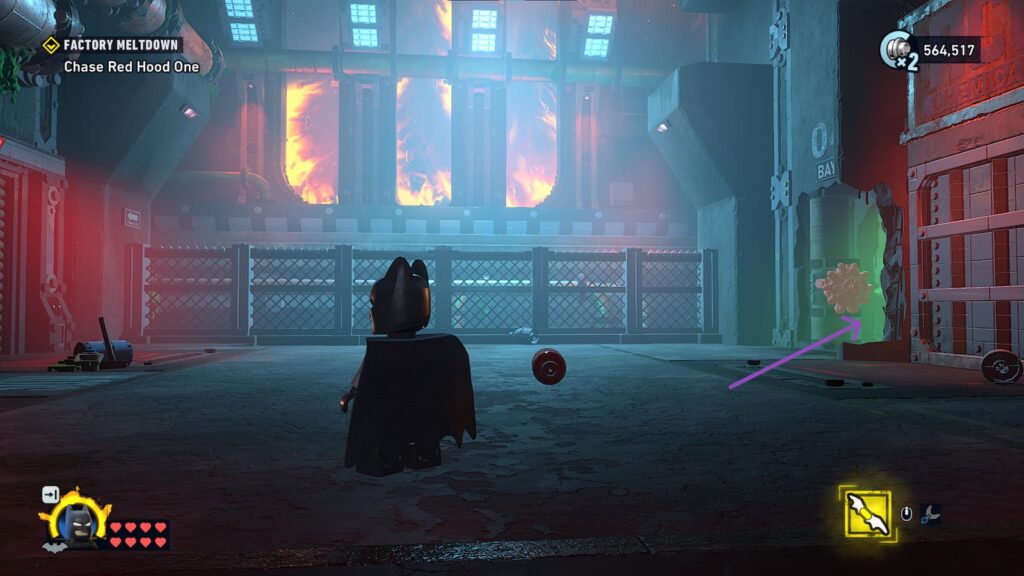
The last Card will be in a side room of a big factory chamber filled with barrels. Go through the door on the right and the Ace Card will be in the left corner, next to a wall that says Bay.
Chapter 2
Mimes, Shreck’s Department Store
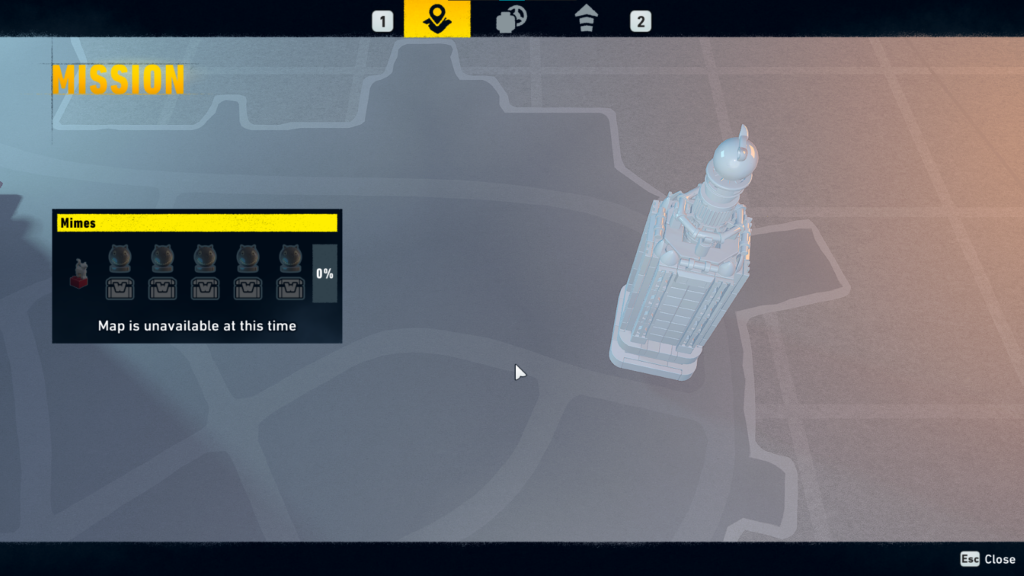
For this map, the collectibles are 1 Red Brick, 5 Cat Heads and 5 Wayne Tech Caches.
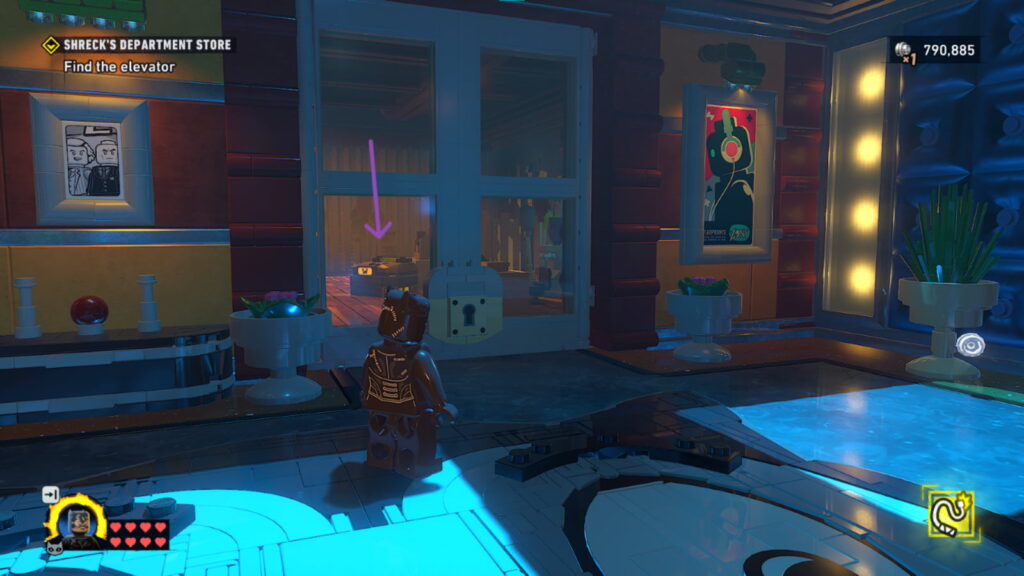
Wayne Tech Cache 1
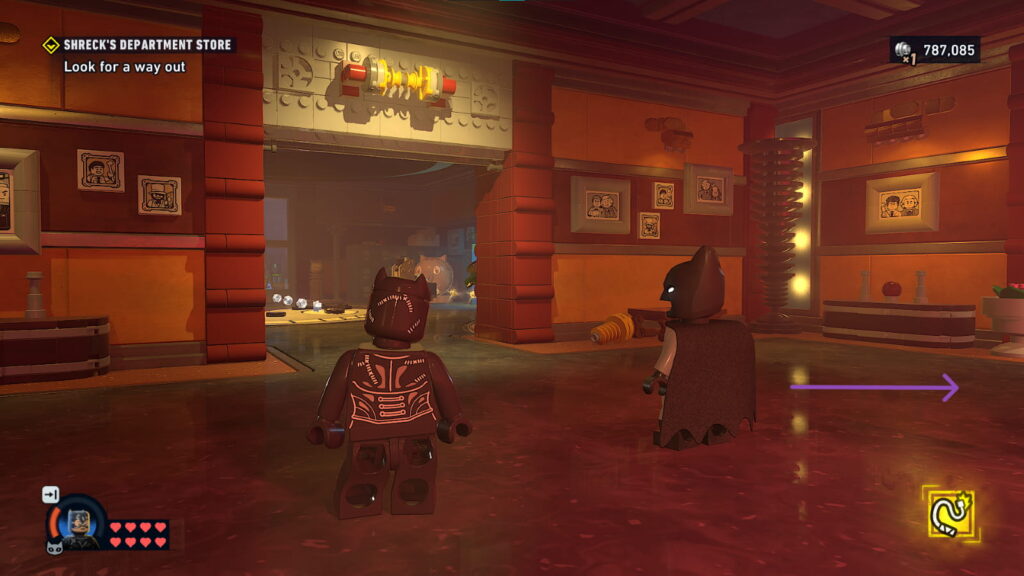
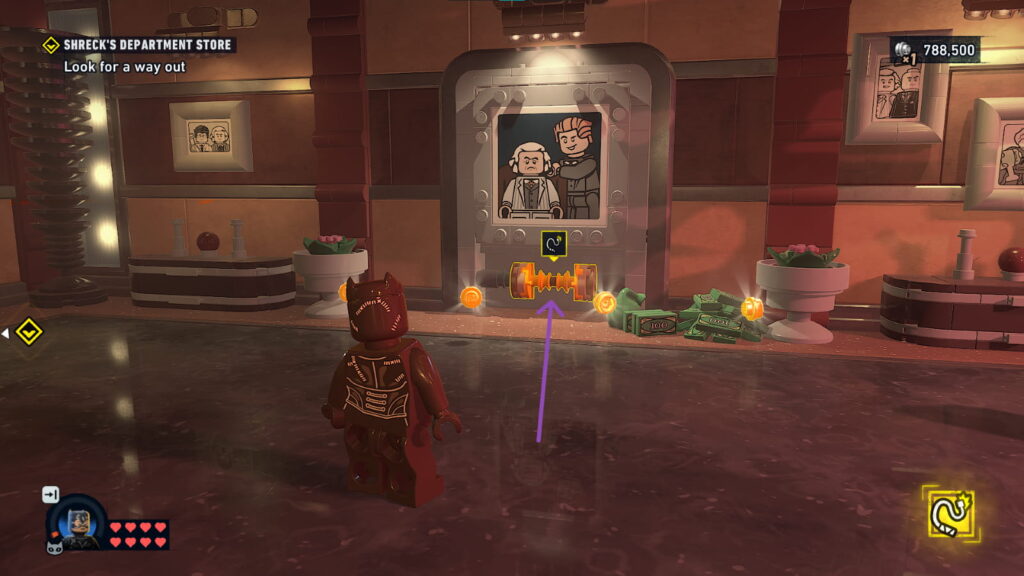
In the starting room, after you get the Catwoman tutorial, turn right. Use her whip to open up the frame and the Wayne Cache will be right behind it.
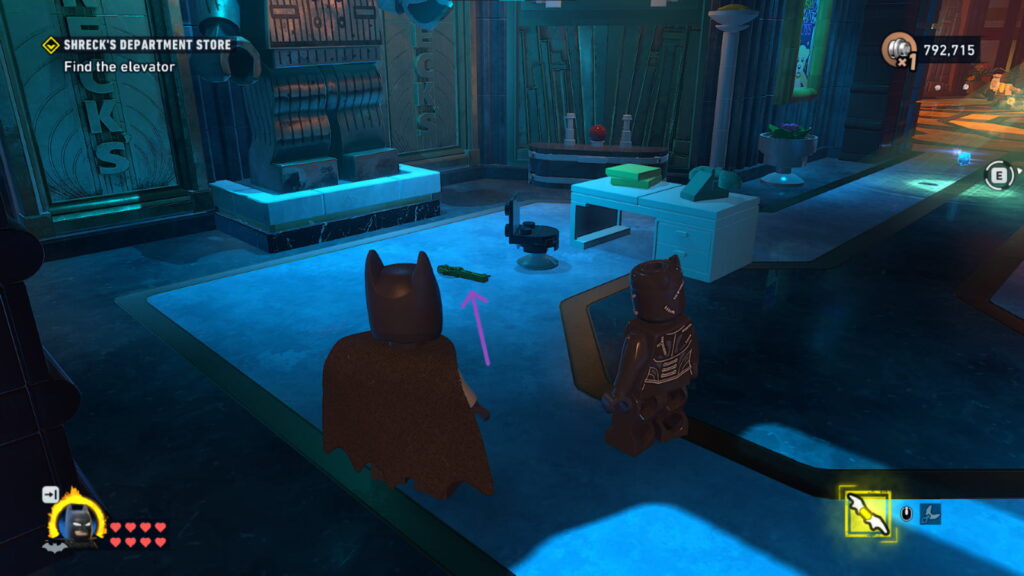
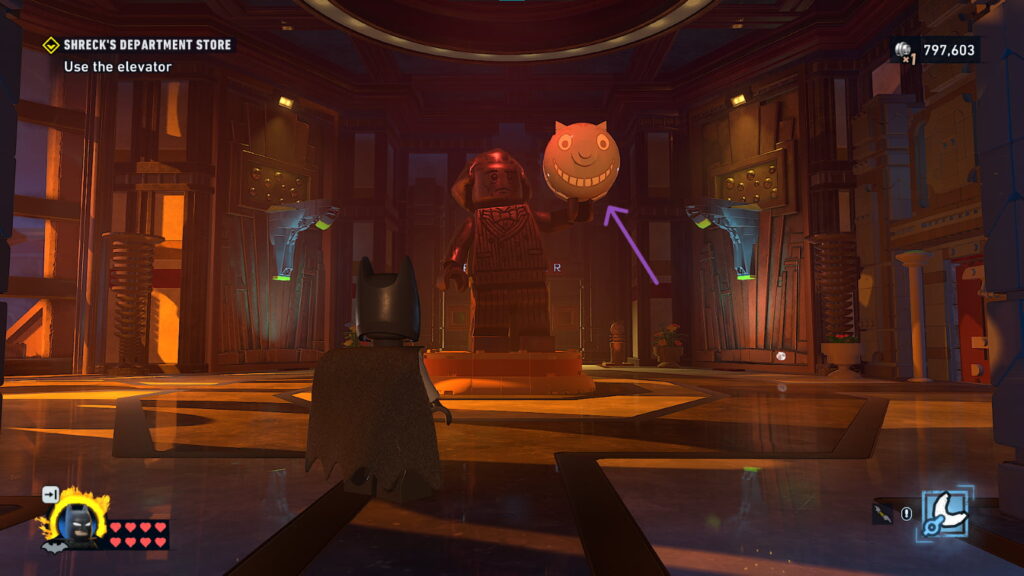
Cat Head 1
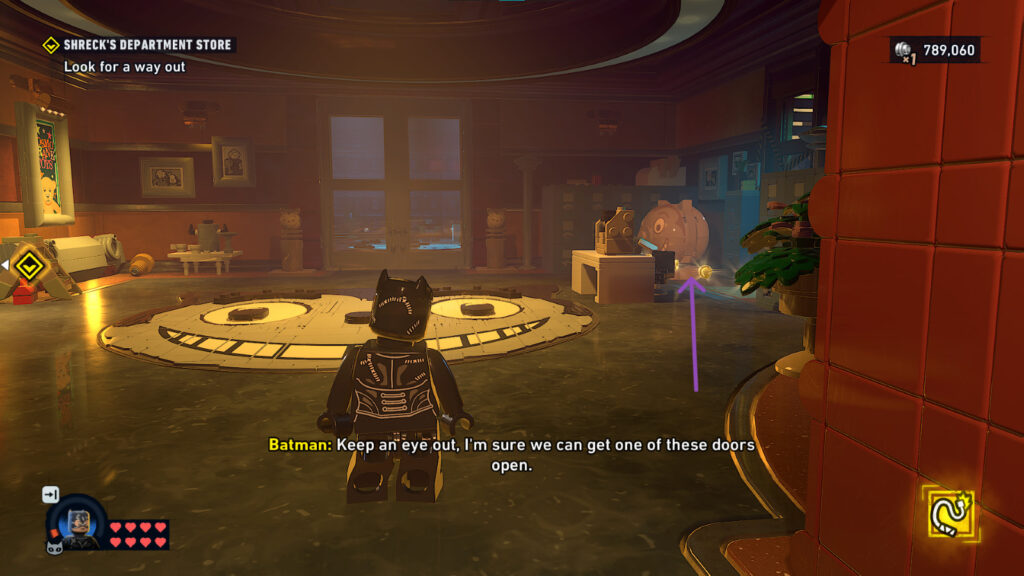
The first Cat Head will be right into the next room, on the right front corner, next to a desk.
Wayne Tech Cache 2
After entering the room, turn left. The door leading to the Wayne Cache will be locked. To find the key, you need to build a contraption and go into the next room.
As you continue, turn left and break all the items. You will then find the key for the locked room. Return to the locked door, open it, and then access the Wayne Tech Cache.
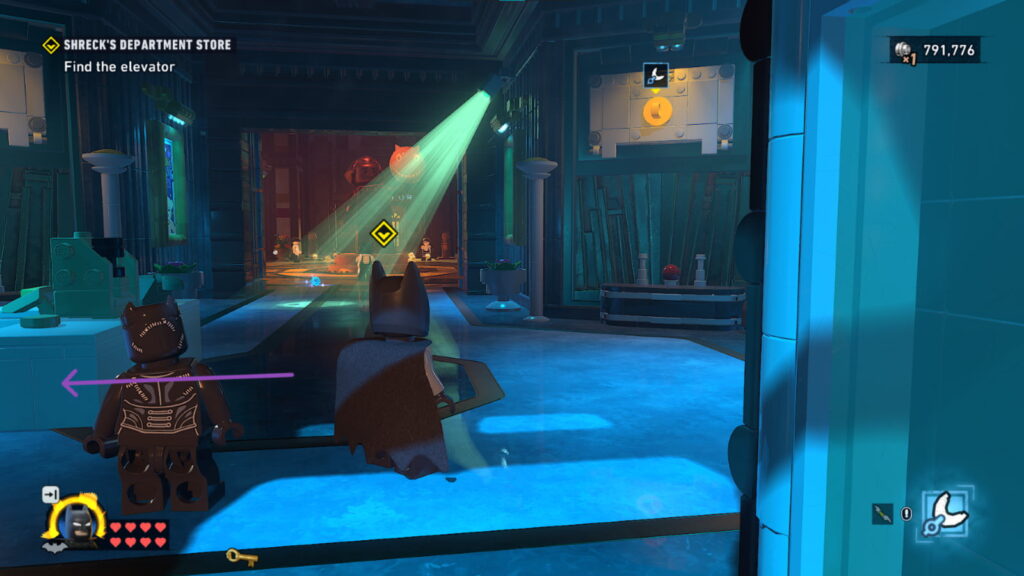
Cat Head 2
After unlocking the Cache room, continue into the next area. Destroy the security camera, fight all the enemies, and the next Cat Head will be right next to the statue in the middle of the room.
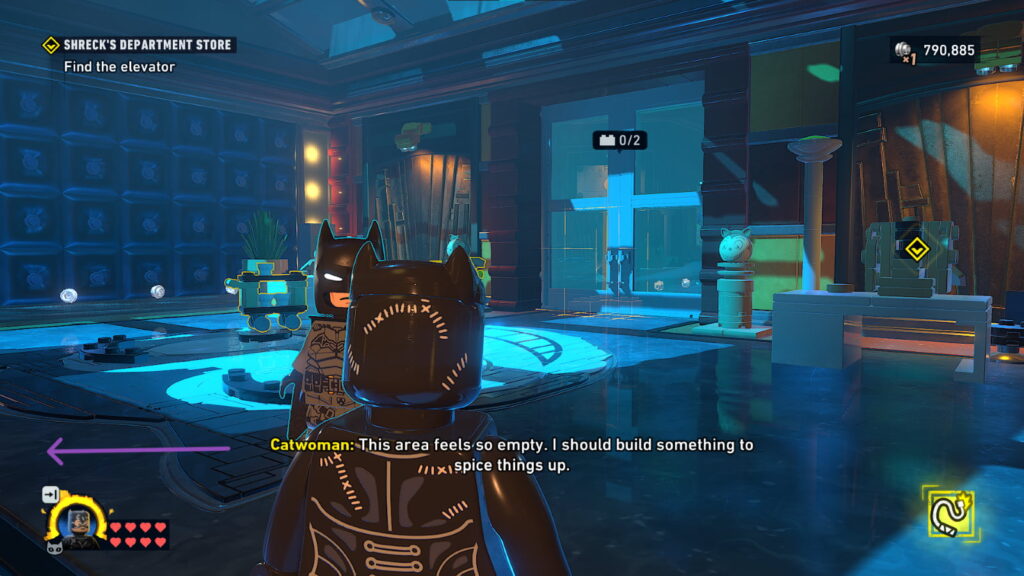
Cat Head 3
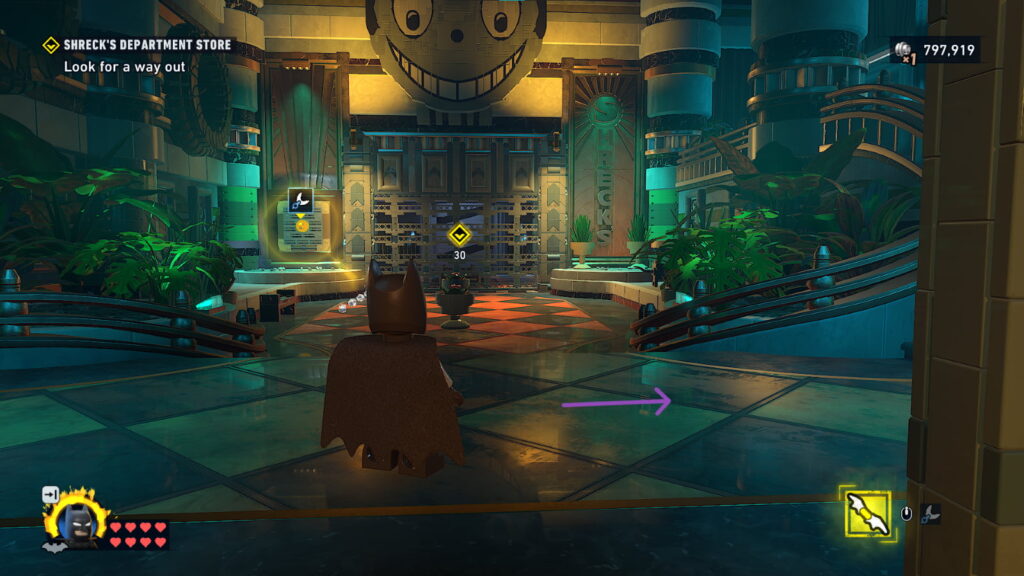
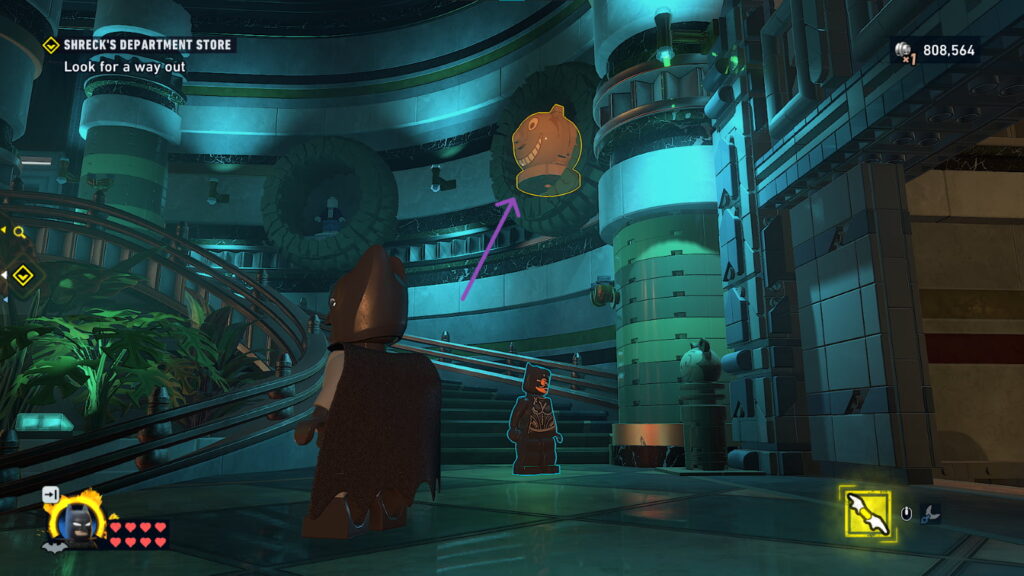
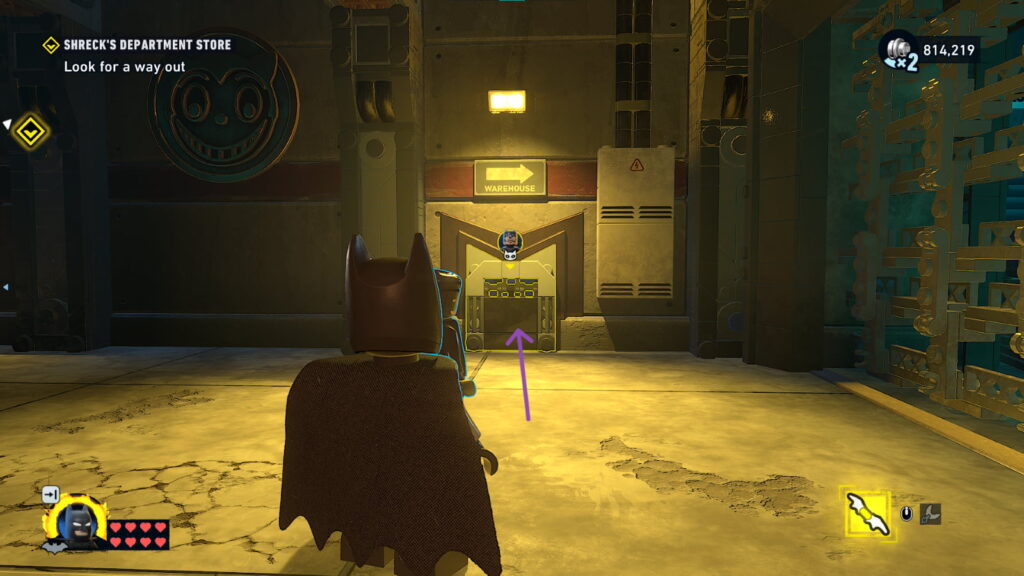
You will eventually go down an elevator which leads you into this turqoise lit room. Turn right, and above the stairs, into a circular space, there will be the next Cat head.
Wayne Cache 3

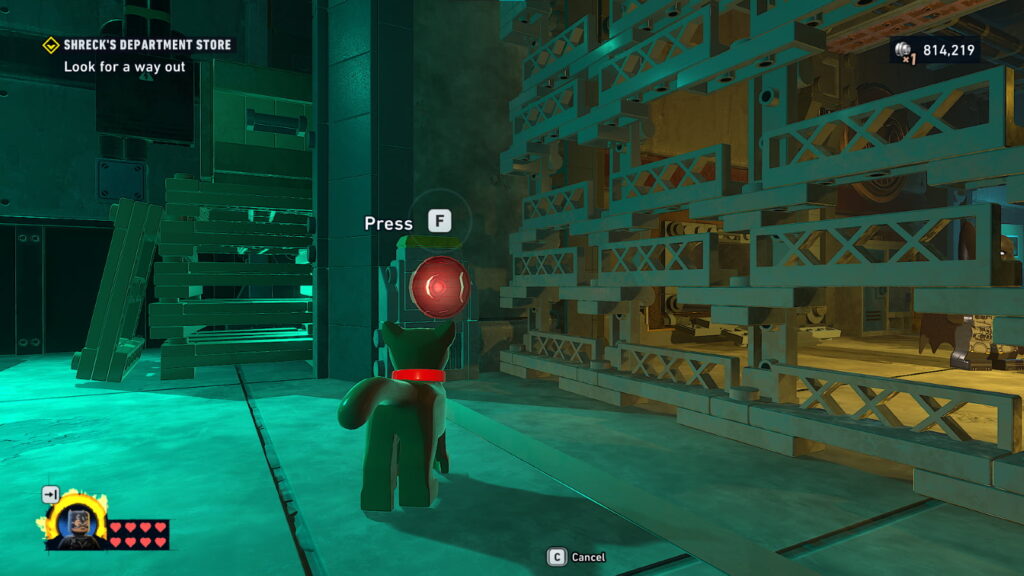
There is a room in which the characters mention it’s an ambush, as several mimes stay still, waiting. After defeating the enemies, from your original position, go right. Destroy the box on the hallway which will reveal a vent you can go through.

Use Catwoman’s summon skill and go through the next tunnel as a cat. In the new room, go right until you see a red button you can press to open the gates.
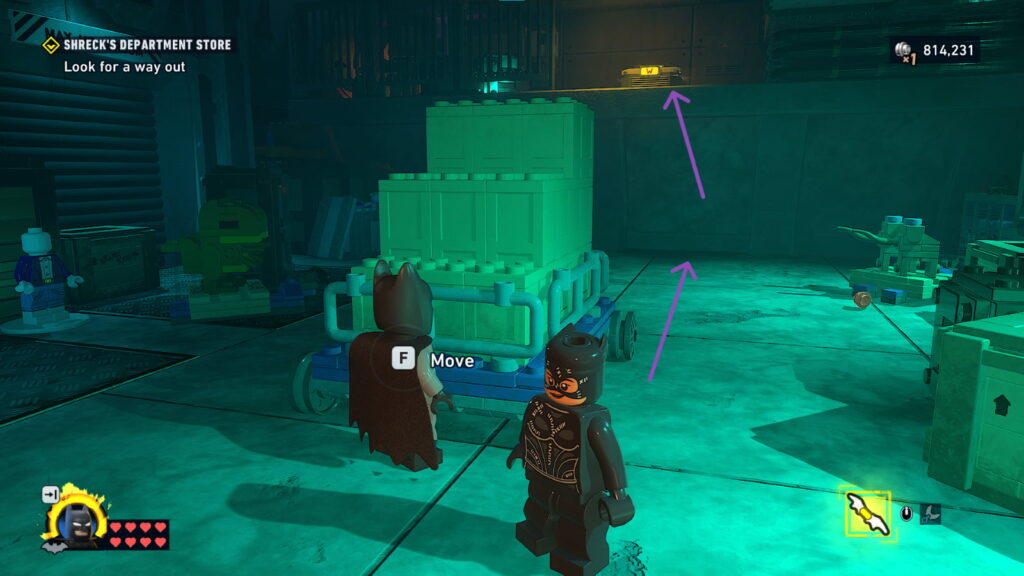
There is a cart you will have to push, as you can’t use the grapple to reach the Wayne Cache. Push it, jumpt over each step, and you should be able to access the Cache.
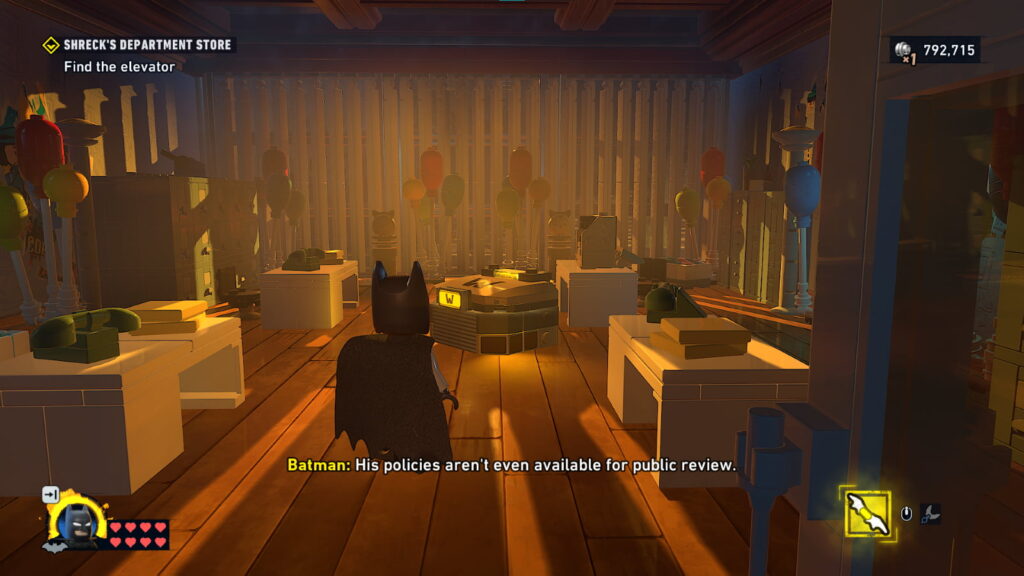
Wayne Cache 4
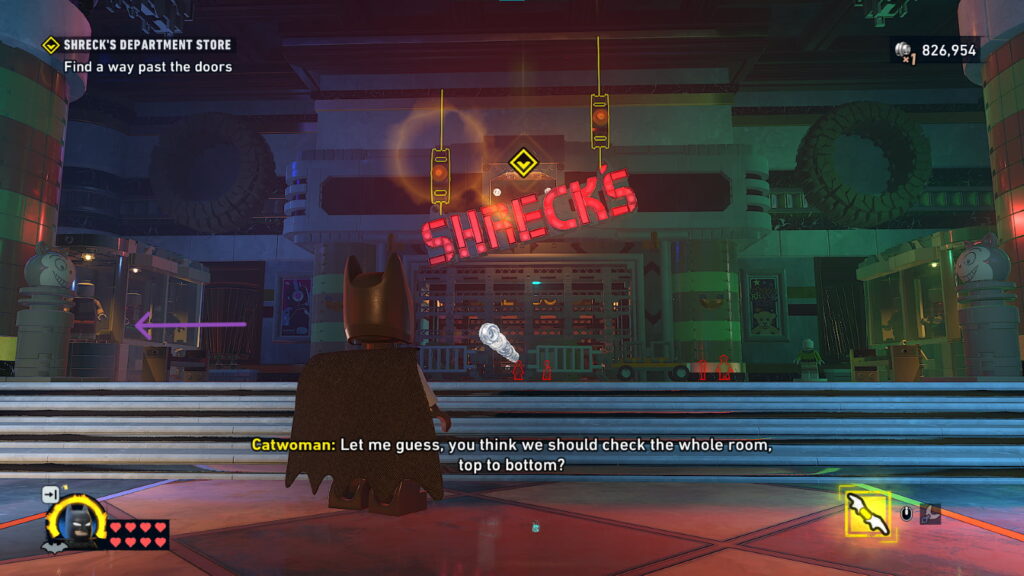
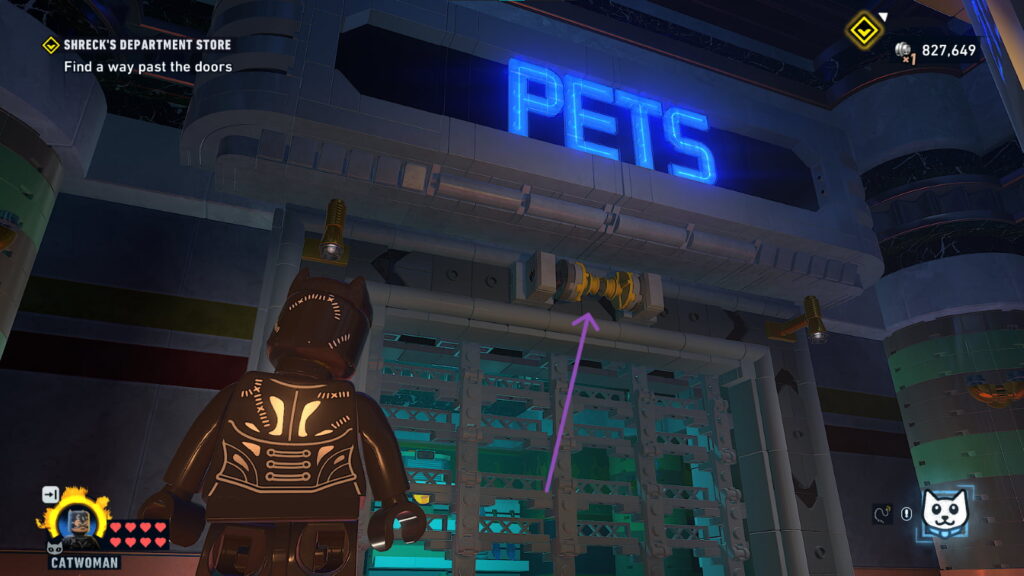
When you reach a room with a big red Shrecks sign hanging sideways, turn left. There will be a gate under a different sign which says Pets. Use Catwoman’s whip to open it. However, be careful as the gate only stays open a limited amount of time, so you will have to switch in between characters for this one.
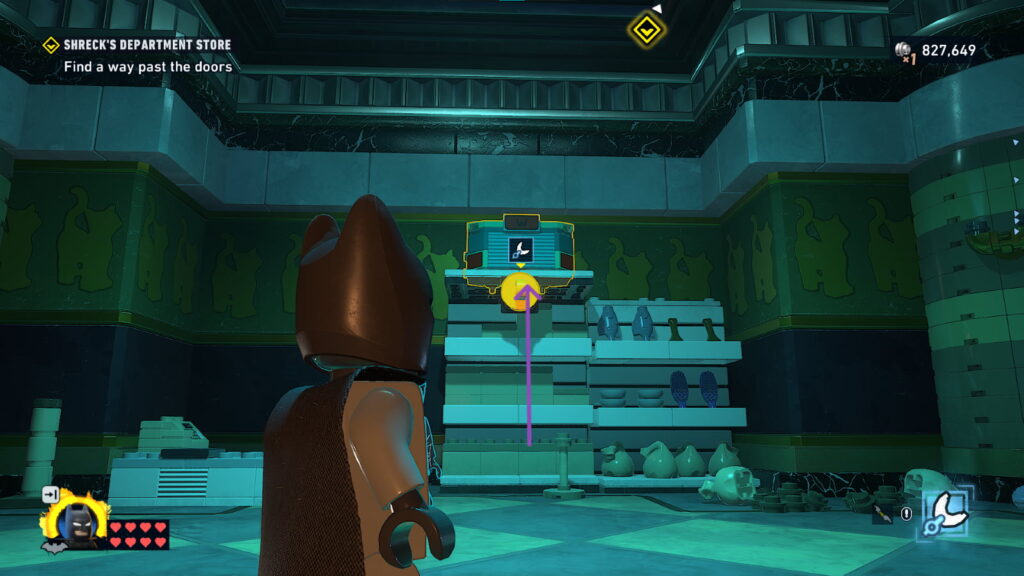
Make sure Bruce gets through the gate, as he needs to use his Batclaw to get the Cache to fall from above those containers.
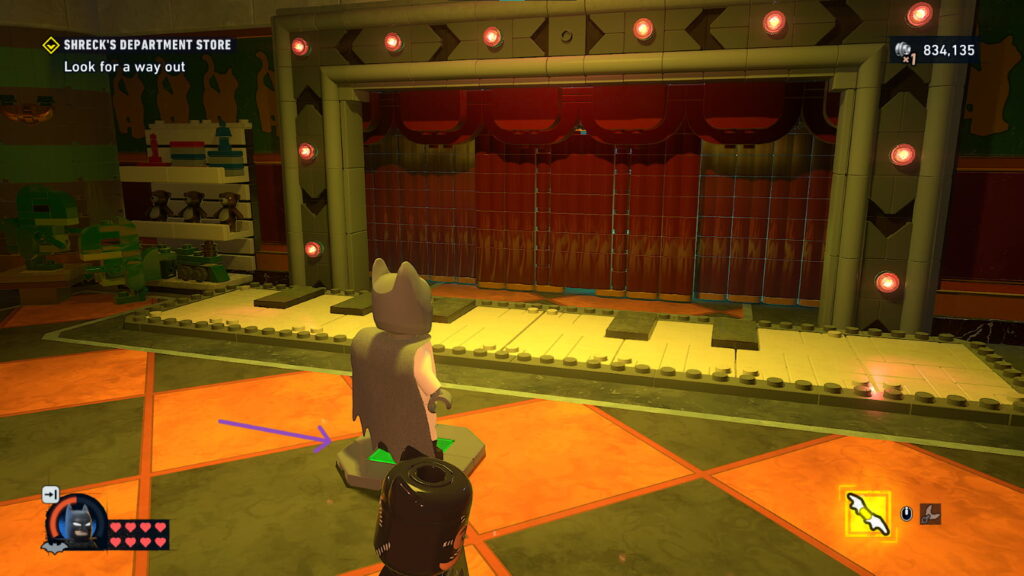
Red Brick
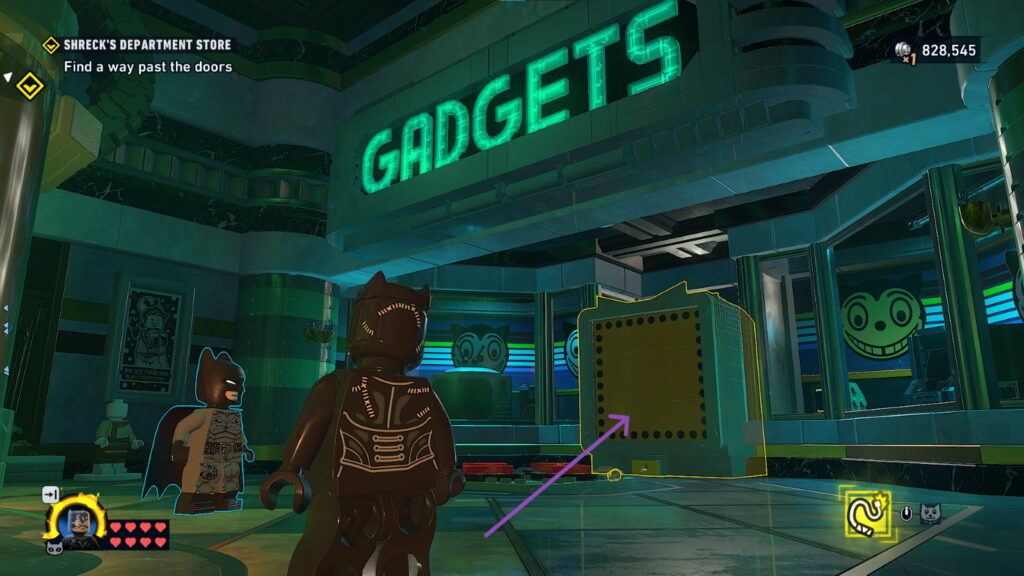
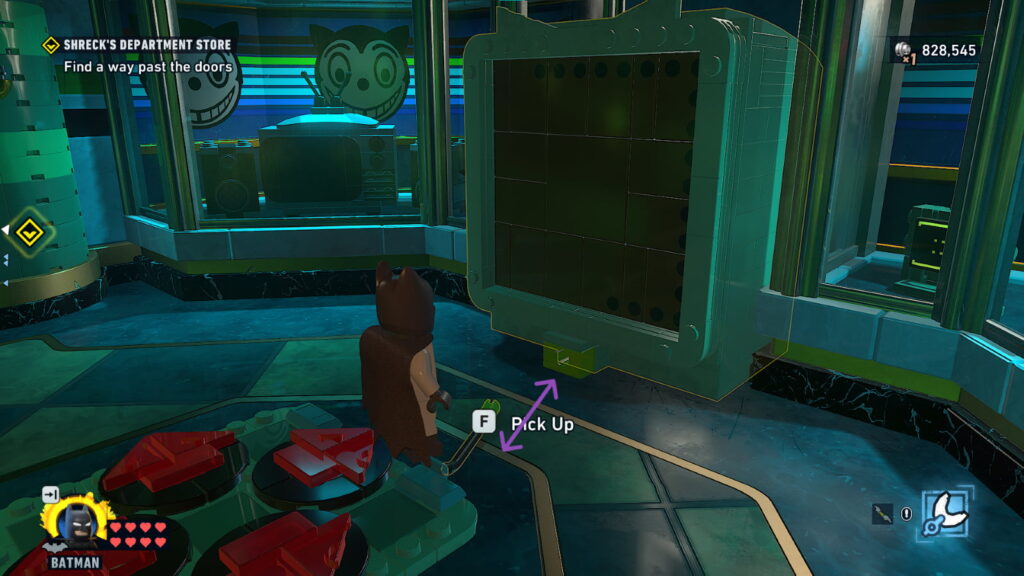
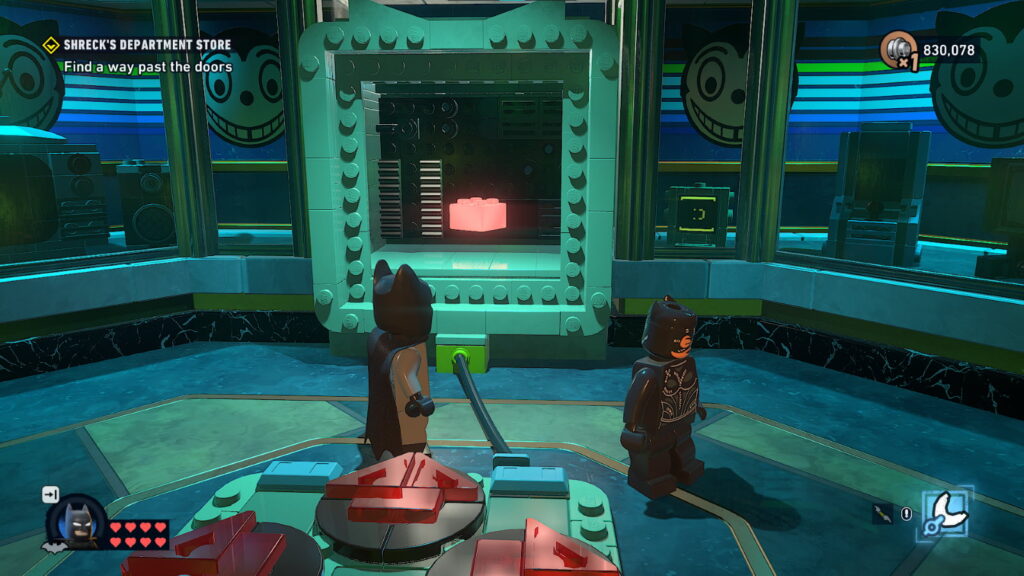
From the same Shreck’s room as before, instead of turning left, now turn right. There will be a square box which you can access only if you connect the tube.
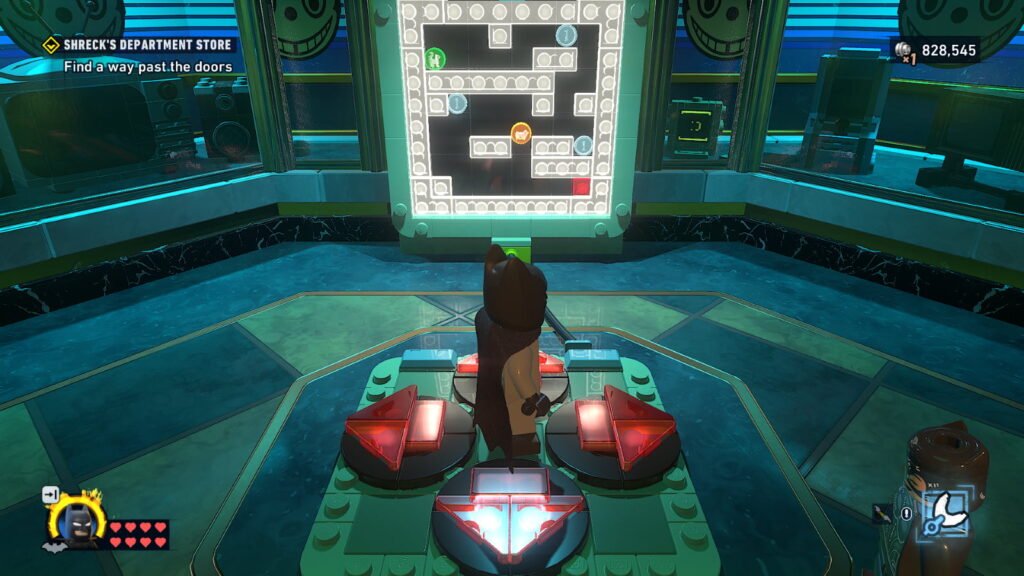
In order for it to open, you need to pass the mini game. Essentially, you just need to get the green cat symbol across to the red dot. The combination I did in order to be able to sit on an arrow uninterrupted each time was:
↓ → ↑ → ↓ ← ↓ → ↓ ↑ ← ↓ → ↓ ← ↑ ↓ →
Be mindful of the moving yellow symbol, as it takes you back to the beginning. Make sure to pass around it only once it moves past where you want to go. Once you’re done, the cube will open up, revealing the red brick.
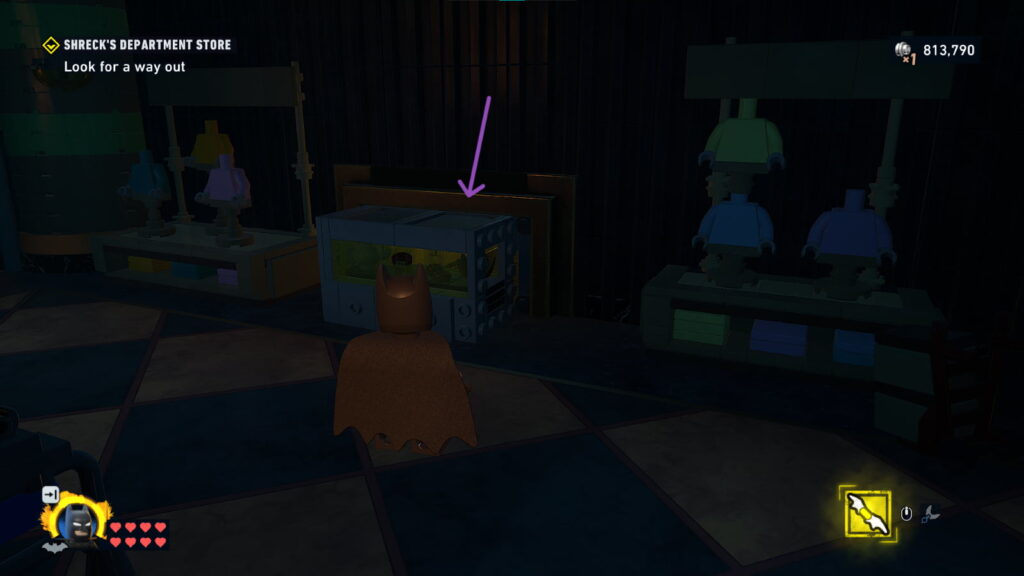
Waybe Tech Cache 5
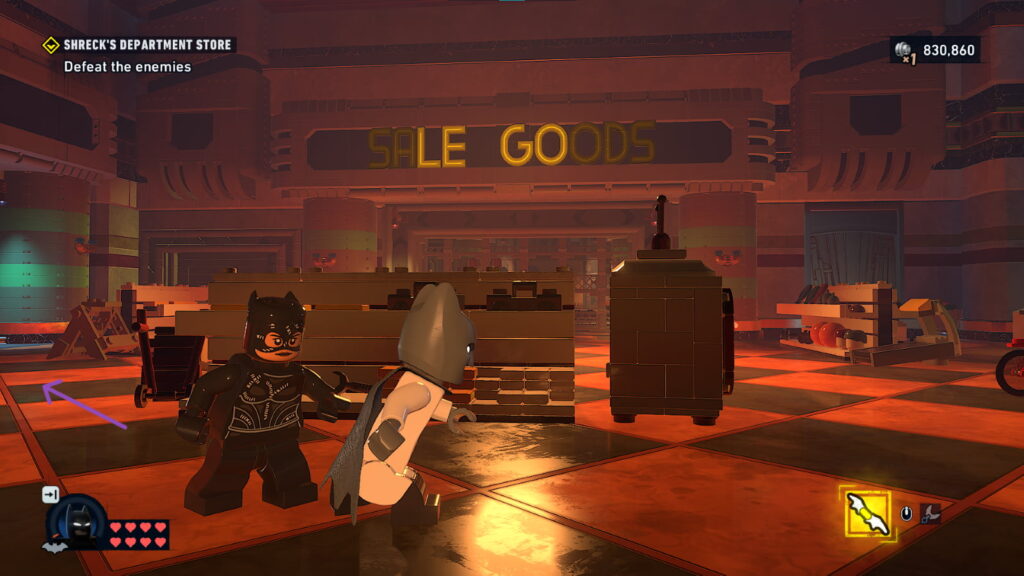
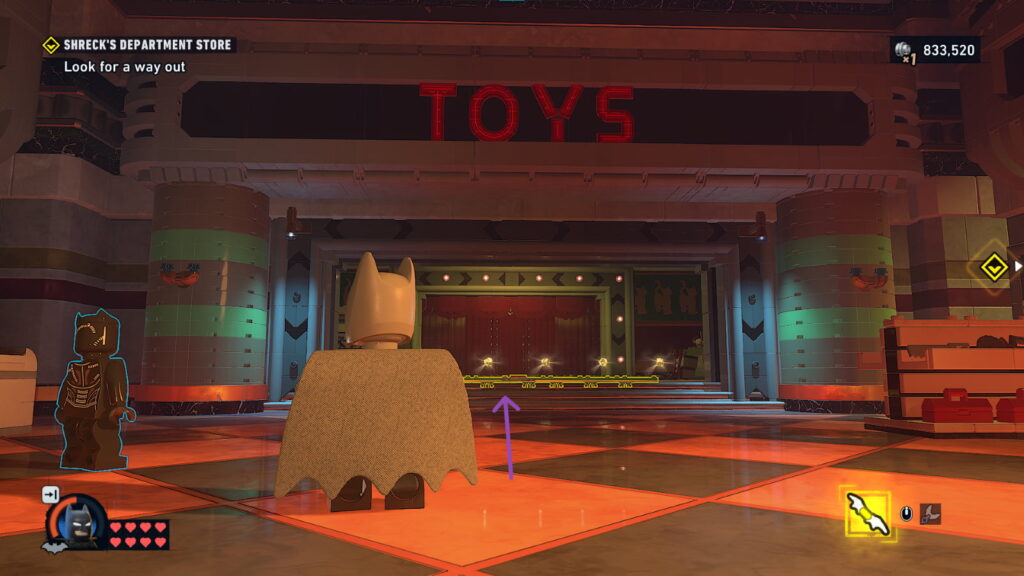
Once you enter a room with the sign Sale Goods at the top, turn left. After getting rid of the enemies, of course. The sign on top of this area should say Toys.
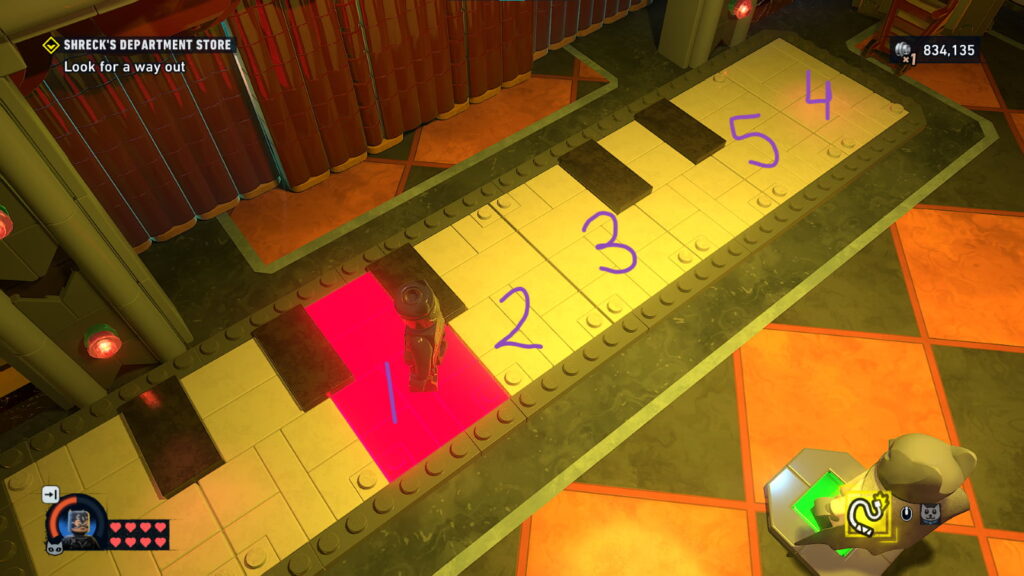
There will be a toy piano in front of some red curtains. Step on the red button to get a sequence which you are then required to repeat. If you didn’t get it the first time, you can step off or make a mistake and step back on, and it should repeat. Just in case, I added number to the tiles you need to press for the sequence to work in the image above. The curtains will then reveal the last Wayne Cache.
Cat Head 4
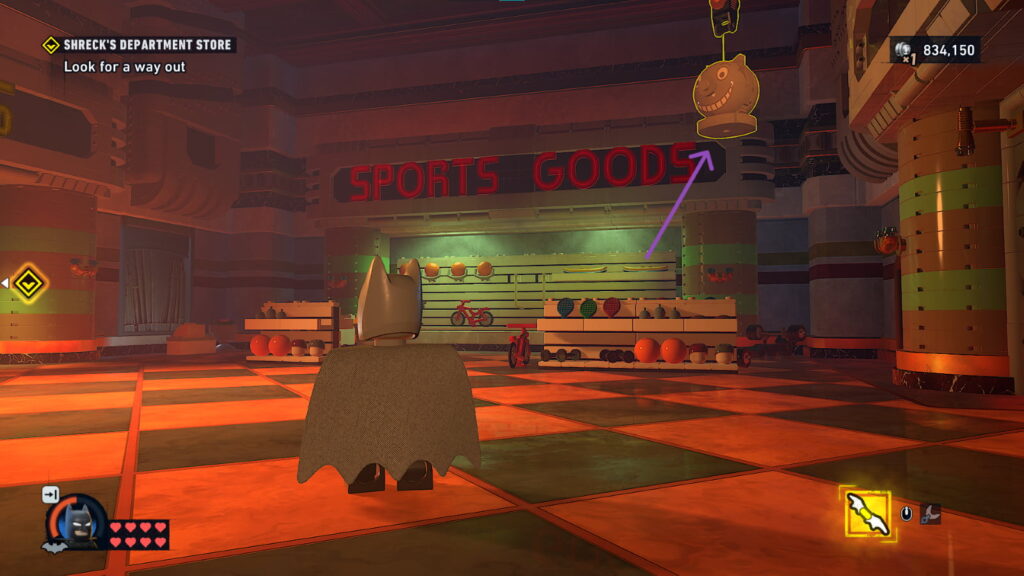
The same deal as before. Instead of turning left in the Sale Goods room, turn right. The Cat head will be located on the top right corner.
Cat Head 5
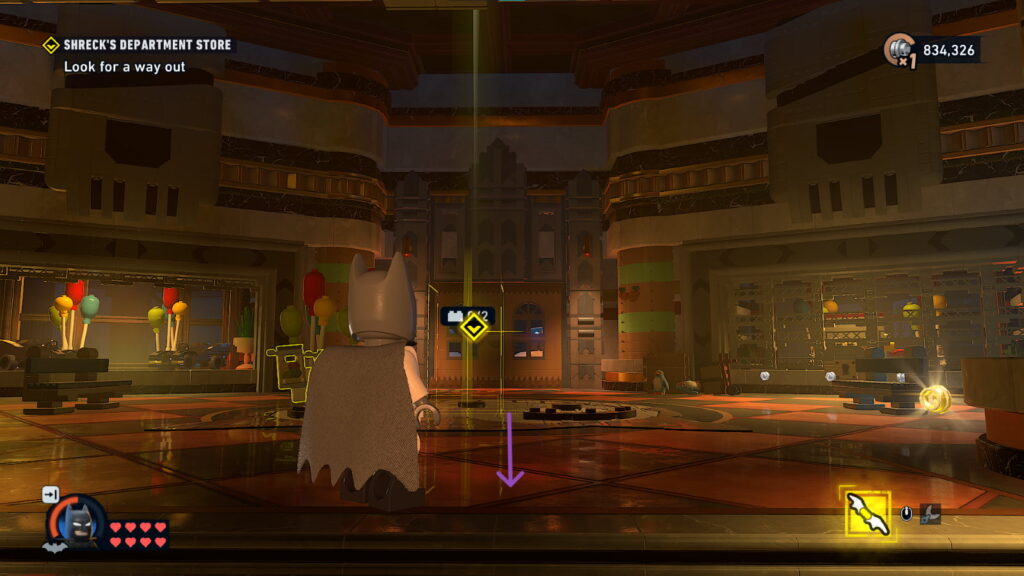
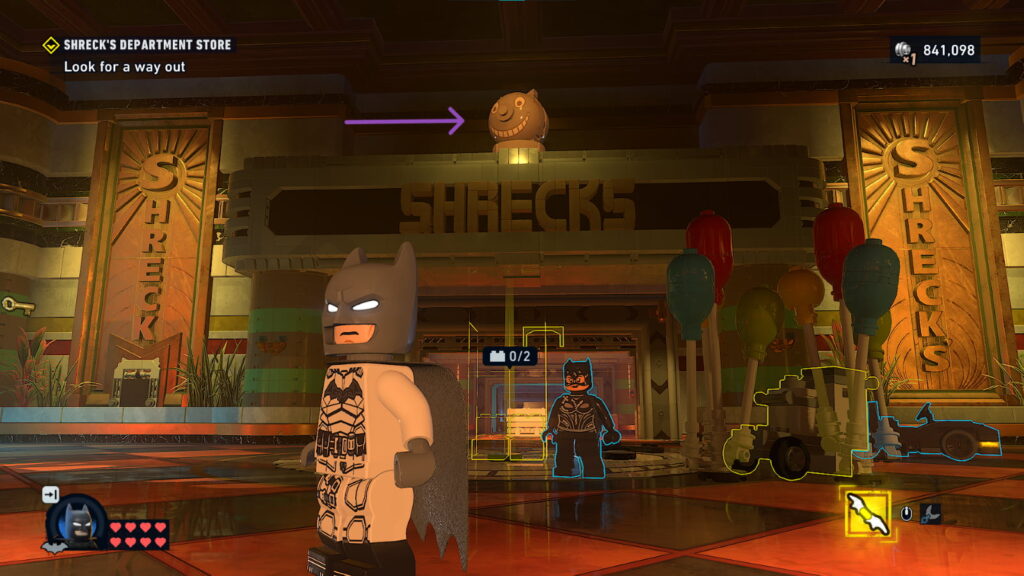
When you reach a room with 2 cars on dispay in the front left side, turn around completely and you will find the last Cat head at the top of the sign which says Shecks.

 [Thursdays]")
