Want to see Raider King content first? Add us as a preferred source.
Like all great Survival Horror games, The Sinking City 2 is filled with plenty of puzzles that will make the player rack their brain and test both their reading comprehension and investigation skills. Some of these puzzles can be quite tricky though, or require the player to piece together multiple documents to figure out the answer. So, if you’re having any trouble with a particular puzzle or are just trying to speed through your NG+ run as soon as possible, please feel free to use this guide detailing the solutions to every single puzzle in The Sinking City 2.
A New Day Puzzles
12 Garrison Street Safe Combination
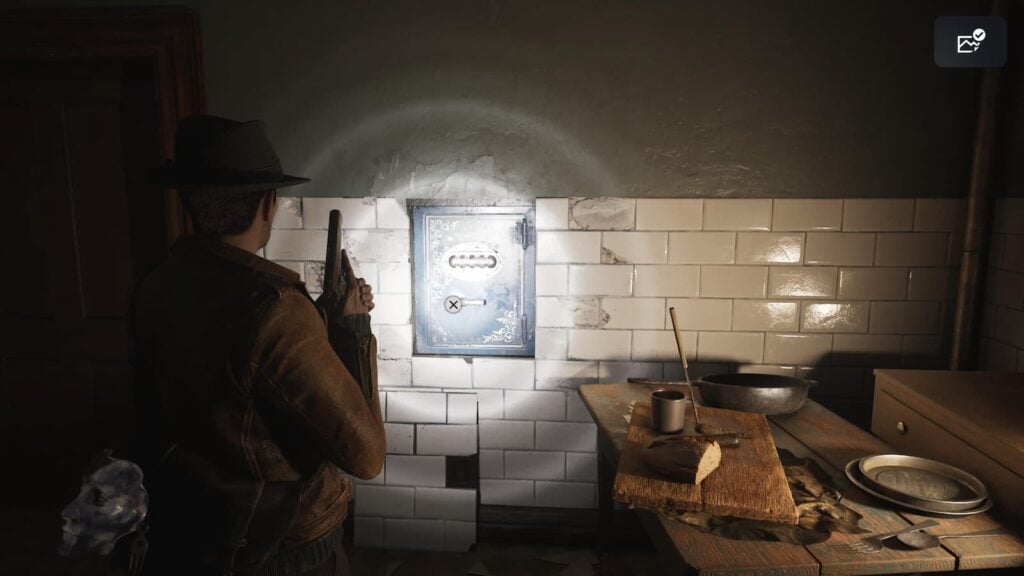
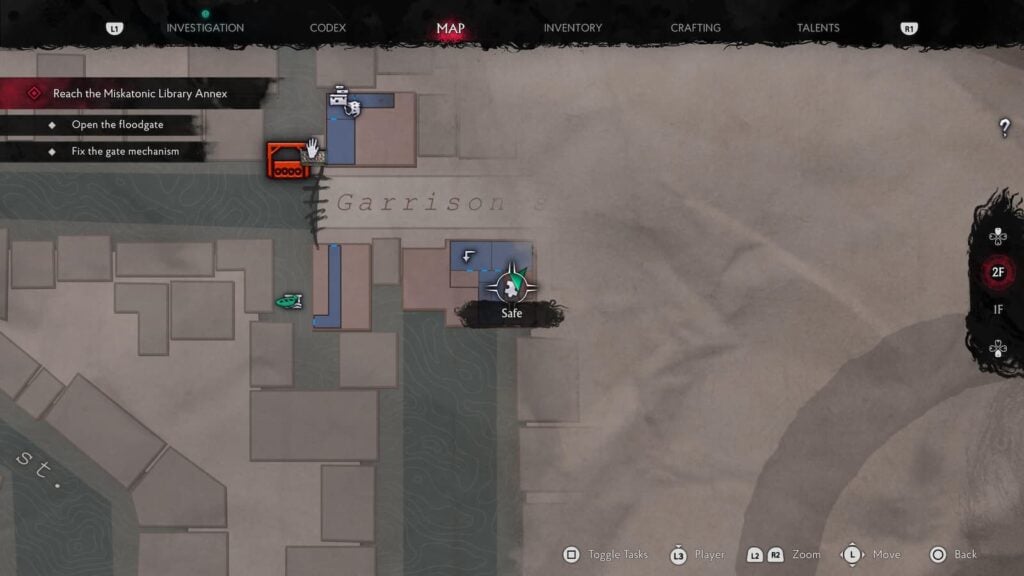
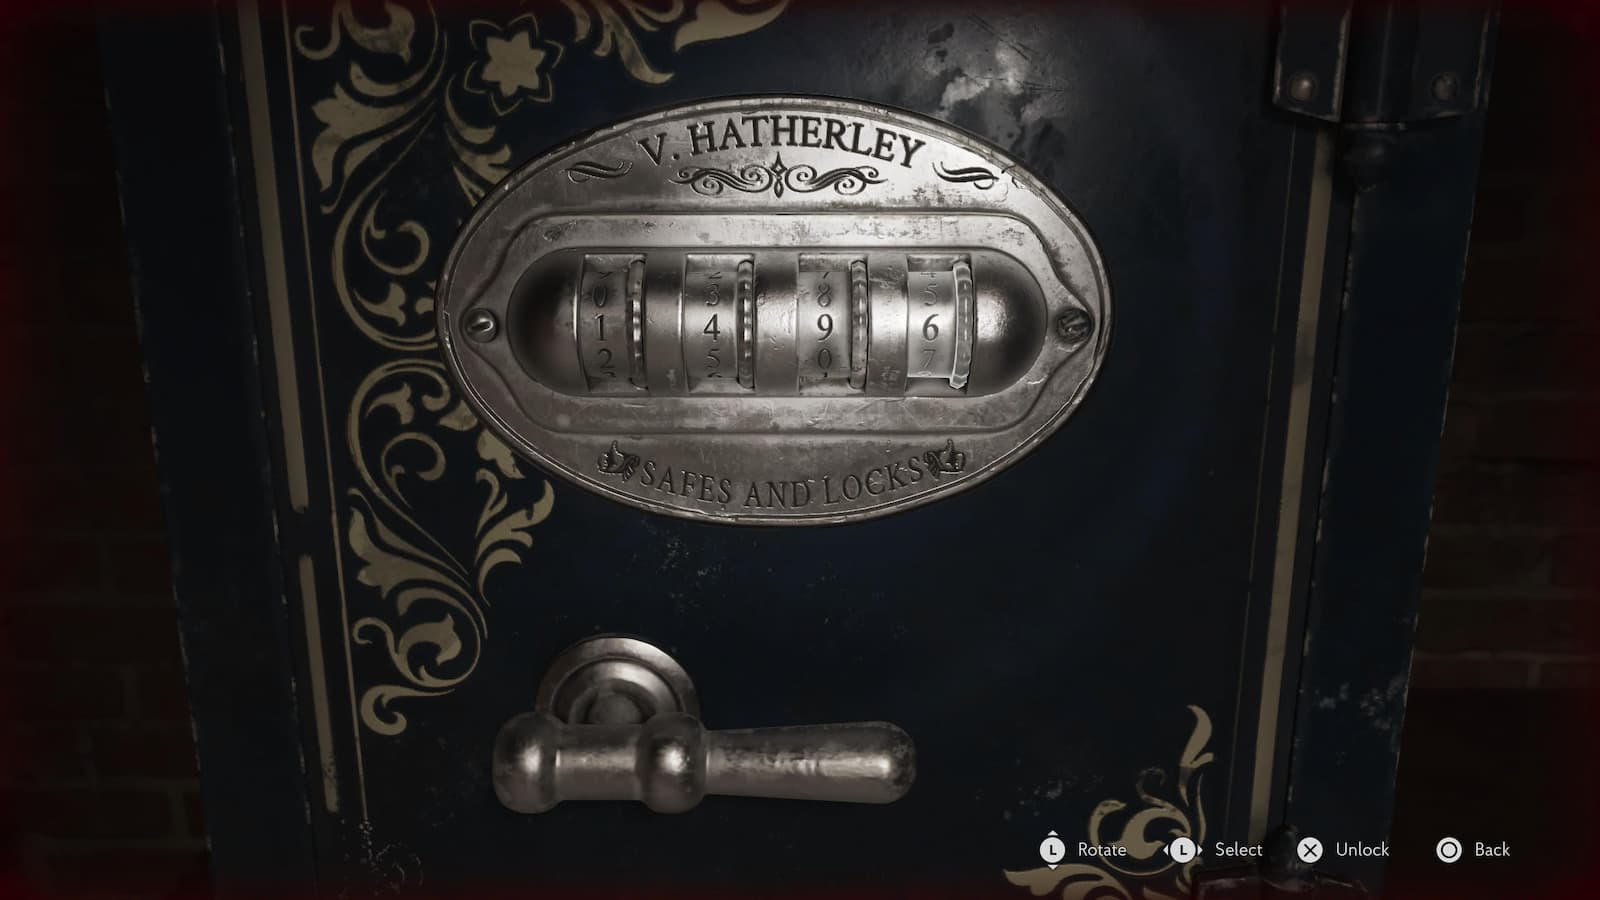
This safe can be found during the game’s tutorial chapter: A New Day. It is located in a room on the second floor of 12 Garrison Street. To learn the combination we’ll need to find two notes in the area. The first note “To Martin” is stapled to the safe. The hint we’ll get from this note says that the combination is the owner’s “Proudest, most miraculous moment.”
So we know we’re looking for a specific moment that the owner is proud of, but what? Well if we head on over to the Radio Shop connected to the building, we’ll find another note titled “From A Sister” that says that this shop was opened 21 years ago. That’s our key.
Because this game takes place in 1929, we’ll just need to do some simple subtraction to learn that the first safe combination in the game is 1908. Inside of the safe area some Dolorocide Pills and 14 handgun bullets.
Floodgate Fuse Puzzle
Before we can raise the Floodgate in the game’s prologue, we’ll need to head down to the other side of Garrison Street to collect the fuses from the nearby store. This is a very railroaded sequence meant to introduce you to the game’s mechanics so you won’t need our help finding them, but one piece of advice I can give you is not to try fighting every enemy on your way back. You don’t have nearly enough ammo for that.
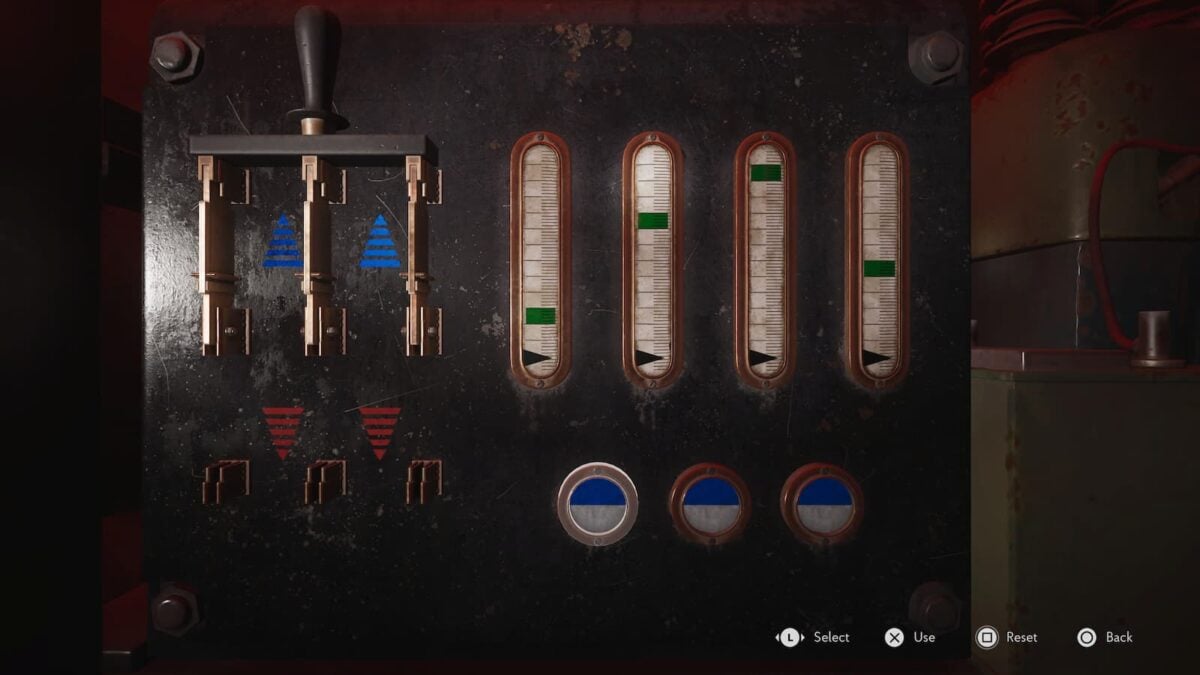
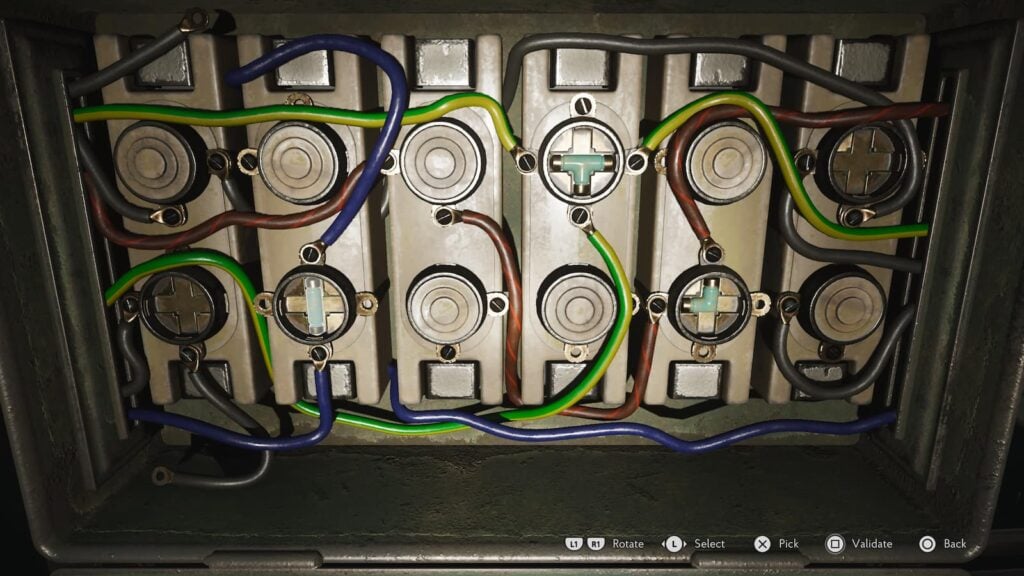
Once you’re back at the Floodgate you’ll need to put all three fuses into the correct position. All of the wires need to connect to ones that are the same color to make the fusebox work. The correct locations are as follows
- Rotate the T-shaped fused until it’s facing down while pointing horizontally and use it to connect the green wires up top.
- Take the L-shaped fuse and use it to connect the red wires all the way on the right
- Use the straight line fuse to connect the blue wires on the left
Once the fuses have been placed you’ll be able to open the Floodgate with the nearby lever. A short and simple puzzle to begin the adventure and the first of many to come.
Wake-Up Call Puzzles
Church Trident Puzzle
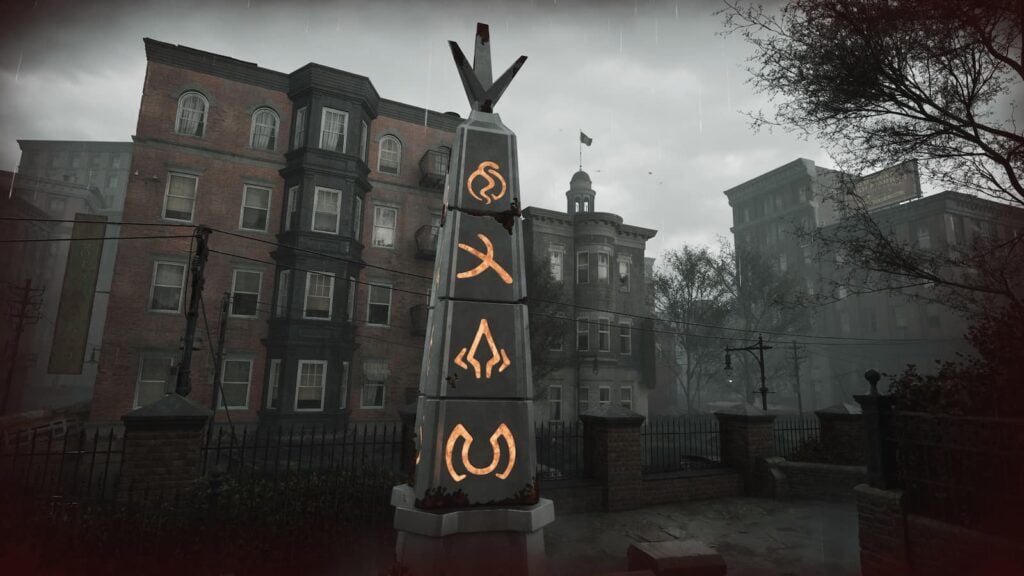
The next major puzzle you’ll encounter is the giant Obelisk outside of the Church in “The Wake Up Call”. Before we can even interact with this puzzle, we’ll need to collect the Star Key that’s located on a corpse next the the Church’s Floodgate. Once you have it, make your way to the second floor of the church and use the key to unlock a door here. Inside of this room will be the Trident you need to interact with the Obelisk.
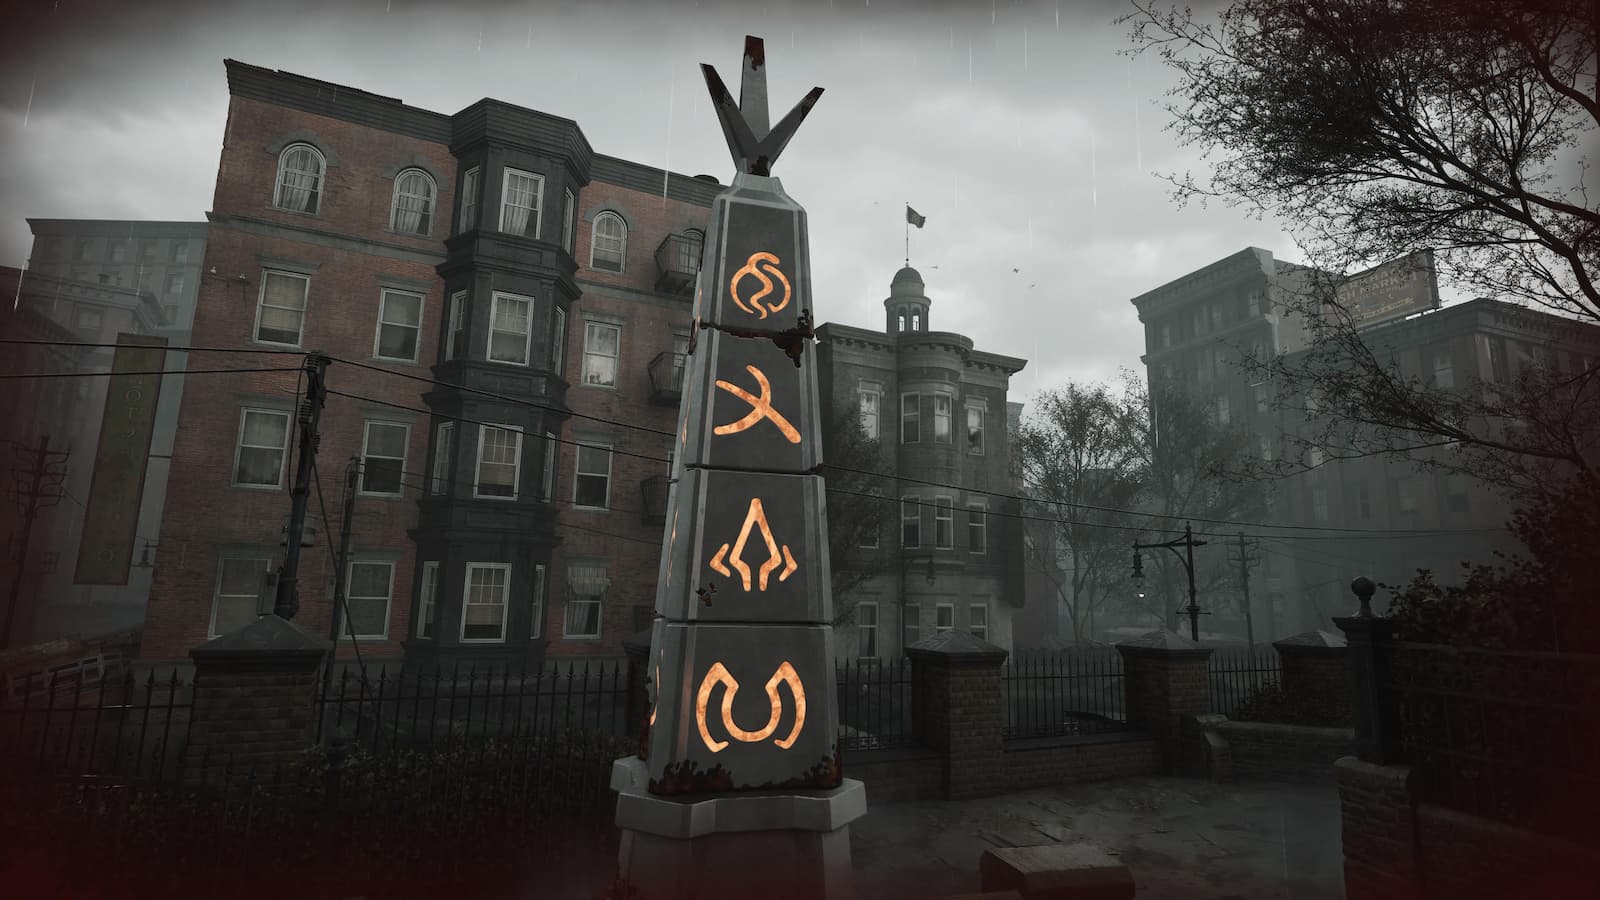
As for figuring out what order you’ll need to put the symbols on the Obelisk in, that can be learned via the “The First Vision”, “Notes of the Path”, and “A Call Upon Believers” notes that can be found around the church area. With these notes we can easily learn that the correct order for the Obelisk’s symbols, from top to bottom, is
- The symbol of a snake in a circle
- The three-pronged trident-like symbol
- The arrow-like symbol
- The symbol which looks like two half-circles
We have also included an image of the correct solution above. Once you have inputted the correct symbol, back away from the Obelisk as it will unleash electric shocks! After the Obelisk has been shocked three time, run back to it and grab the trident in-between lightning blasts.
Once you have the Trident, return to the church and place it in the altar on the second floor where you got it in the first place to complete this puzzle.
Church Floodgate Puzzle
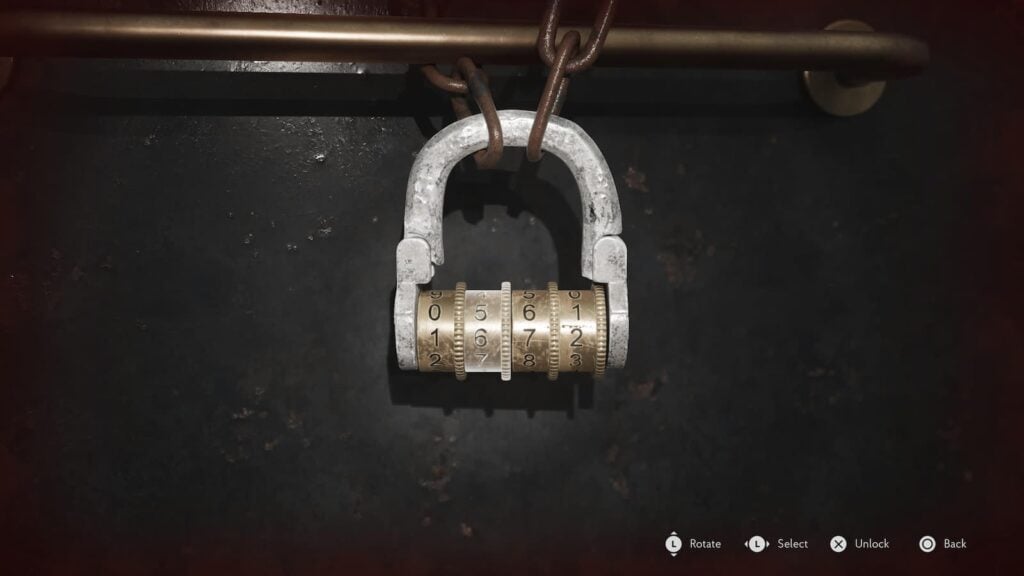
While the Trident and Obelisk as the exciting puzzle in the Church area, they’re not the one required for progression. To progress we’ll instead need to open the nearby floodgate. Unfortunately, it’s locked with a combination lock. Thankfully, it’s not a super hard combination to figure out.
Next to the corpse of the floodgate attendant, you’ll find a note stating that the code is the year the church’s bell was made. Easy, right? Unfortunately, there is no way to actually see the church’s bell in the game. Instead, we’ll need to infer how old it is from two other notes in the church labeled “Origins of the Redemption Church” and “Report on the Bell”.
According to “Origins of the Redemption Church”, the church was first founded in 1667. However, the “Report on the Bell” states that the bell wasn’t installed until half a decade after the church opened. So if we do some simple math we can figure out the code is
1667 + 5 = 1672
Devil’s Reef Safe Combination
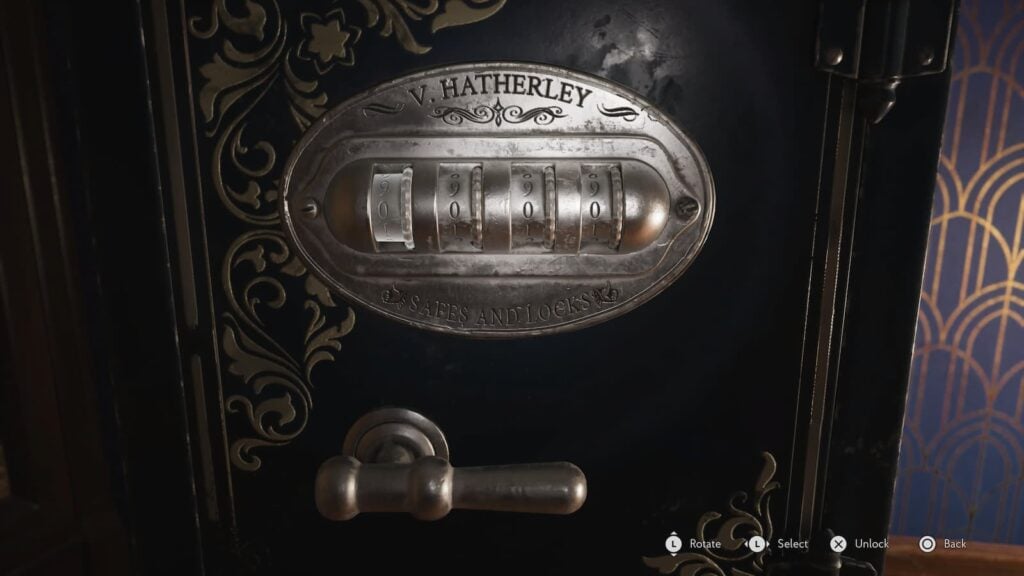
The next safe we’ll encounter is on the third floor of Devil’s Reef, while you’ll be able to find this safe almost immediately upon entering the area, you’ll have to wait until you find the Staff Key before you can find the note pointing you toward the combination in the next room over.
According to this note, the safe combination is hidden within the lyrics to the song “Baby, One More TIde”. How? By counting the limbs mentioned in each line of course. The first lyric of the song talks about bat wings, bats have two wings and thus the first number is 2.
That means the combination for this safe is: 2137
Devil’s Reef Ventilation Puzzle
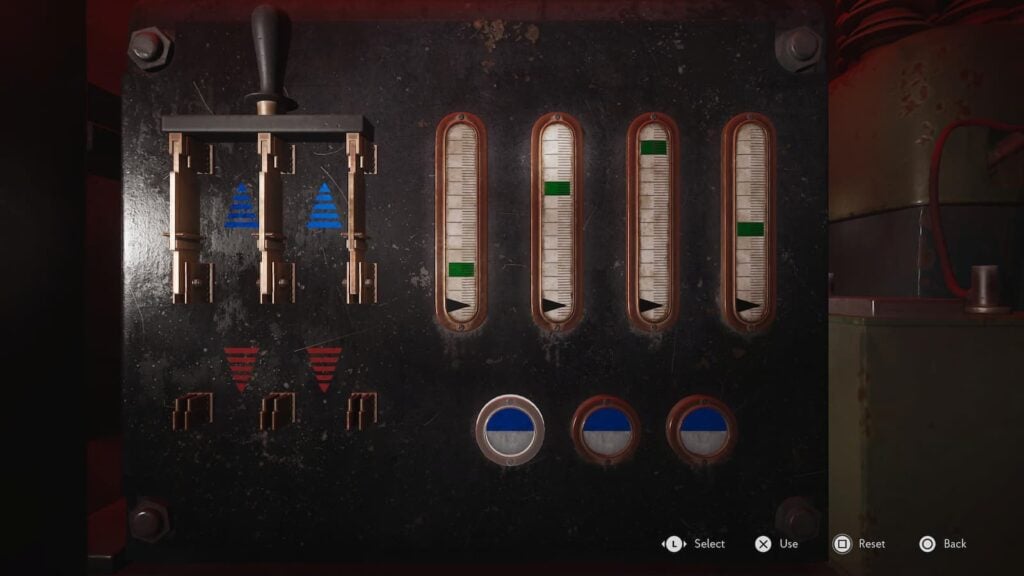
When you reach the basement of the Devil’s Reef you’ll need to turn on the ventilation system by pressing buttons to make four meters hit the correct amount of pressure. There are four meters and three buttons. The left button moves the far left and middle-left meter, the middle buttons moves the two middle meters, and the right button moves only the far right meter. Pulling the lever will reverse the process and make a meter lower instead of rise.
To quickly solve the puzzle press the following buttons
- Press the left button two times
- Press the middle button four times
- Press the right button two times
- Pull the lever
- Press the left button one time
Once all the meter are in the correct position the ventilation system will turn on.
A Sight for Sore Eyes Puzzles
Wireless Room Brain Puzzle
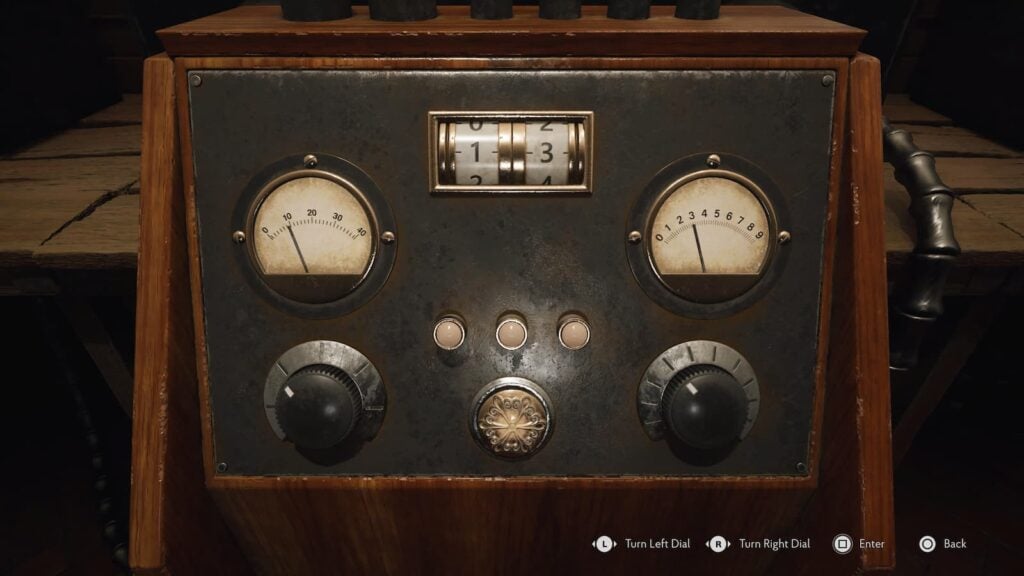
When visiting the Hospital Wireless Room during a Sight For Sore Eyes, three brains will ask the player to input a frequency. However, each of the brains says that the others is giving half-wrong information. Wright says Pence is lying, Dunwich says Wright is lying, and Pence says is only half correct.
By keeping track of who is lying, we can eliminate everything Wright says as he’s a complete liar. As for the frequency itself; Pence says the primary is a number that’s bad luck on Fridays, Dunwich says the secondary frequency is the primary rounded to the nearest ten then divided by two, and Pence says the third frequency is double the sum of the first two.
That means the three numbers we need to input are
- 13
- 5
- 36
After inputting the correct numbers you’ll be rewarded with a brief scene and an extra Dream Essence.
Hospital Prism Stations Puzzle
As we make our way through the hospital, we’ll need to stop at several stations in order to charge up and activate the Prism we’re going to use to save Faye’s body. Before you can interact with these stations though, you’ll need to locate their Occult Symbols which are scattered throughout the hospital. All thee Stations have three symbols of a corresponding color to find.
Once you have located all three stations, you’ll need to line up the three symbols you found to whichever corner of the Prism is currently glowing. Here are the exact positions of the symbols you need to line up.
Blue Station
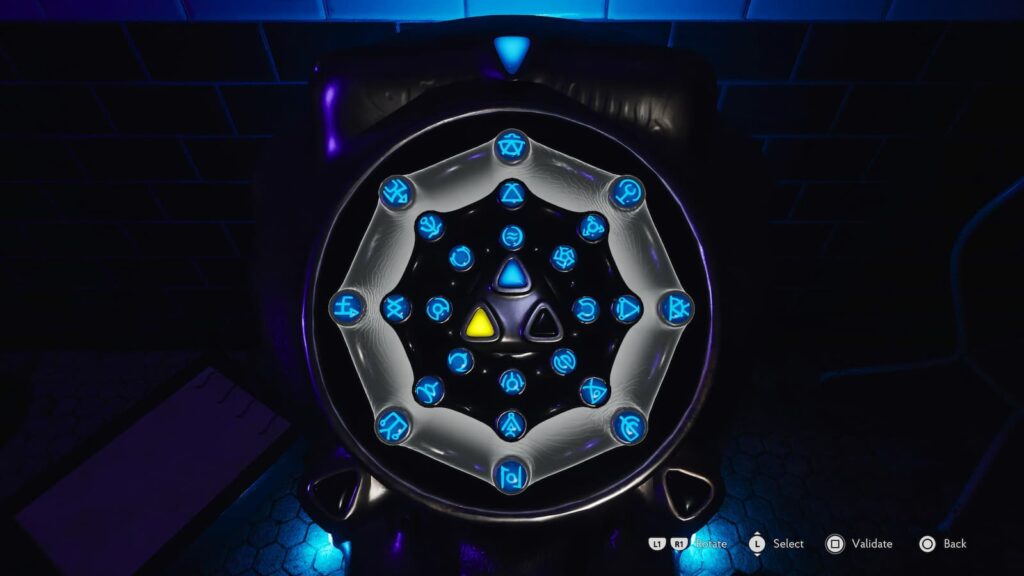
For this station you’ll need to line up the symbols you found to the top triangle of the station. From exterior to interior they are:
- The half circle with a triangle within it
- The triangle with lines (not the one with dots)
- The two gusts of wind within a circle
Yellow Station
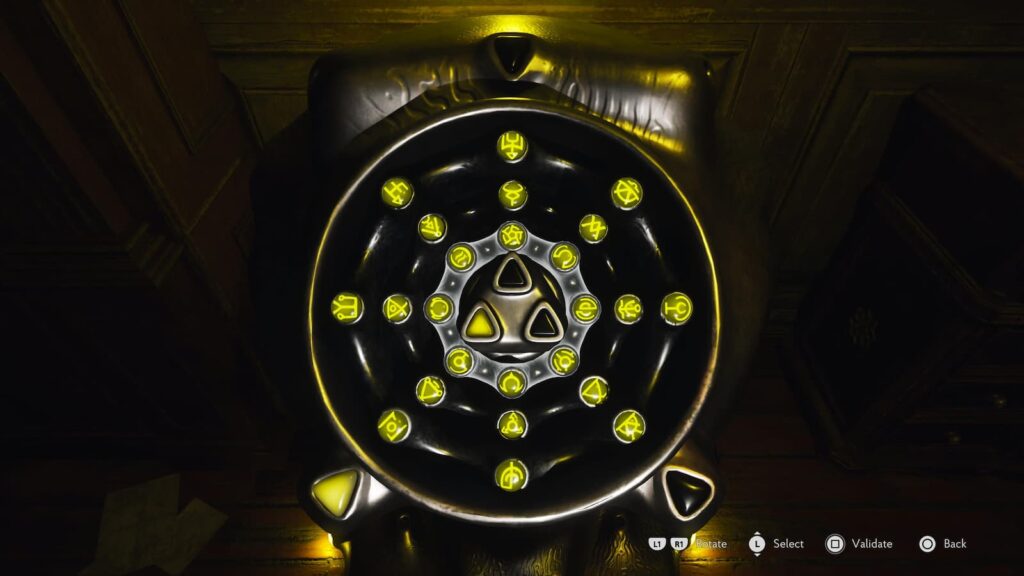
Next, this station will need us to line up the symbols we found with the triangle in the bottom left corner. From exterior to interior they are:
- The square with a circle in the center
- The triangle with two dots on the end
- The small circle which extends into two half-circles
Pink Station
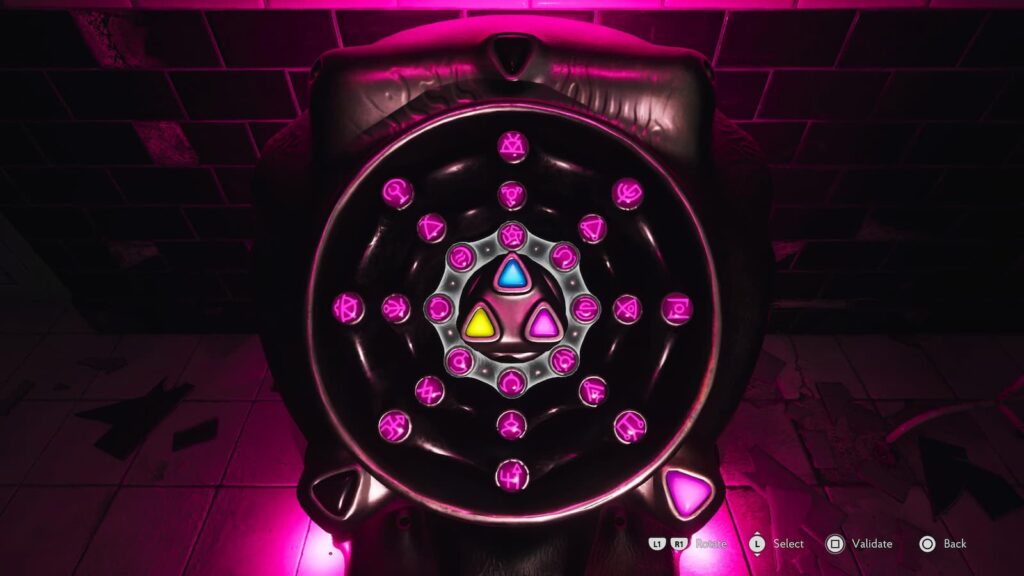
Finally, we’ll need to line up the pink symbols we found with the pink triangle in the bottom right corner. The correct symbols, from exterior to interior are:
- The three-pronged lines where two of the lines end in circles and the middle one ends in a V
- The arrow pointing toward the center
- The circle with a line
Time and Tide Puzzles
Ezekiel Puzzle Combination
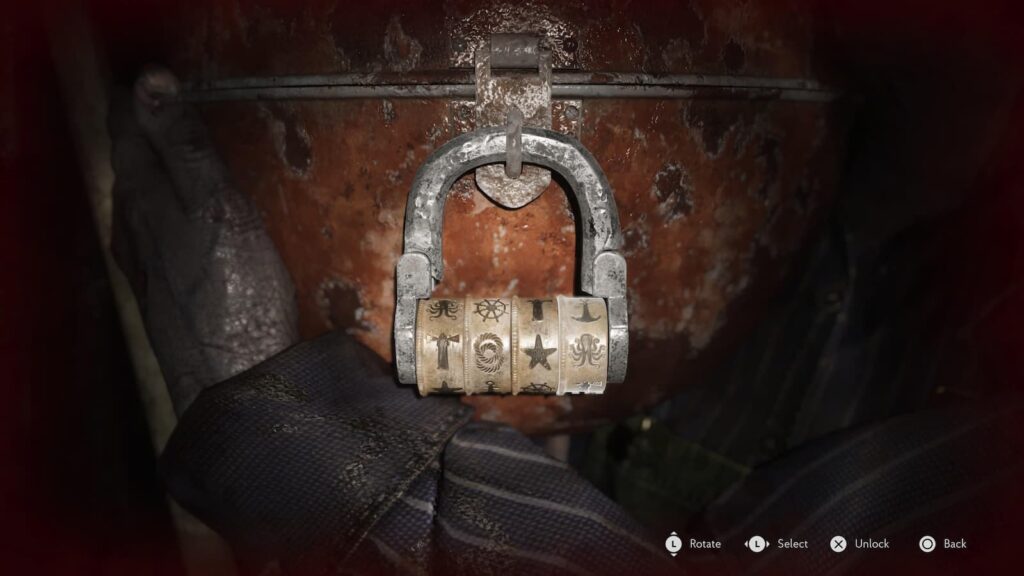
After getting the Bolt Cutters and revisiting the Fishing Shop on the first floor, you’ll come across the corpse of poor Ezekiel and a locked box. If you want to open this box, you’ll need to gather various notes and look through the various display items in his store to figure out the combination.
Once you’ve done that, simply input Lighthouse, Rings, Starfish, Octopus and you’ll be rewarded with an attachment for your submachine gun.
Arkham Fish Market Salt Storage Code
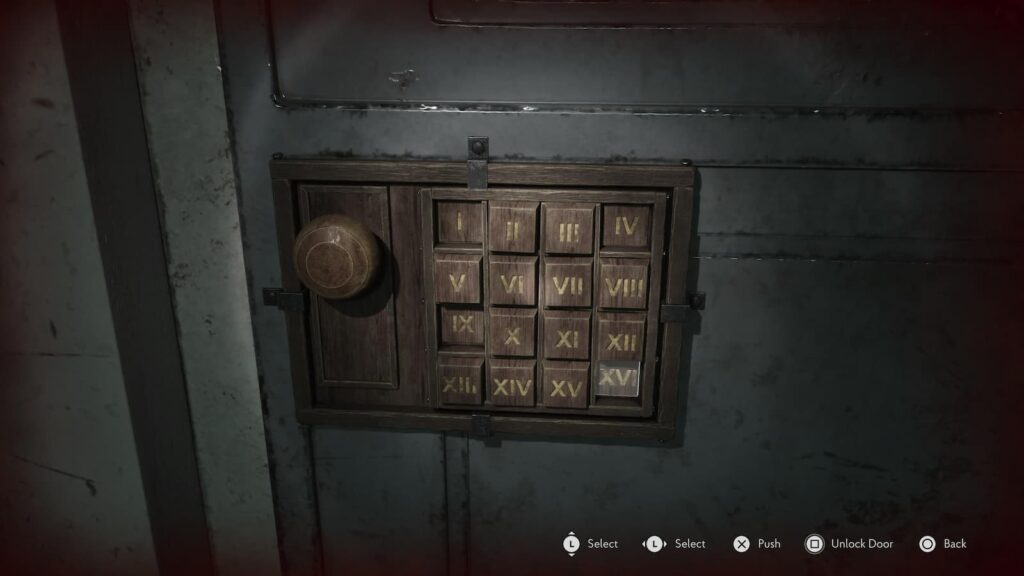
When walking through the Cutting Area in the fish market, you’ll quickly come across a large door with a lock that’s labeled with roman numerals. In order to open this door, you’ll need to look around the area for several notes detailing Sybil’s investigation and various punishments that sailor’s face at sea.
Apply the numbers on the list of punishments to the note “Instructions to Sybil” and you’ll get the code: I IV IX XVI. This room will have an attachment for your grenade launcher as well as a Dream Essence if you crush the thing waiting for you inside the room.
Frozen Statue Puzzle
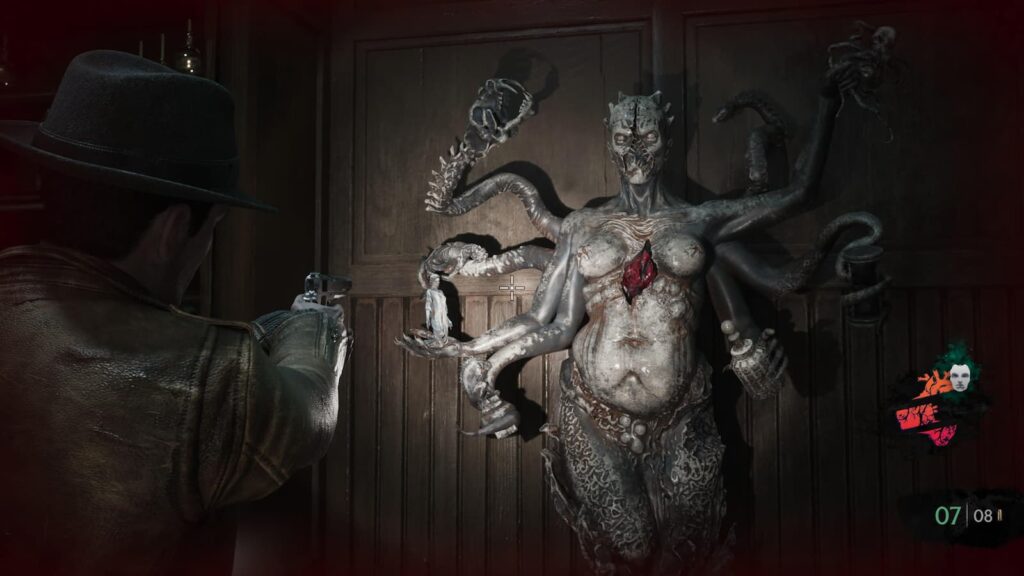
After Ma Fishface and Faye travel through time to bring you another Leden Jar, you’ll need to solve a cryptic riddle via reading the note left behind in the safe and interacting with the statue in this room. Insert the frozen heart that was in the safe into the statue and it will sprout multiple limbs.
To get the Leden Jar from the statue, we’ll need to shoot the limbs in the correct order, or rather we’ll be shooting at the smaller statues in the large statue’s hands. Shooting them in the wrong order will damage you so pay close attention and shoot them in this order
- The woman on the left arm (Your left, it’s the statue’s right hand)
- The octopus in the top right
- The Deep One in the bottom left
- The hourglass on the right hand
- The Leden Jar in the bottom left
Once all of the correct limbs have been shot, the statue will fall apart and you’ll gain a Heart of Ice which you need to bring to the identical statue in the Cold Storage room.