Want to see Raider King content first? Add us as a preferred source.
The purple orbs known as the Frozen Darkness are special hidden items you can pick up during the Repeat missions. If you get all of them from all of the Repeat missions, you will get the Embrace the Darkness achievement, as well as a bunch of clothes for Sung Jin-woo. The Frozen Darkness don’t seem to always appear in the same location based on how many you got. Rather, they seem to spawn in one of the set locations that I’ll list down below. Here are all of the spawn locations for the Frozen Darkness in Solo Leveling: Arise Overdrive.
If you found one I missed, make sure to send me a screenshot on my Discord so I can add it and make the guide better!
Disclaimer: This is a work in progress!
All Frozen Darkness Spawn Locations
Chapter 1 – Train to Become a Formidable Combatant
You can get a total of 10 Frozen Darkness from this Repeat mission. From all of my runs, a max of 3 can spawn per run, so you will have to replay the mission 4 times to get all of the collectibles. When you have 9 and need only 1, make sure to check all of the spots on each floor, since only 1 will spawn from those runs onward.
Most of the time I found 1 Frozen Darkness on each floor. However, there was one time when I found none on the Floor 1 and 2 on Floor 2, so keep that in mind if you get nothing on one of the floors.
Hapjeong Station Floor 1
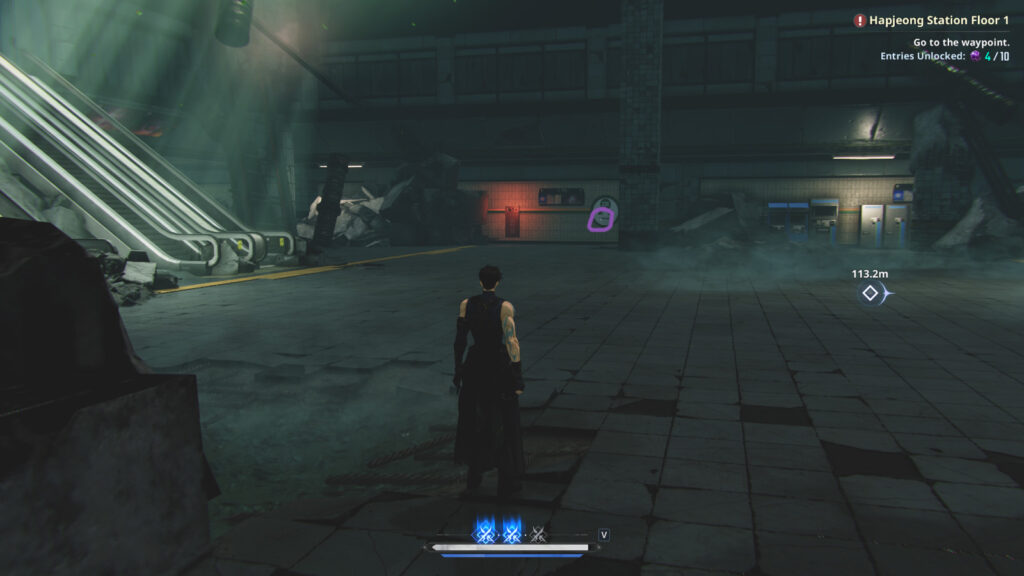
Since Floor 1 is a very linear, it’s relatively easy to spot the spawn locations. The first one is after you take your first right. You’ll reach a space with an escalator. Walk straight past the pillar and check the green and white sign to see if it’s sparkling. If not, continue to the next spot.
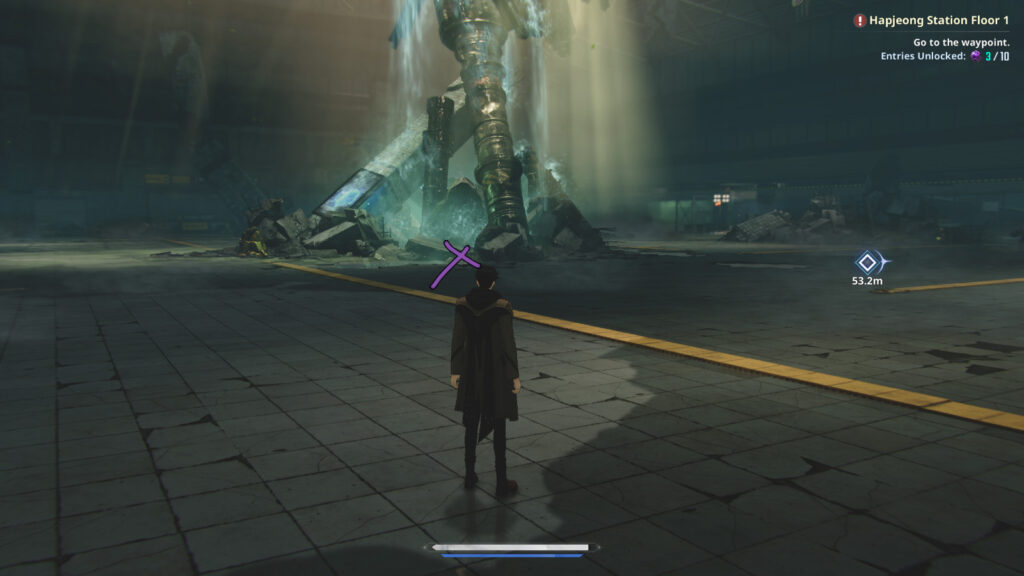
Take a right from the previous spot and you’ll reach a place where a pillar has fallen in the middle of the station with water flowing over it. Usually a bunch of mining resources spawn here. In between the resources, a white sparkling Frozen Darkness can spawn.
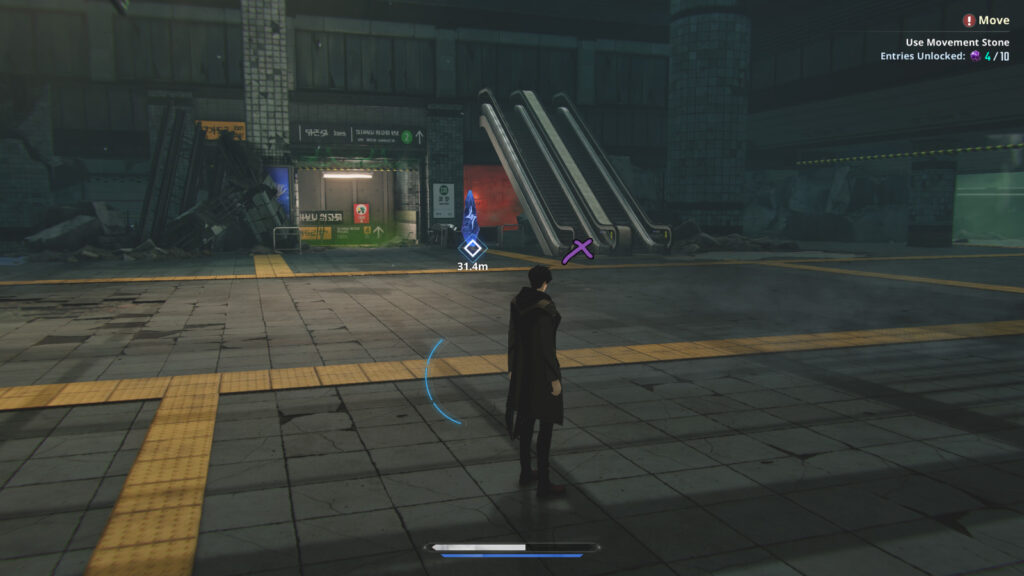
The last spot I found on Floor 1 is right at the exit, on the escalator to the right of the Move stone.
Hapjeong Station Floor 2
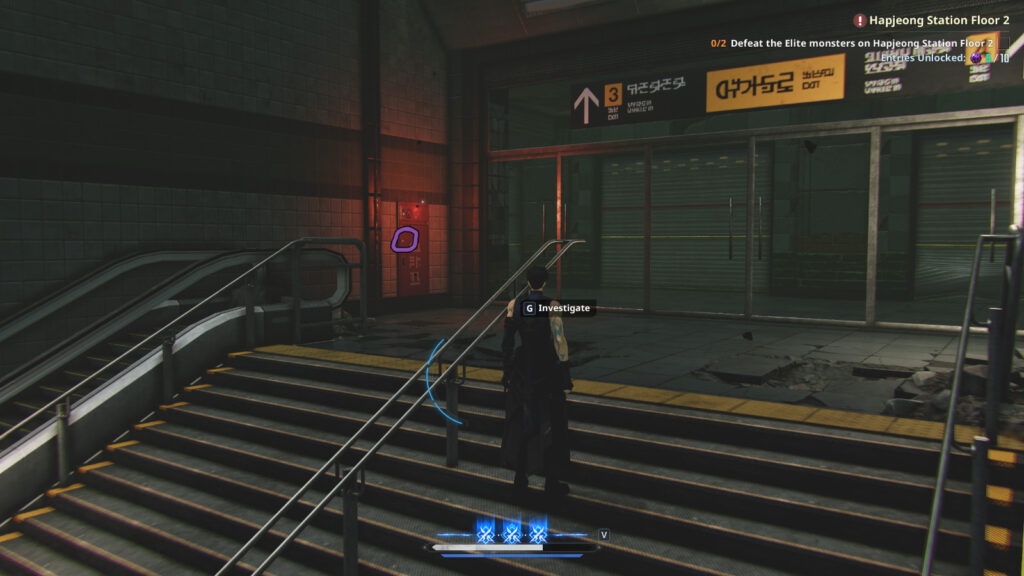
The first location is extremely obvious, since you’ll see the “Investigate” prompt appear right as you reach the 2nd Floor. Turn around and go up the stairs. The Frozen Darkness is right on the red door to the left.
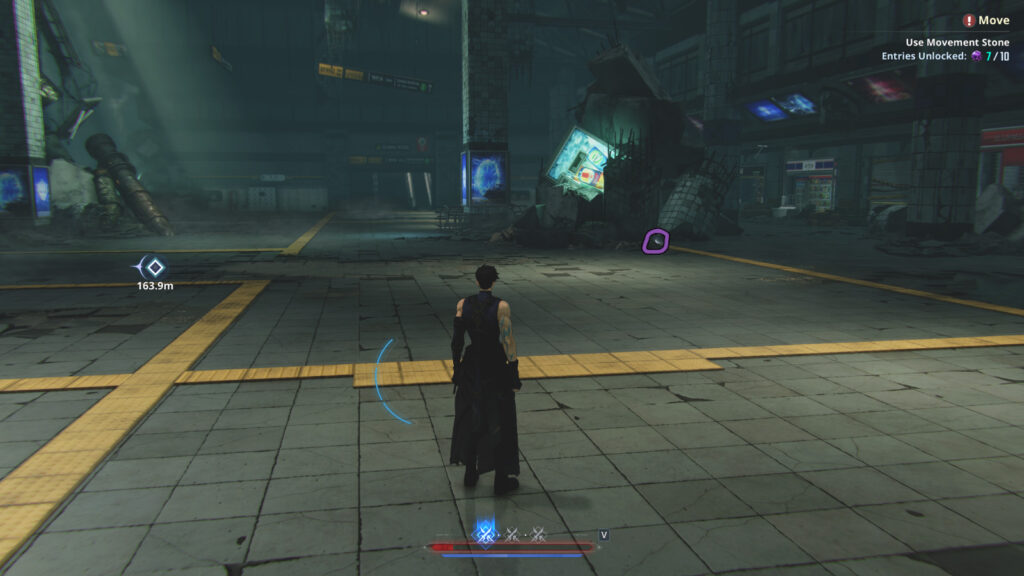
Go down the same stairs you would go down for Floor 1 and walk straight. After passing into the 2nd area with enemies turn around. The white shining item can spawn behind the rubble next to the pillar.
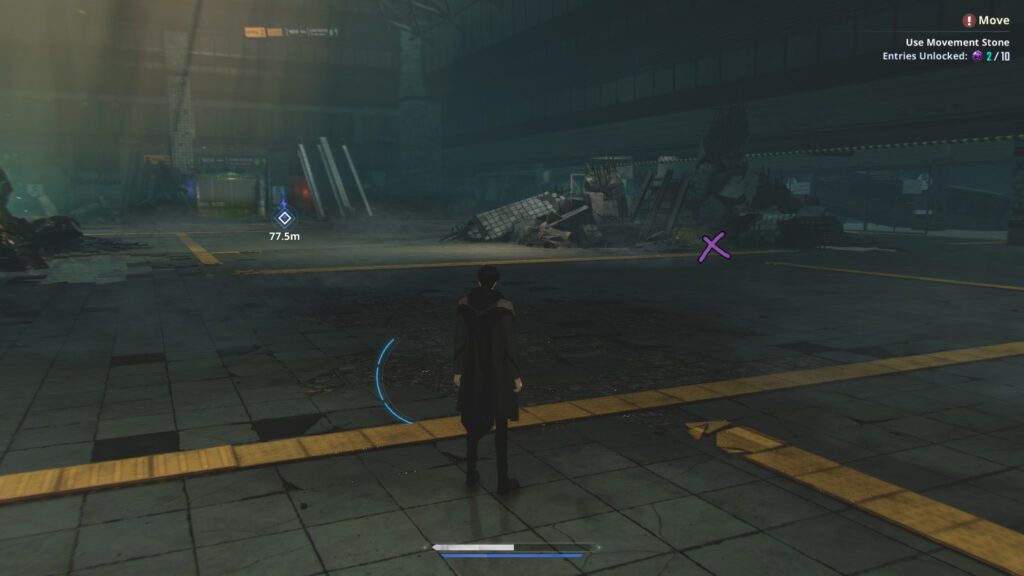
The last 3 locations are all close to the exit point. Right across the Move stone, walk straight ahead and turn to the left. The Frozen Darkness can spawn next to the rubble.
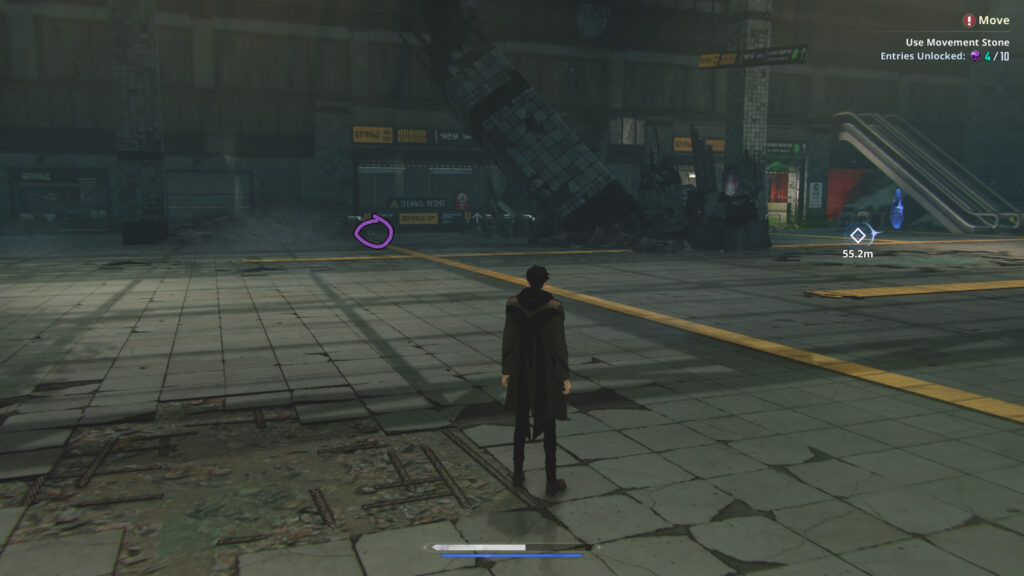
From the Move stone, walk to the left. The sparkling light can appear on the escalator going down.
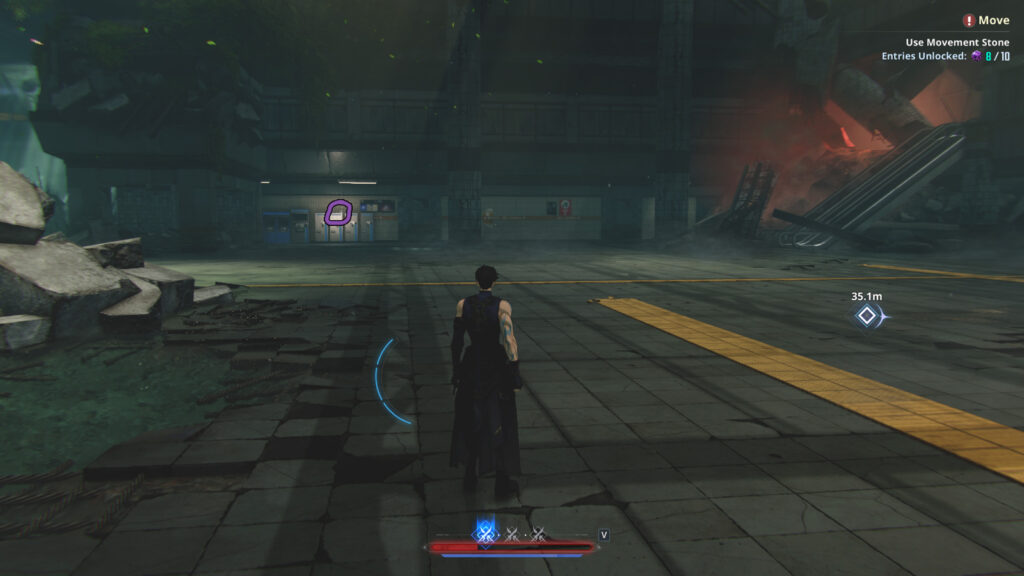
From the Move stone, walk to the left and straight. The Frozen Darkness can spawn on top of the 2nd ticket machine.
Hapjeong Station Floor 3
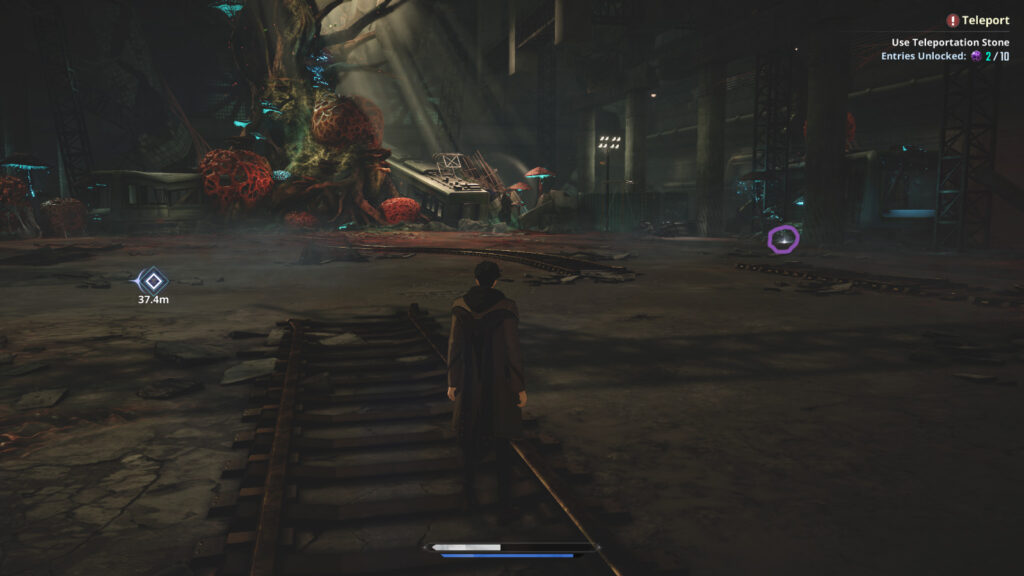
After beating the boos, you can find one spawn point to the right next to the metal beams.
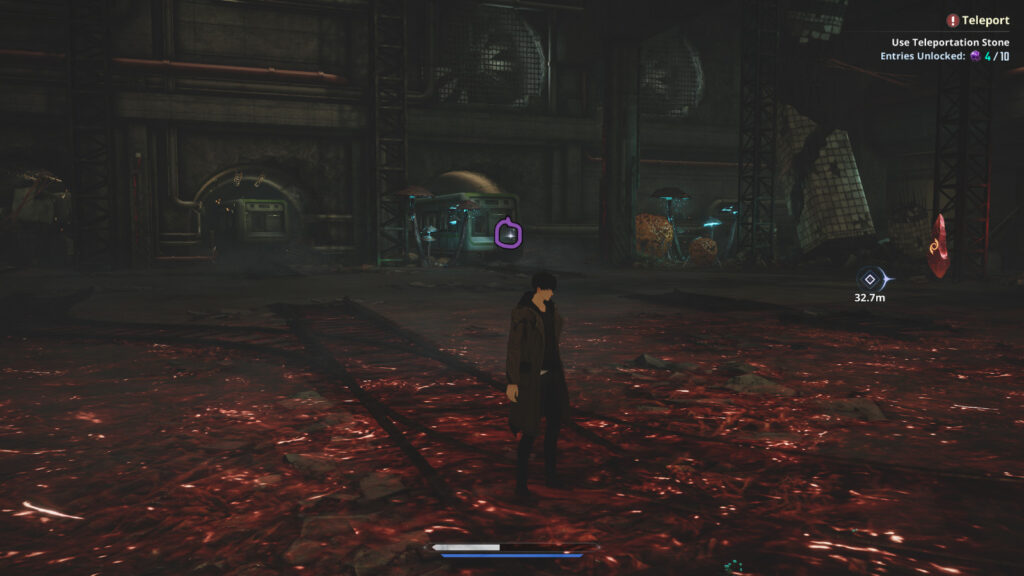
Or you can find it in the back of the room, in the ruined train.
Chapter 2 – Lizards
You should be able to get all Frozen Darkness in 2 runs for this Repeat mission.
Floor 1
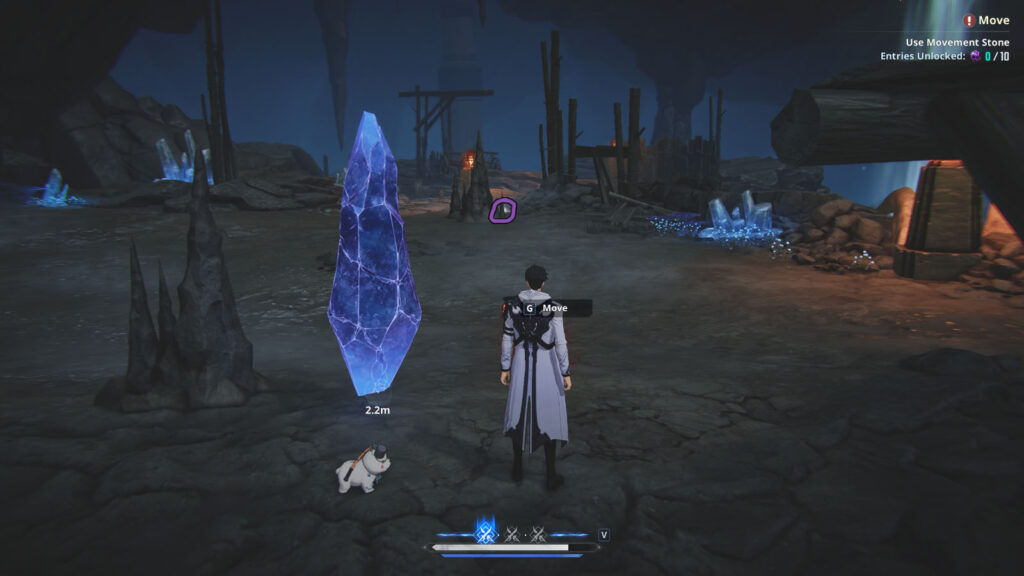
From the Move stone, look to the left. The Frozen Darkness can spawn behind the stalagmite overlooking the cave.
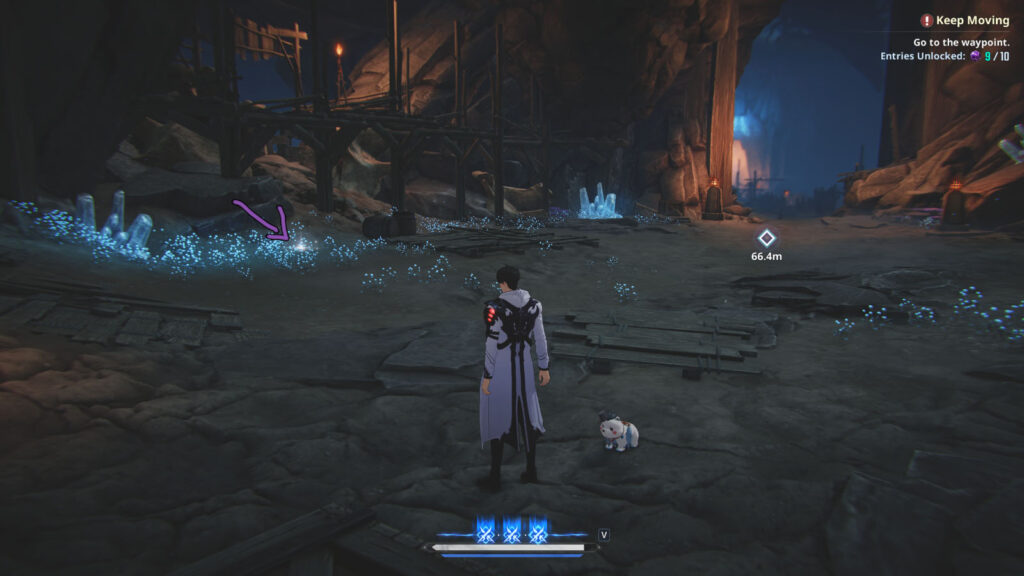
The second spawn location on this map is right at the start, in the blue flora next to the scaffolding.
Floor 2
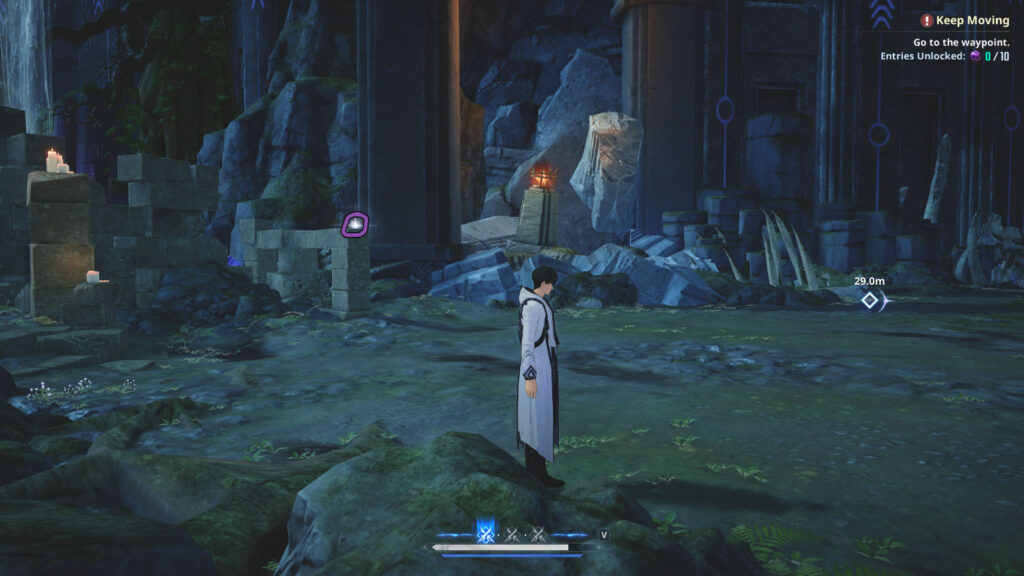
Right at the point where you start the floor, turn to the left. The sparkling item can spawn on top of a little stone structure.
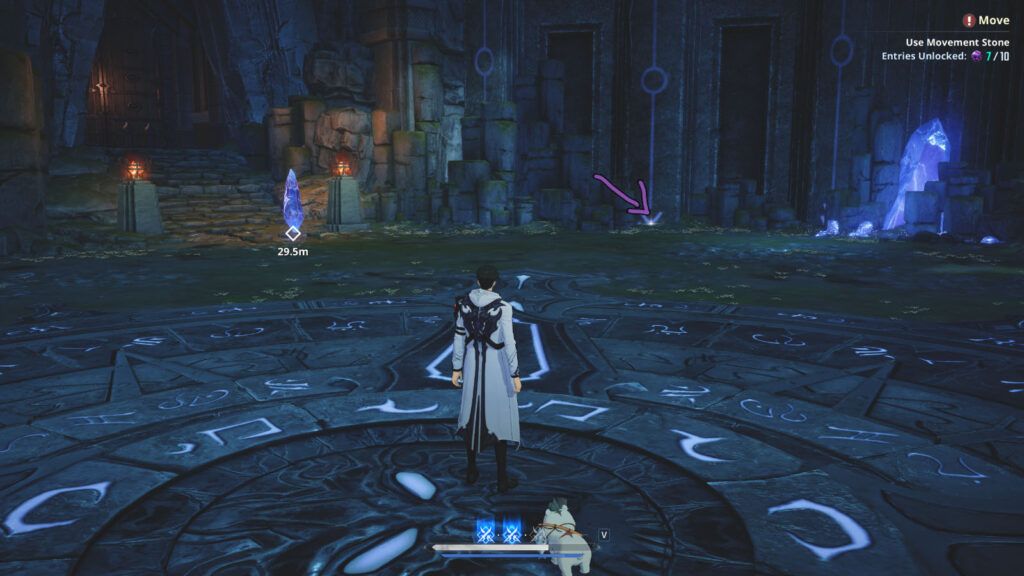
The second location is right next to the Move stone, to the right. The arrow on the wall is pointing right next to the spawn point.
Floor 3
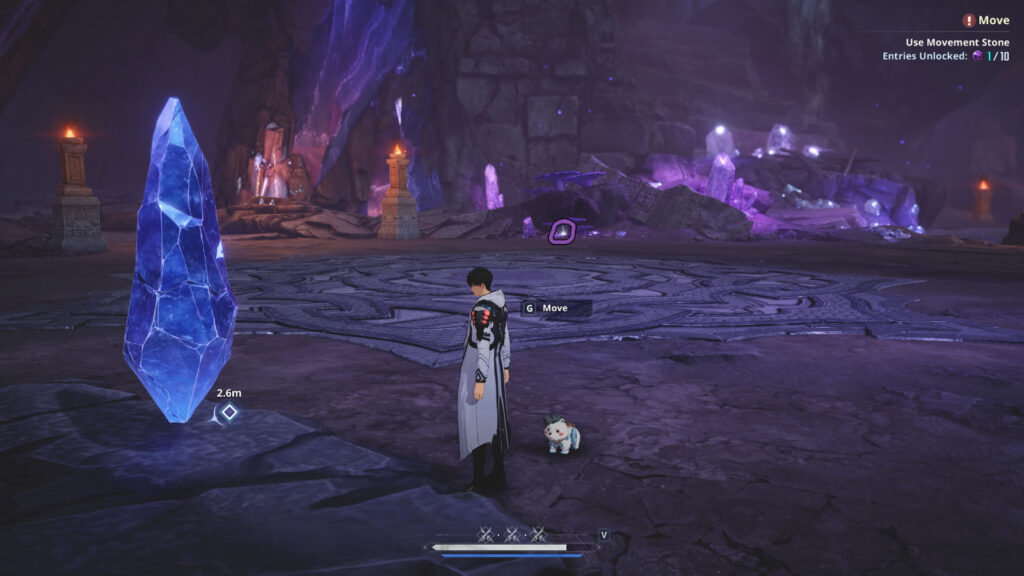
Look to the room toward the set of purple mushrooms from the Move stone. The Frozen Darkness can spawn right under the mushrooms.
Floor 4
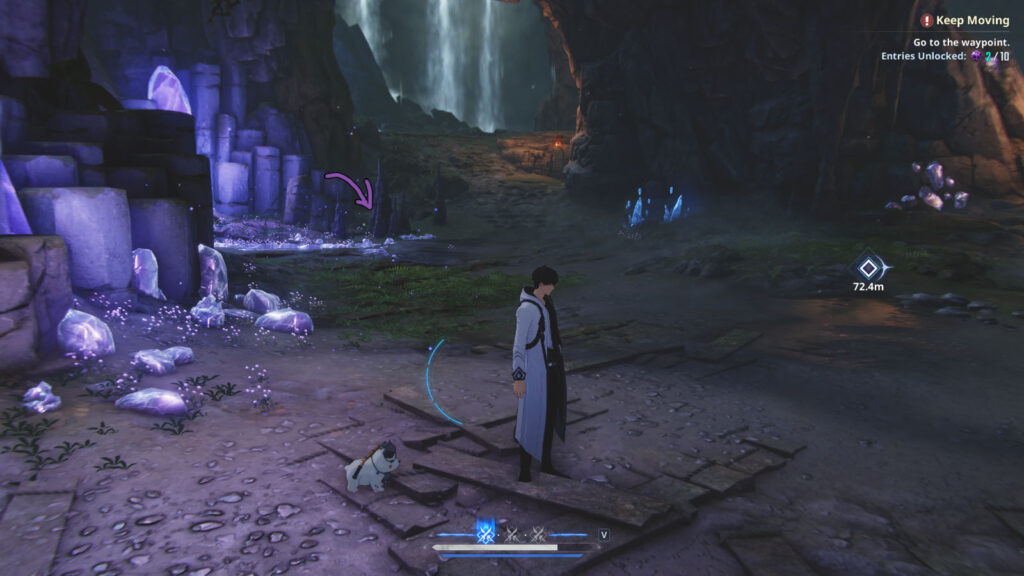
In the first area with enemies, look to the left. The Frozen Darkness can spawn behind the stalagmite in the purple corner, next to the path leading upwards that’s blocked off.
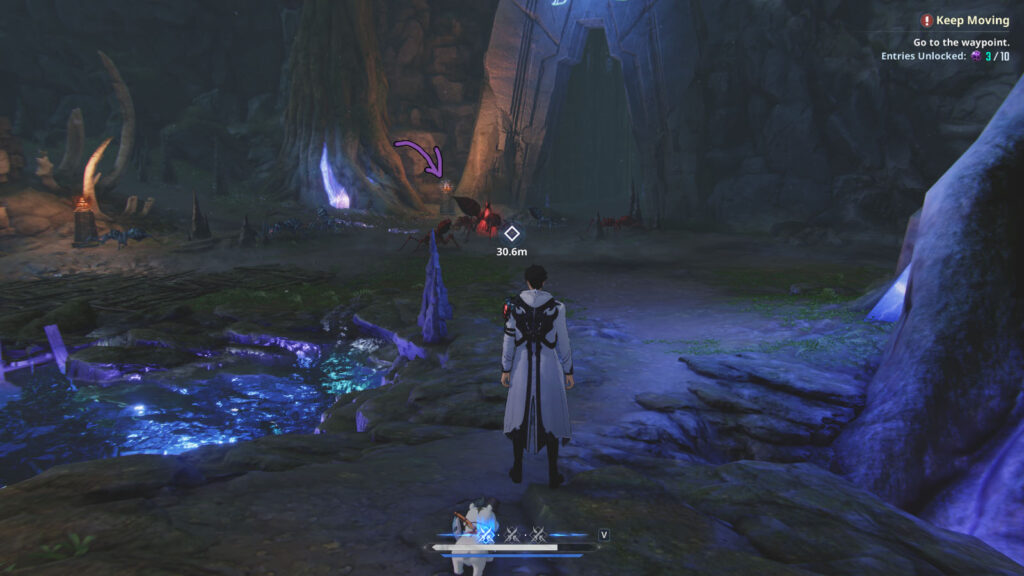
In the second area with enemies, there’s a little torch next to the large stone archway. The sparkling items can spawn on top of it.
Floor 5
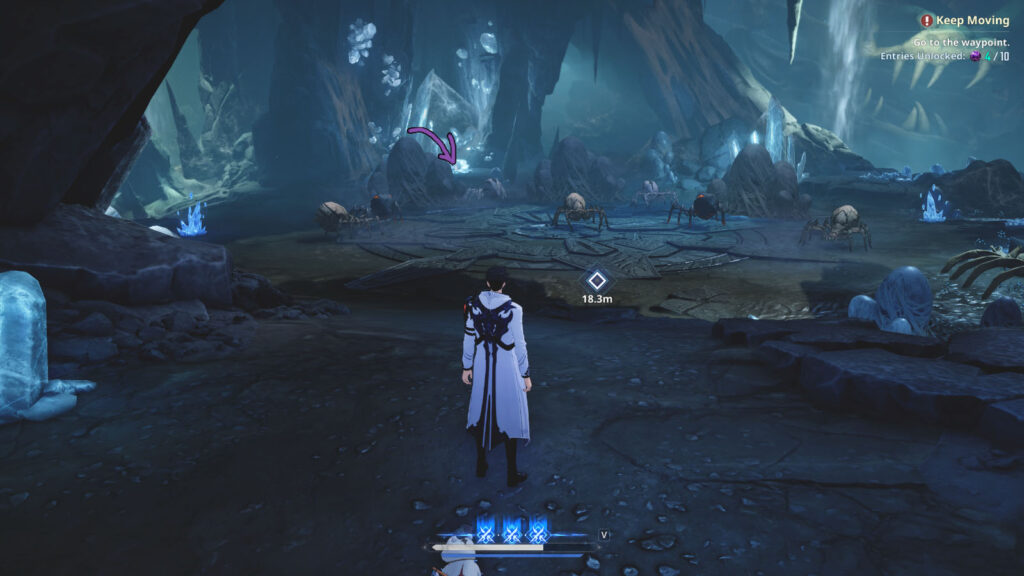
In the boss fight area, right next to the Move stone. Approach the little ledge there on the crystal and you can pick up the Frozen Darkness, if it spawned there.
Floor 6
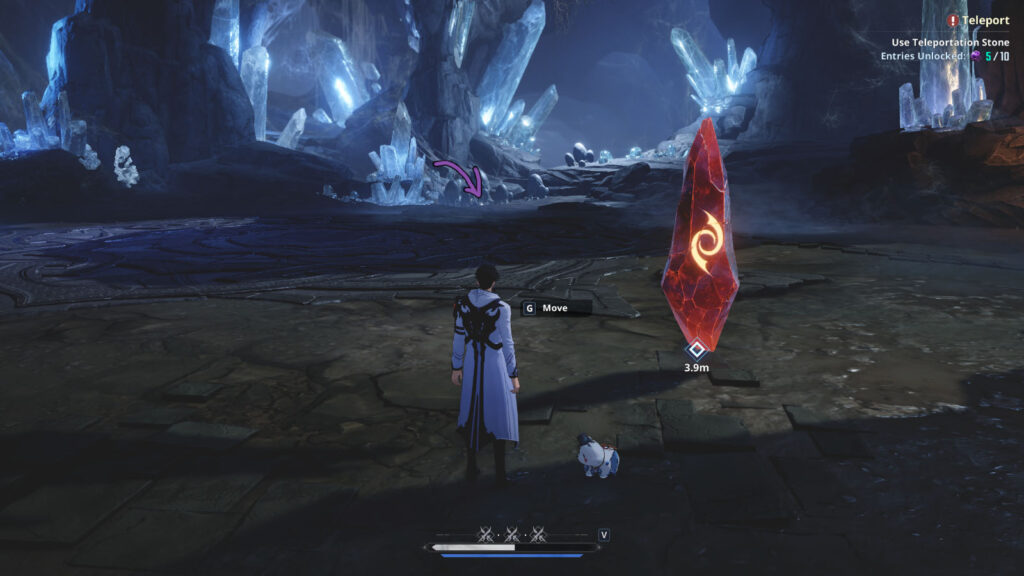
After the boss fight, walk to the Move stone and face the part where you can see a drawing on it. In the distance, next to the spider eggs, a Frozen Darkness can sparkle.
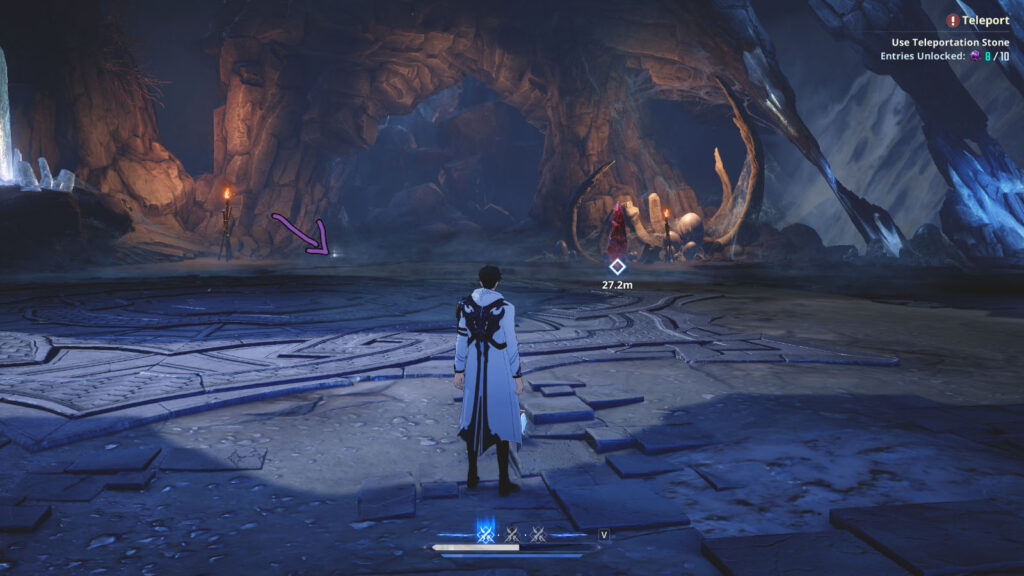
The second location is close to the Move stone, next to the torch on the left.
Chapter 3 – Gatekeeper
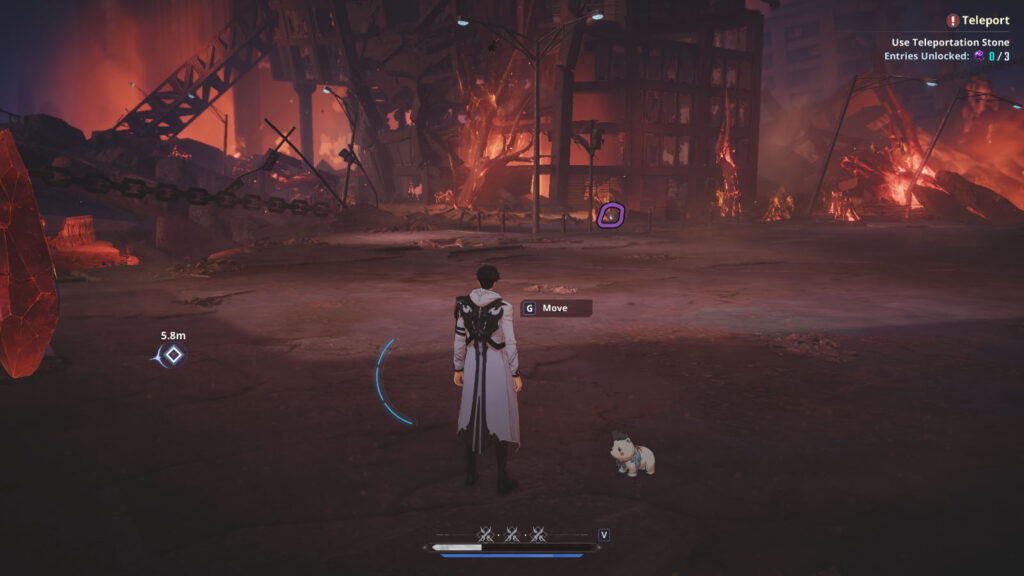
Walk to the Move stone and look back. A spawn location is right next to the destroyed building to the left, next to a burning tree trunk.
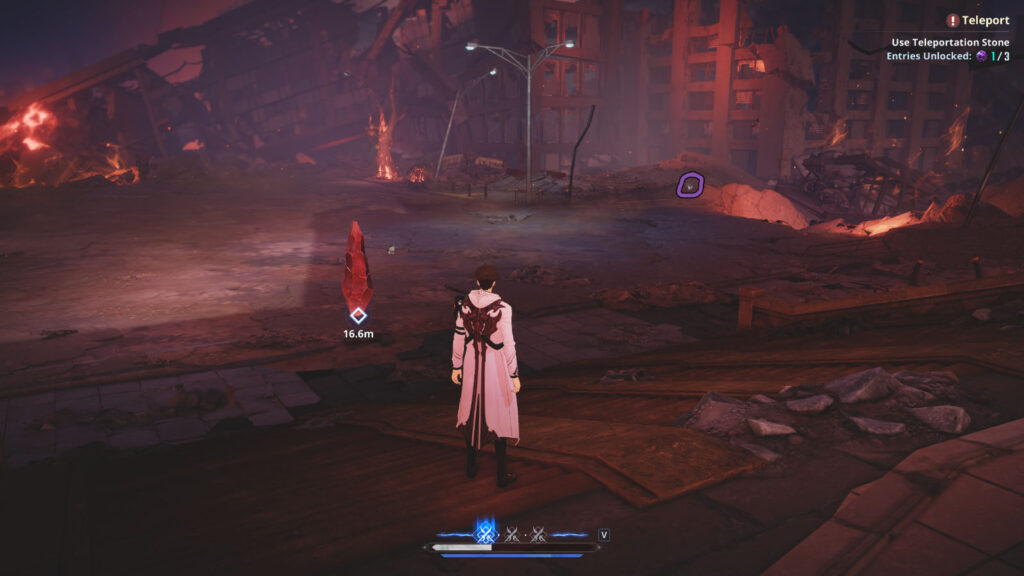
The 2nd spawn point is to the right as you look back from the Move stone, at the end of the broken road, to the left.
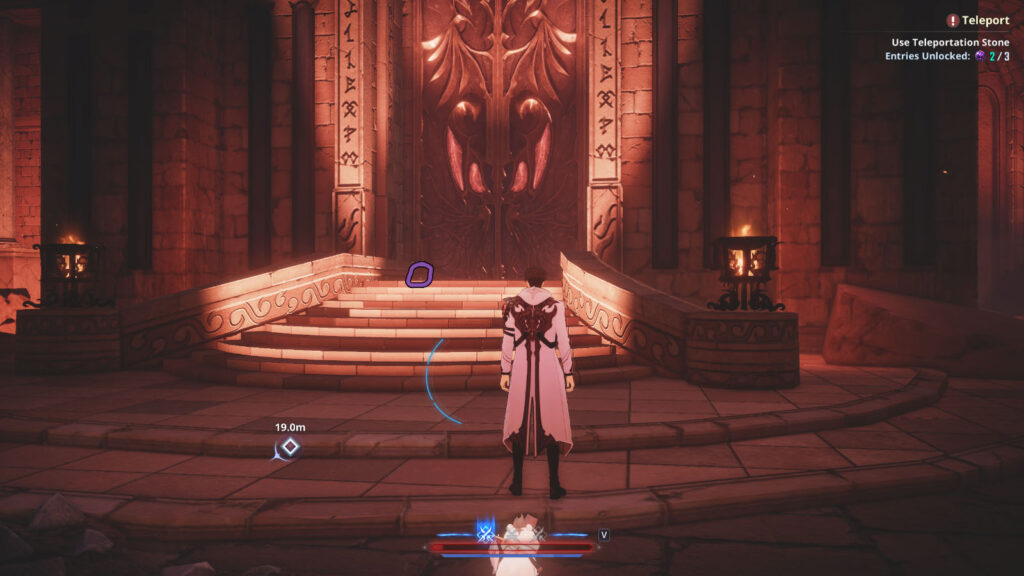
The last one is right next to the big door Cerberus was protecting. Go up the stairs and look to the left as you stand right next to the door.
Chapter 4 – Kang Taeshik
I managed to get all of these ones in one run.
Floor 1
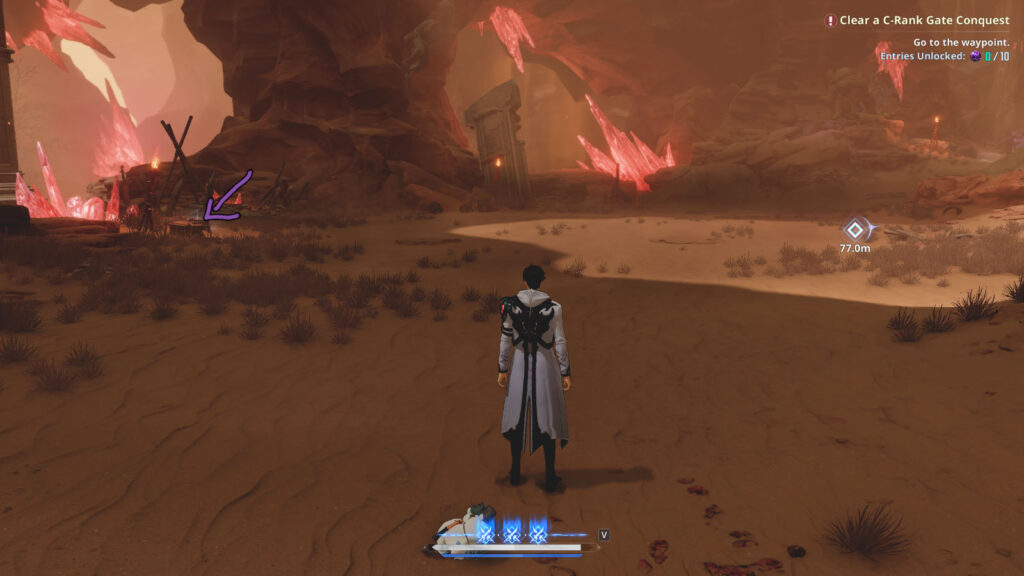
In the first area with enemies, look to the left. It’s right next to the broken wooden boxes.
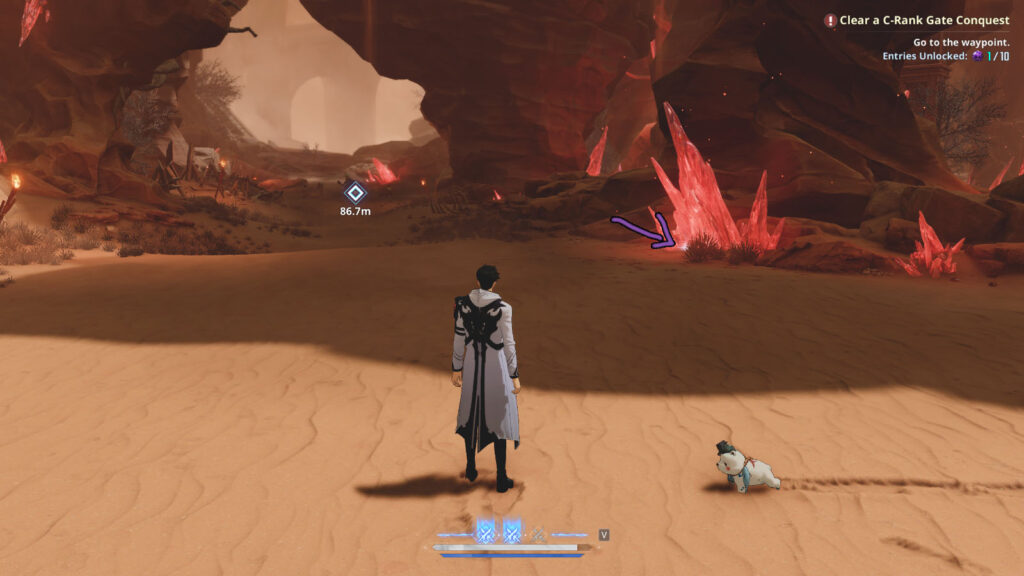
In the second area with enemies, look to the right. It’s next to the big red crystal coming out of the floor.
Floor 2
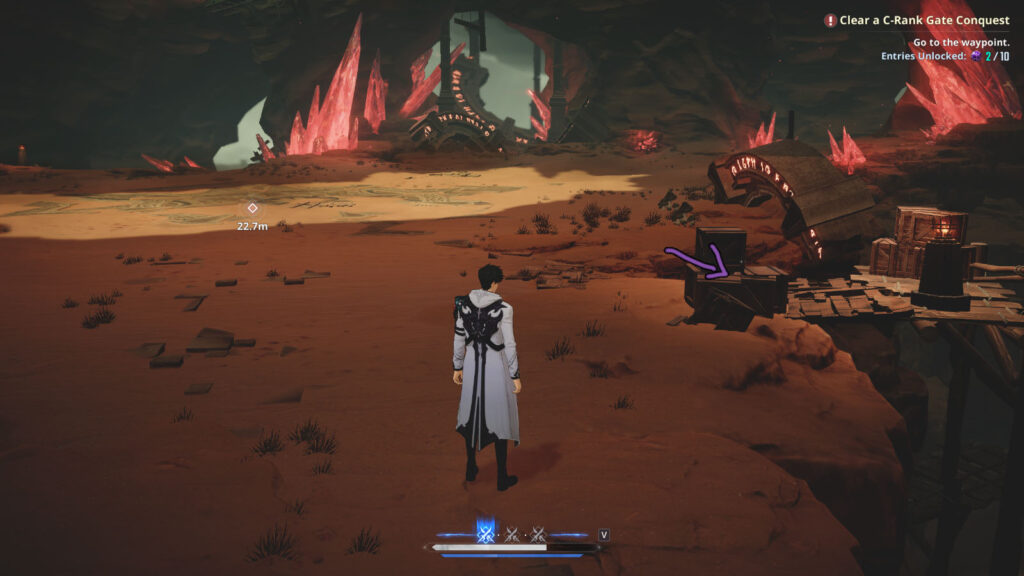
Right at the start point, turn to the right and look at the boxes there. The spawn point is inside the boxes.
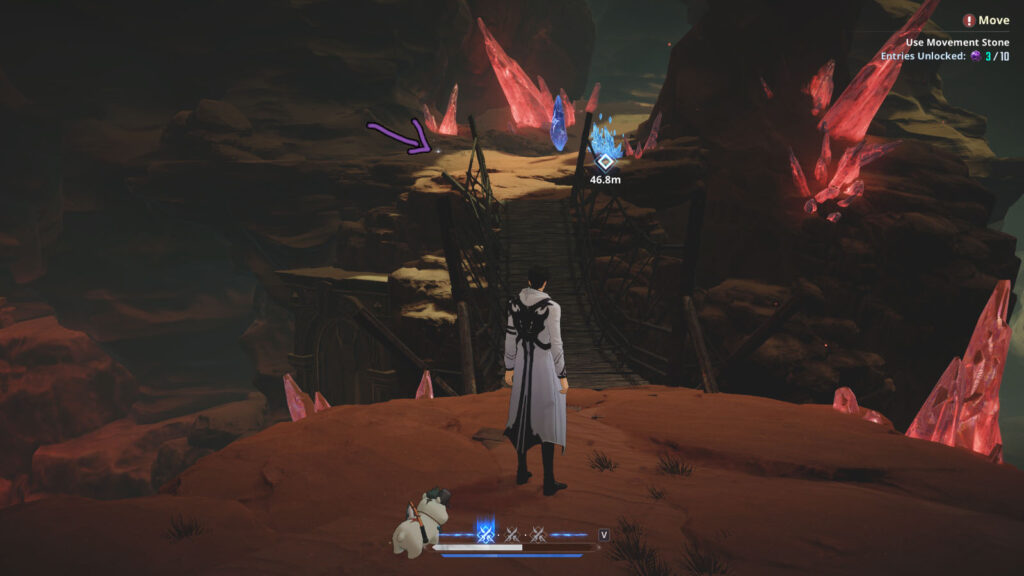
The second one appears right next to the Move stone on the other side of the bridge, to the left.
Floor 3
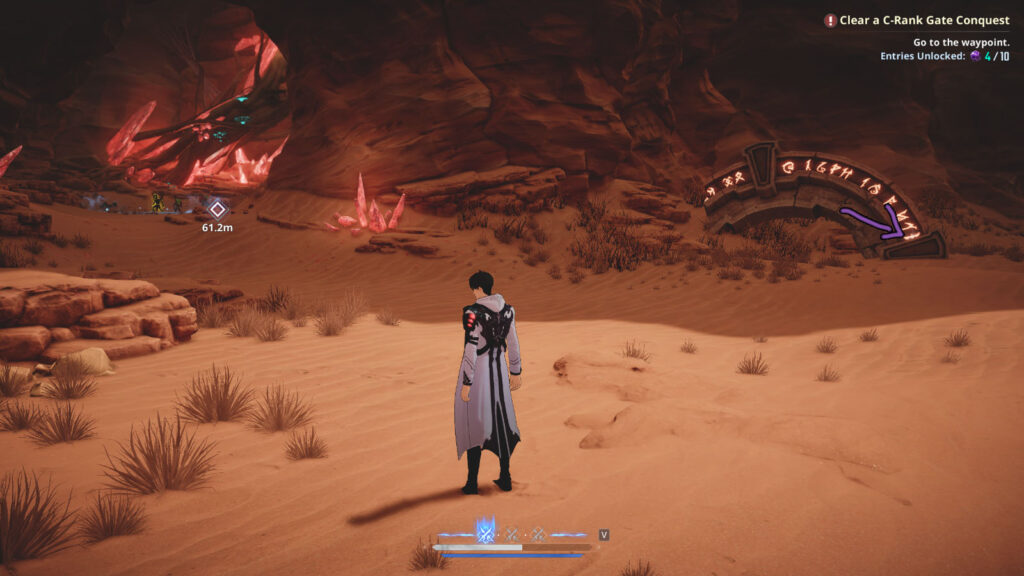
Right at the start of the floor. Instead of advancing, turn to the right and you’ll find a buried arch. The Frozen Darkness spawns inside the right side of the arch.
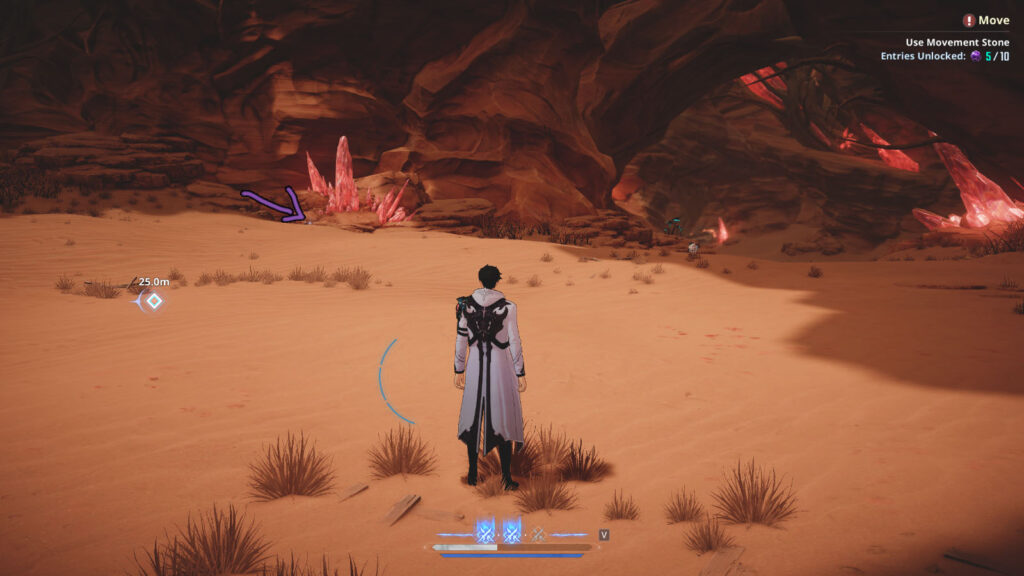
At the end, when the Move stone appears, look back the way you came. The Frozen Darkness spawns next to the red crystal to the left.
Floor 4
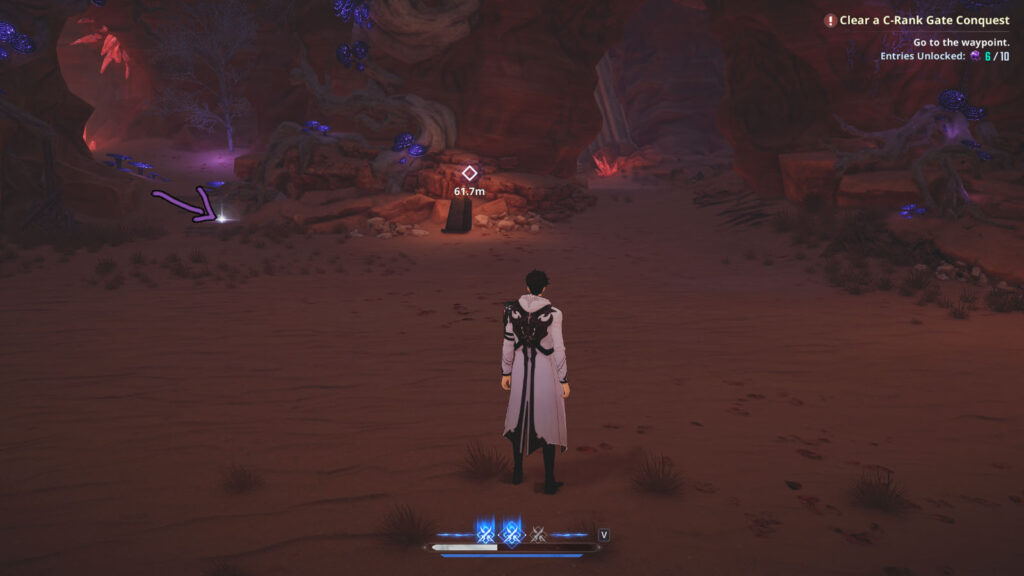
Right at the start of the floor. Walk to the left where all the purple mushrooms are and you can pick up the Frozen Darkness from there.
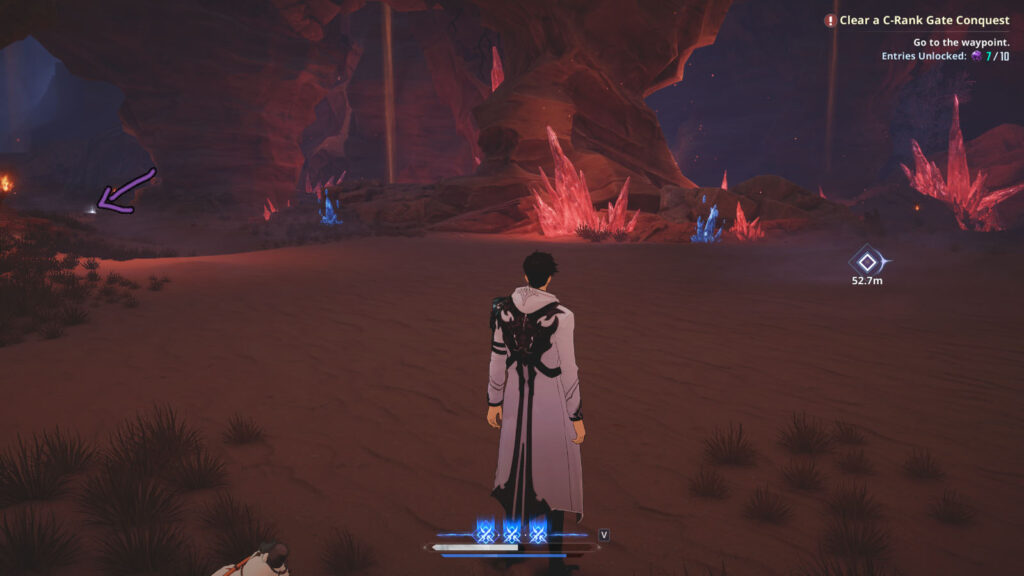
After beating the first area with enemies, walk to the left instead of the mission path to the right. The spawn point is next to some broken wooden boxes.
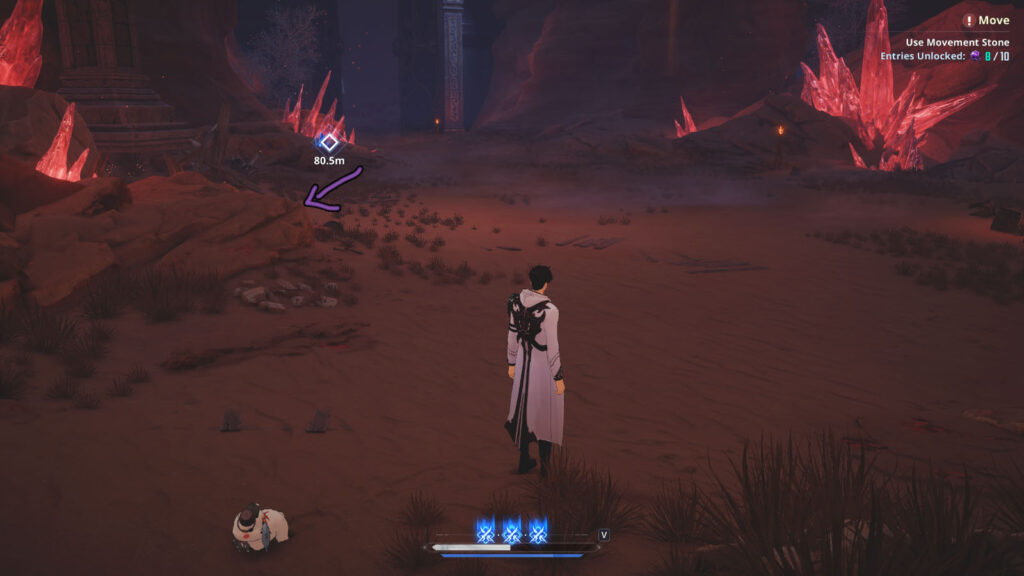
In the area with the boss battle, next to some broken barrels. If you’re coming from the earlier area, it’s to the left right as you enter the boss area.
Floor 5
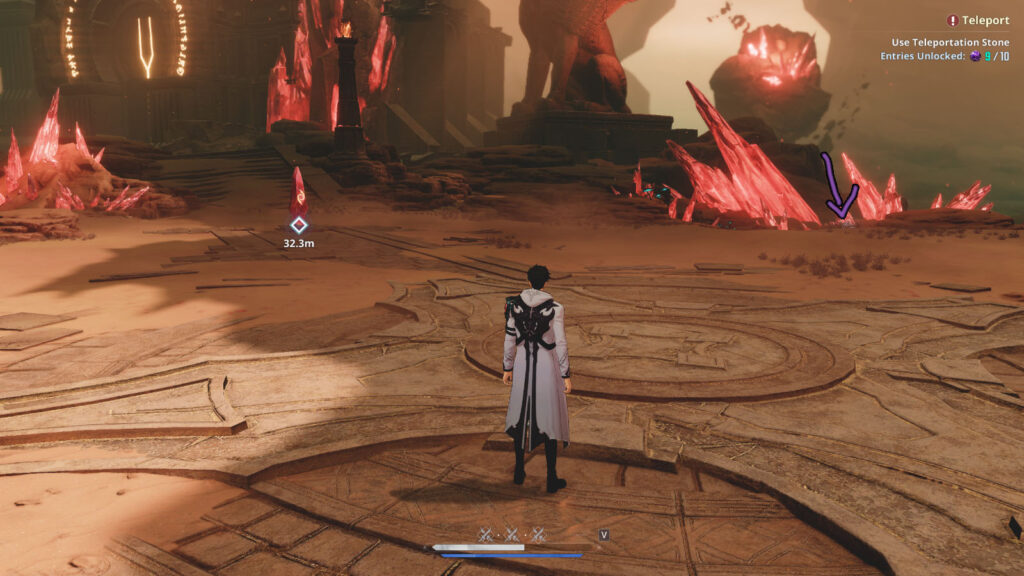
The last spawn location is right at the end. After finishing the battle, look at the face of the Move stone. The Frozen Darkness appears to the right, next to the red crystals.
Chapter 5 – Protector of the Throne
Floor 1
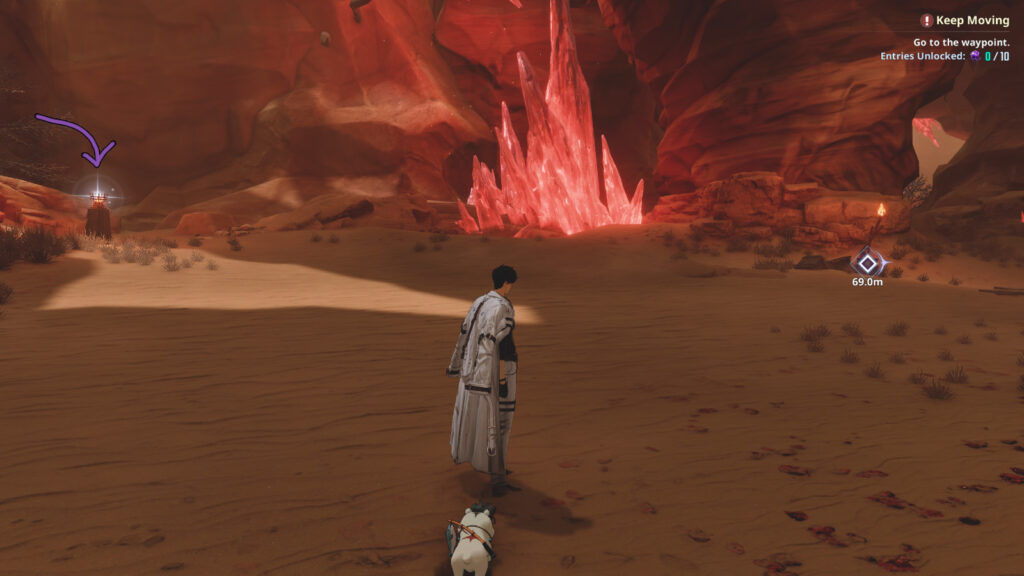
Right at the start. Turn to the left and it will flash on top of the fire.
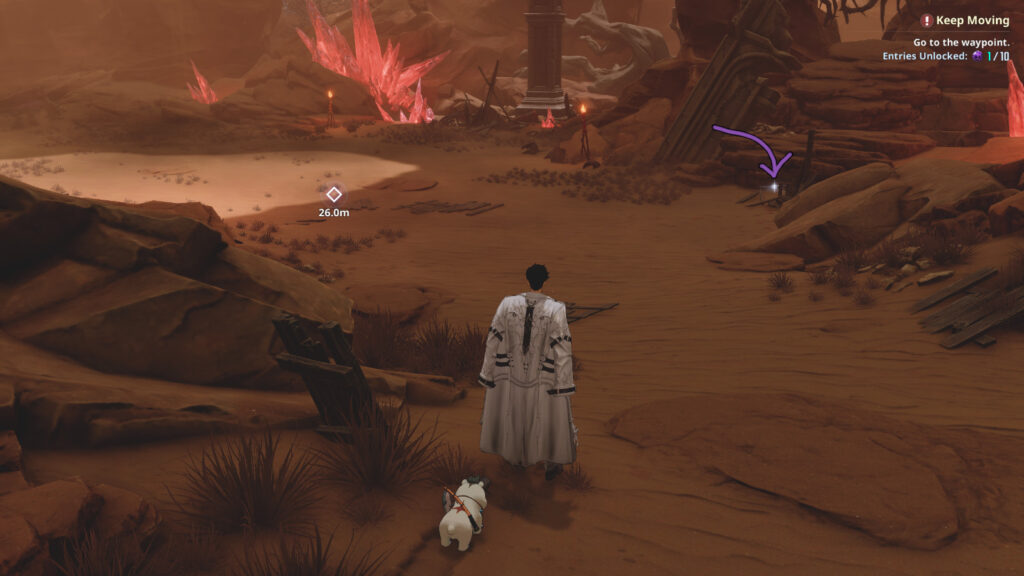
After you take the first left, it will sparkle to the right, next to the broken wooden pole.
Floor 2
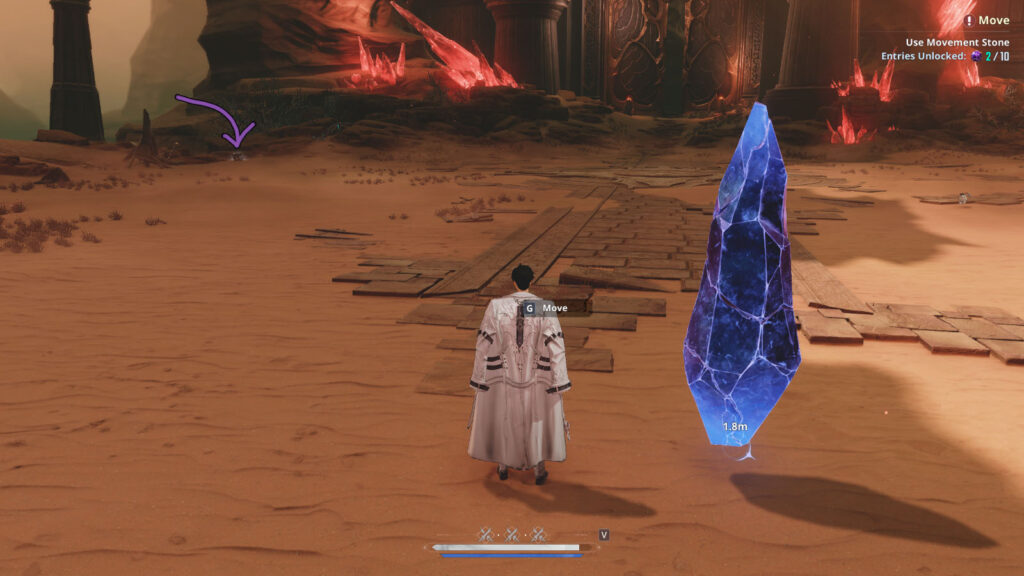
From the Move stone, look back to the gate. The Frozen Darkness spawns in a broken box to the left.
Floor 3
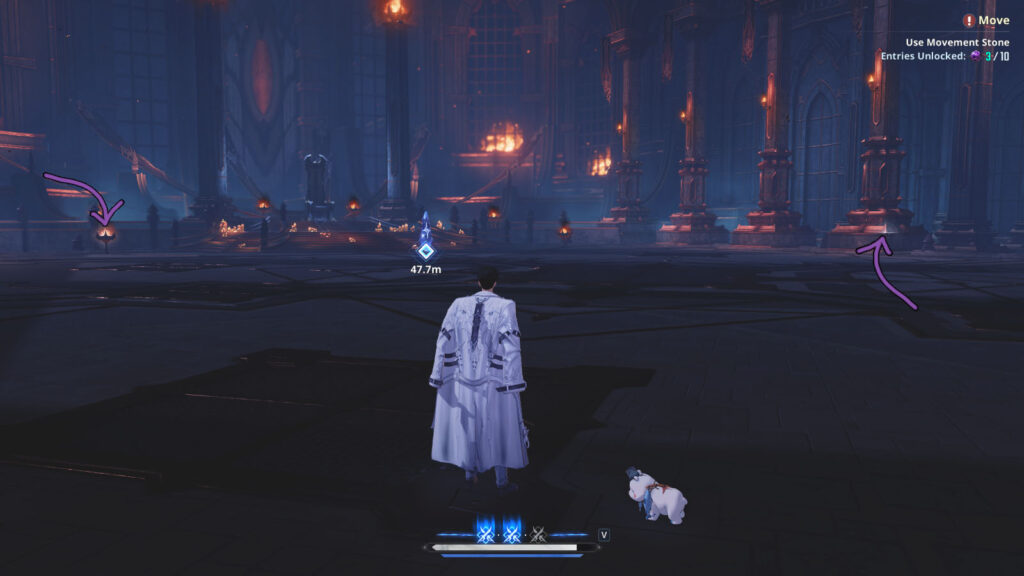
Go back in the room and look at the Move stone. The first spawn location is to the left of the stone, in a torch holder.
The second one is to the right, on the base of a pillar.
Floor 4
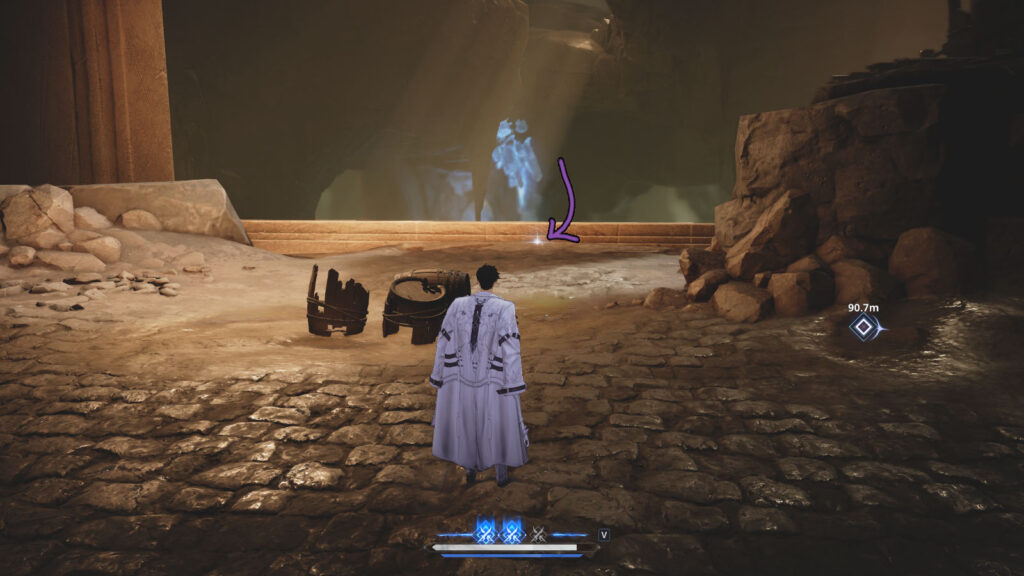
Right at the start of the floor, don’t go towards the objective, go the opposite way, to the back. Turn to the right towards the ledge and you’ll find one of the first spawn points.
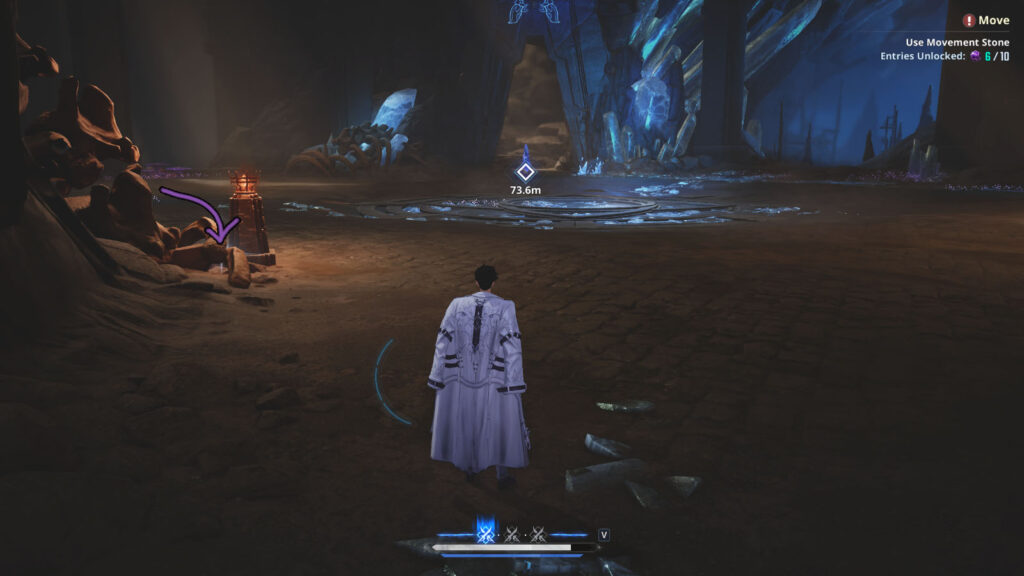
The next spot is right next to the entrance to the boss room, next to the torch pillar.
Floor 5
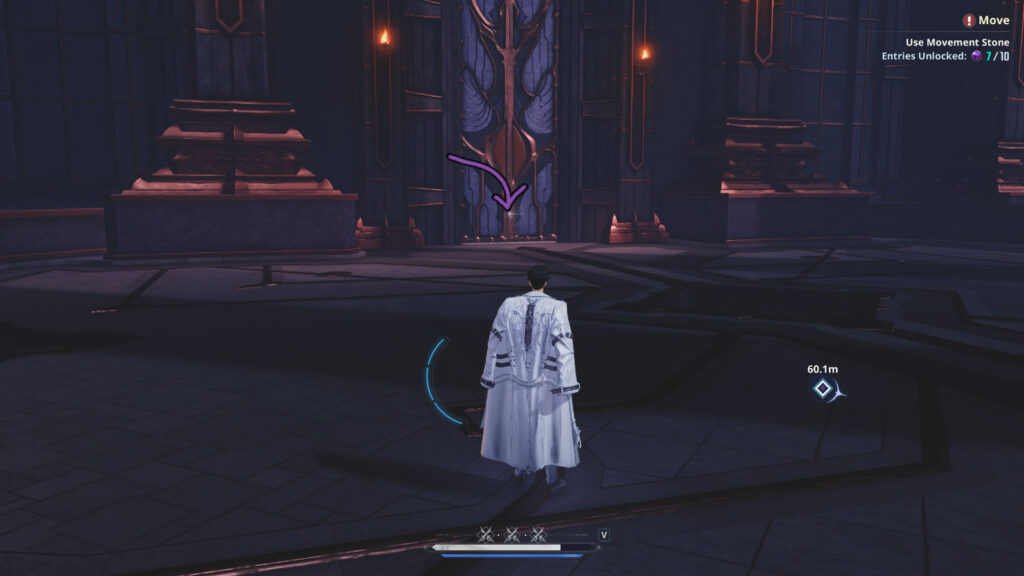
At the back of the room, right on the door.
Floor 6
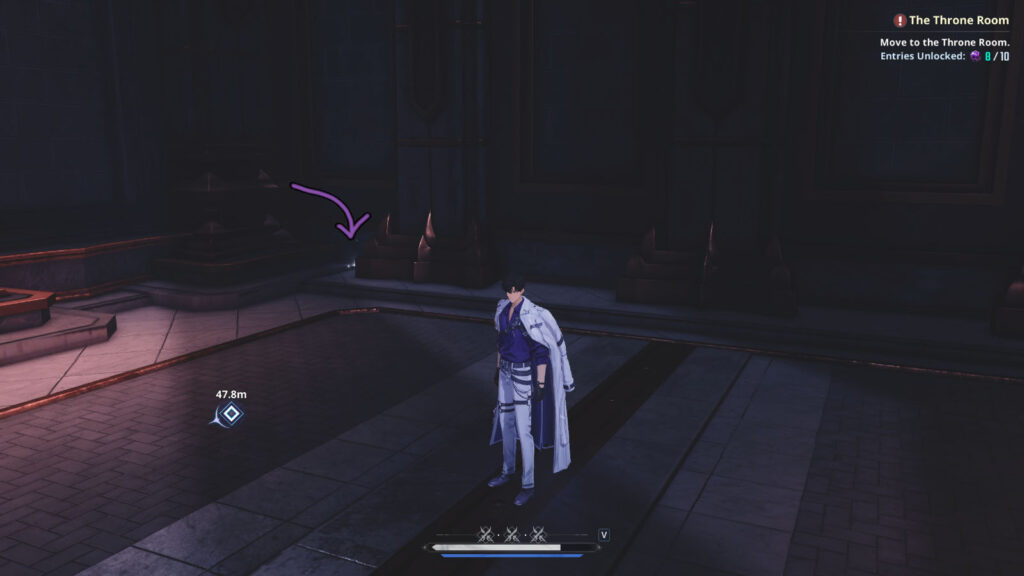
At the start of the prep room, turn around and look to the left. It’s behind the chest/bench-looking pillar base.
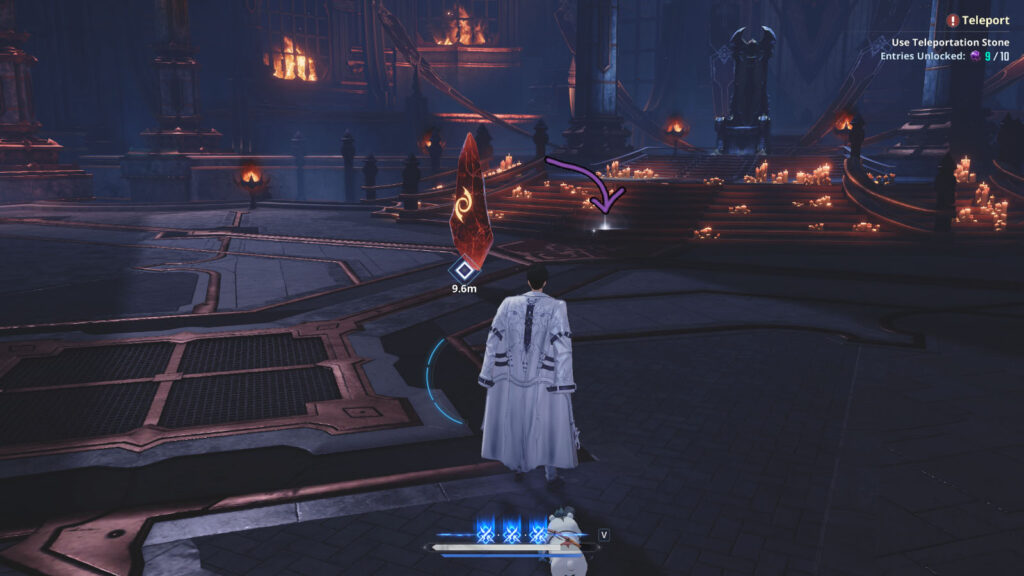
Last one is right behind the Move stone. Be careful not to press the Move button by accident when picking it up.
Chapter 6 – The Red Gate
Floor 1 – Sequence 1
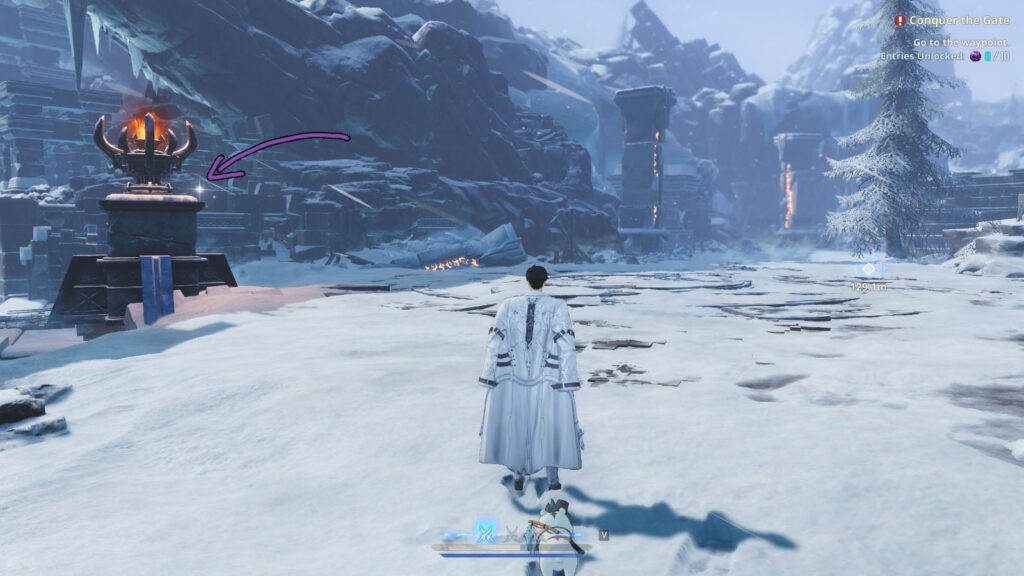
Right at the start. Look at the large pillar with a torch on top. The Frozen Darkness appears up there.
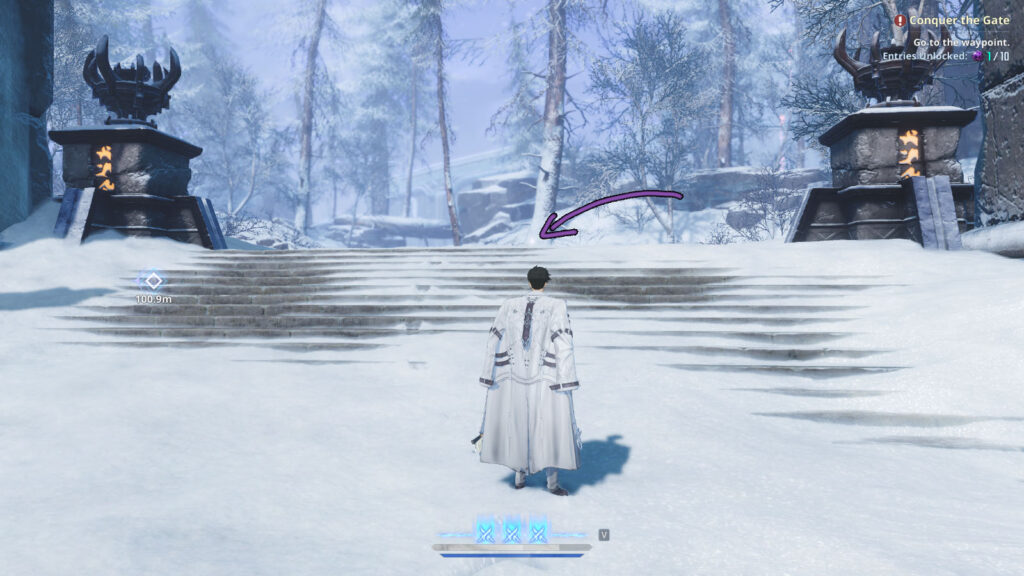
The next one spawns right between the two torches on the way to the objective, on the top of the staircase.
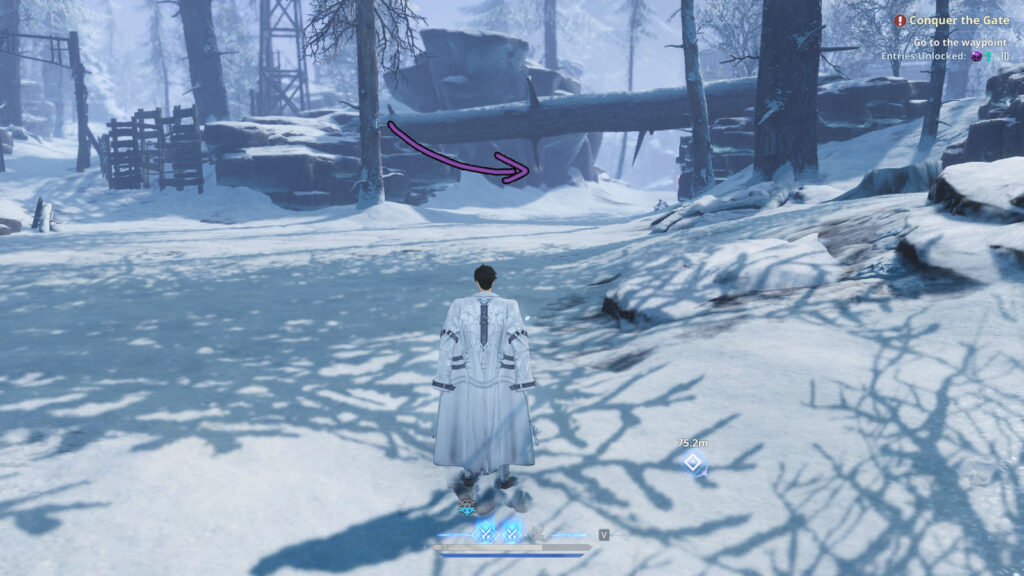
After the battle with the two mini-bosses (captain and archer), go to the right instead of the objective. The Frozen Darkness shines on the tip of a fallen log’s branch.
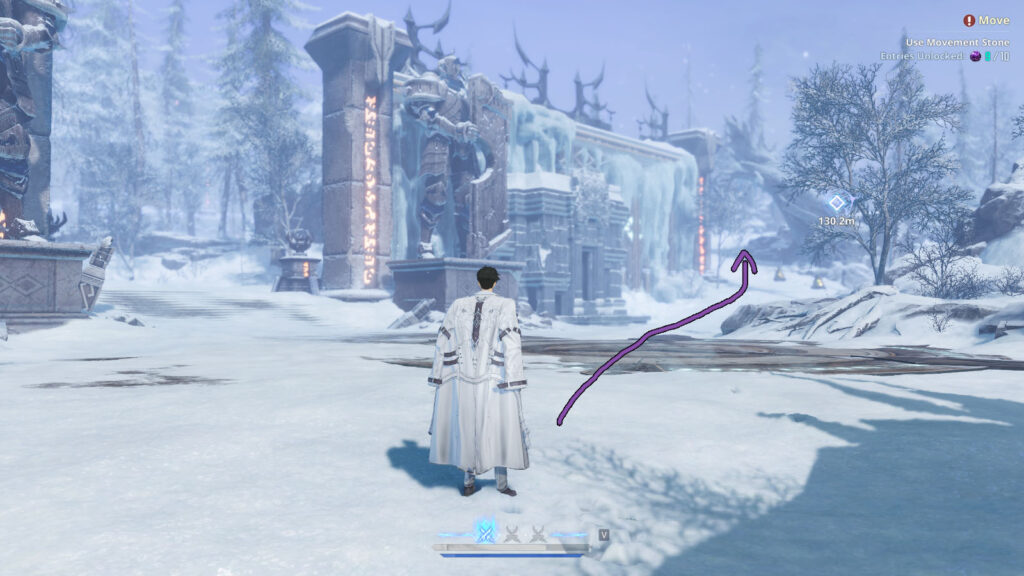
For the next one you can head back where you found the 2nd Frozen Darkness and walk to the left to an area that was inaccessible before. If you go up to the resources and up the route, you’ll see a Frozen Darkness shining on the ledge.
Floor 1 – Sequence 2
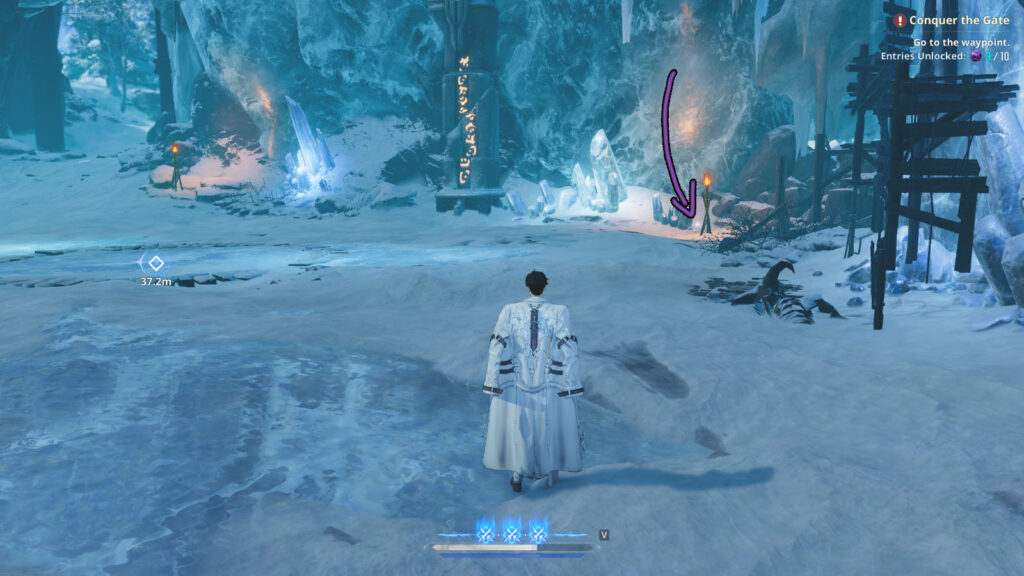
Right at the start of the cave area. Look to the right at the torch.
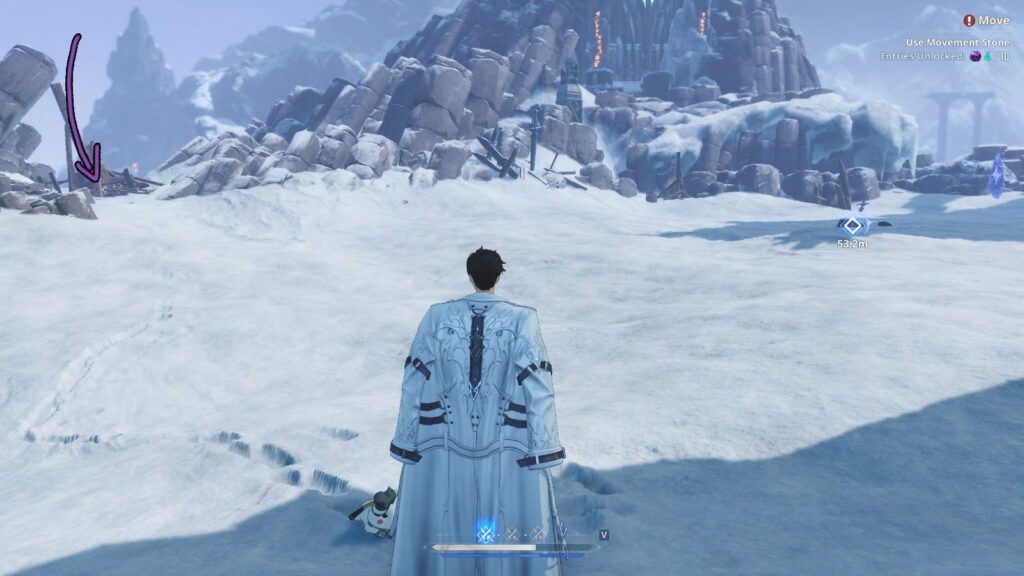
Right after the wolf boss battle, look to the left as you look at the Move stone. The Frozen Darkness shines in the broken wooden structure.
Floor 2
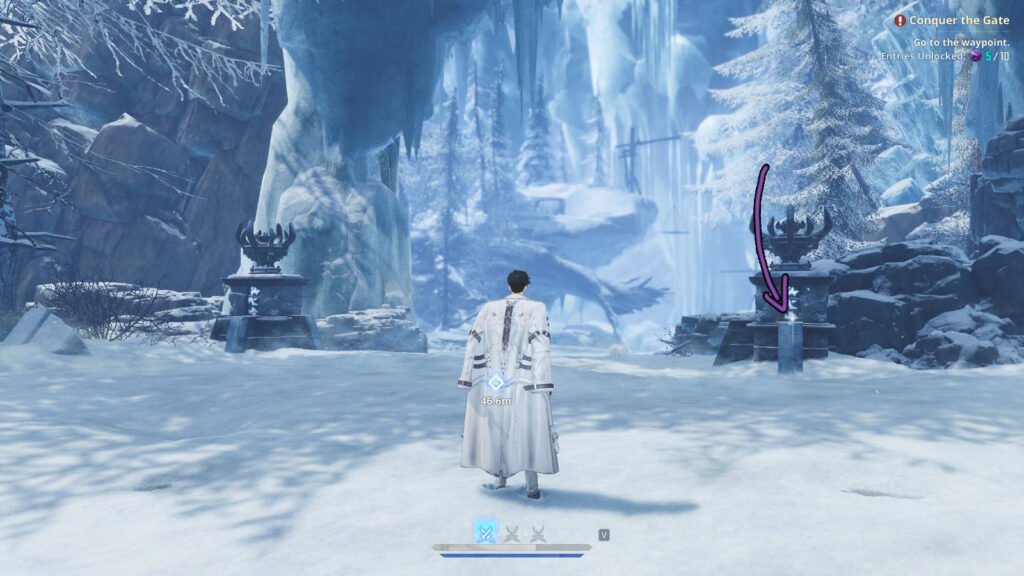
Right at the start, on the torch pillar to the right.
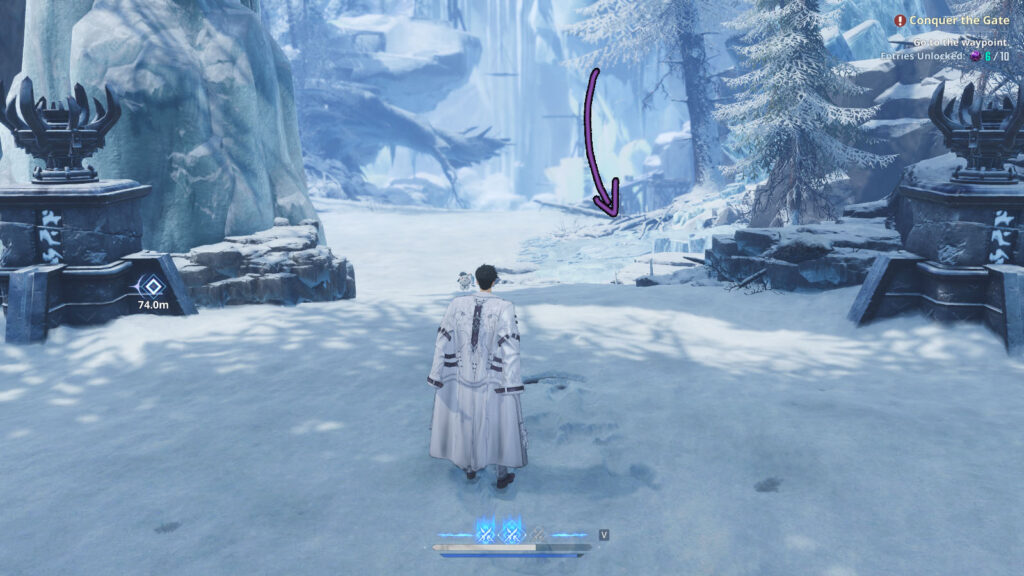
Pass through the pillars, beat the enemies, and get close to the broken wooden structure to the right.
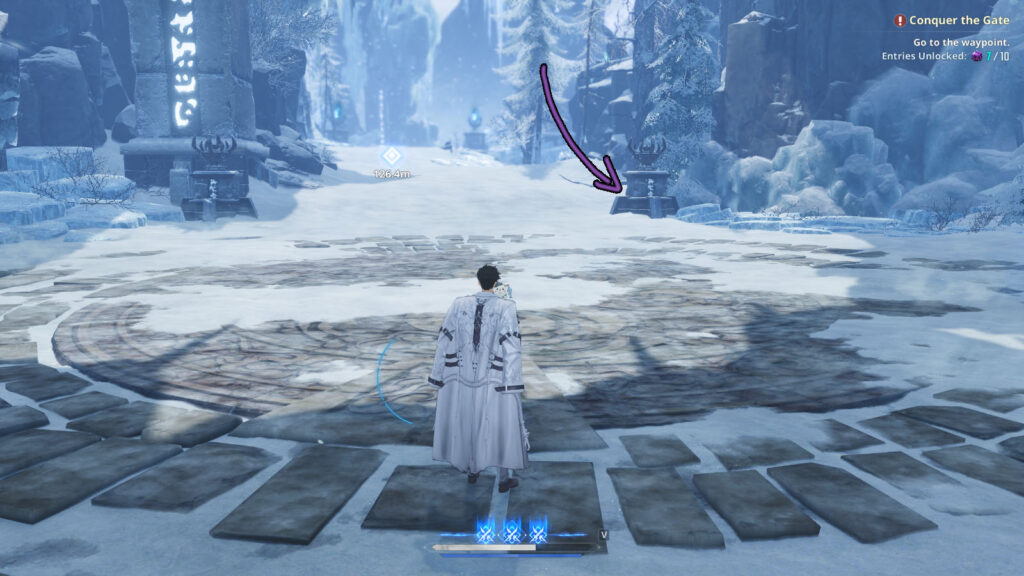
After the battle with the bears, behind the torch pillar to the right.
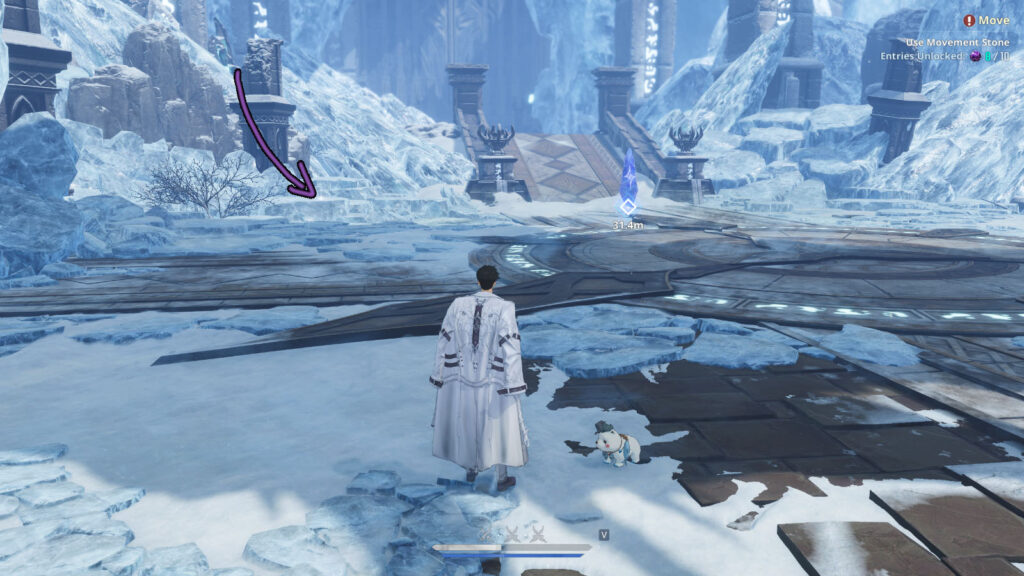
To the left of the Move stone, after the boss bear fight, next to the ice.
Chapter 7 – The Ruler of the Lower Floors
Floor 1
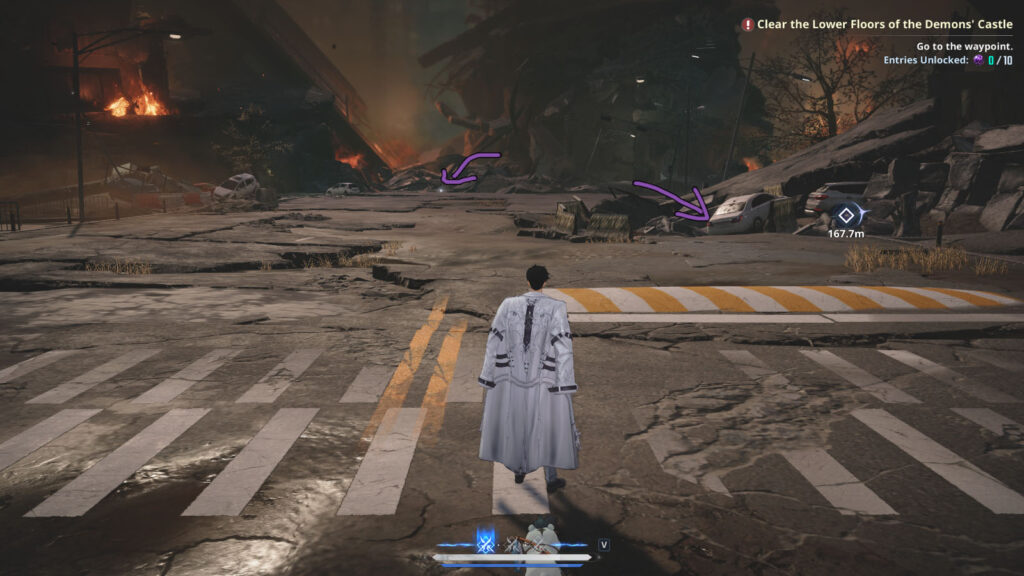
The first two are right in the first area with enemies. The first Frozen Darkness spawns to the right, behind the white car, and the second one is further ahead, next to a fence at the edge of the map.
Floor 2
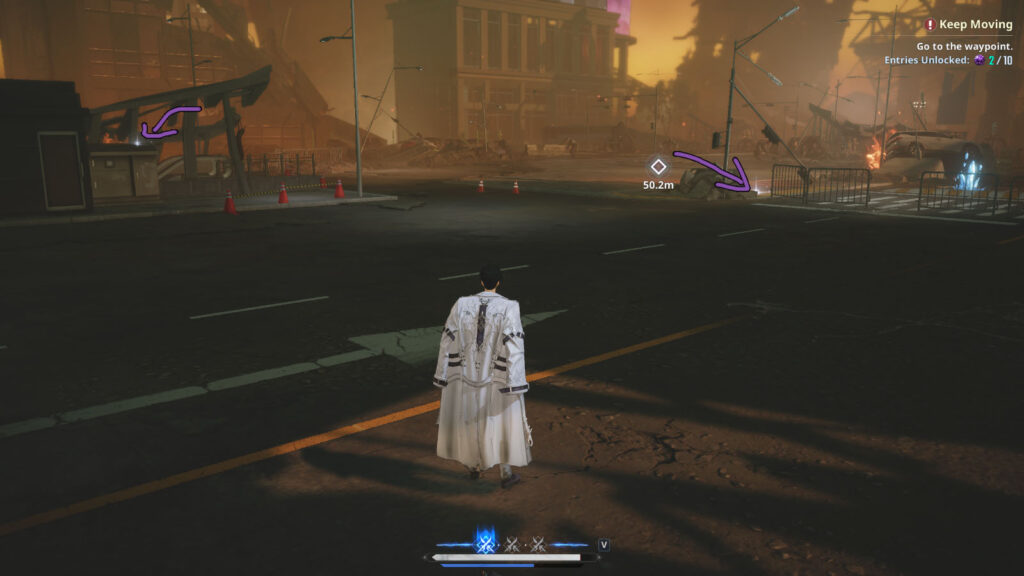
On the second floor, you’ll first fight the Burning Demon that will run away. After defeating the remaining enemies, don’t advance to the next area. Instead, look to the left and right.
The first Frozen Darkness spawns on storage box, next to an escalator leading down, on the left as you look to the objective, and the second one is to the right, in the rubble next to the fence.
Floor 3
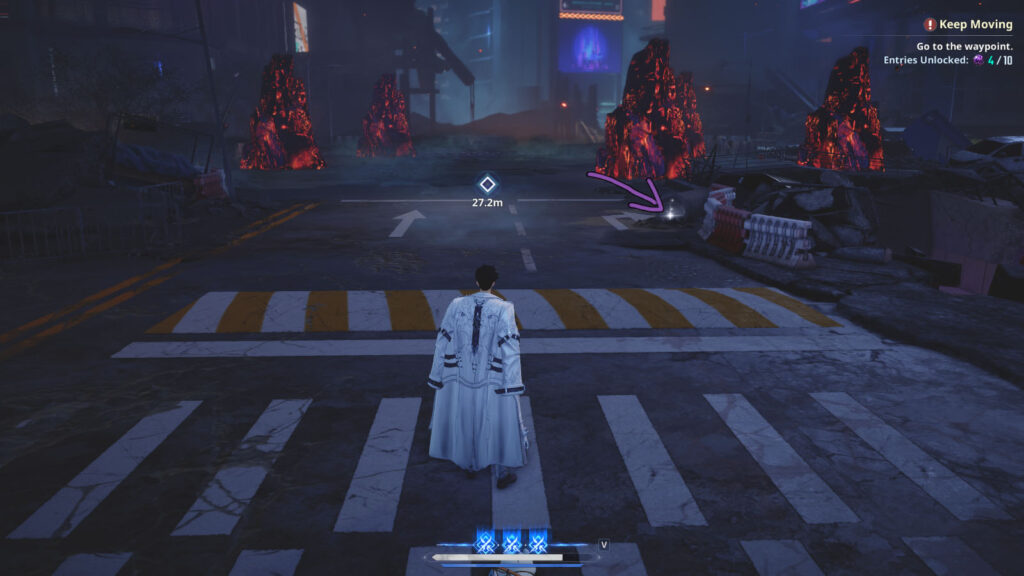
The first one is impossible to miss. After defeating the first round of enemies, walk to the next objective and look to the right. The Frozen Darkness will shine in the little sewage pipe.
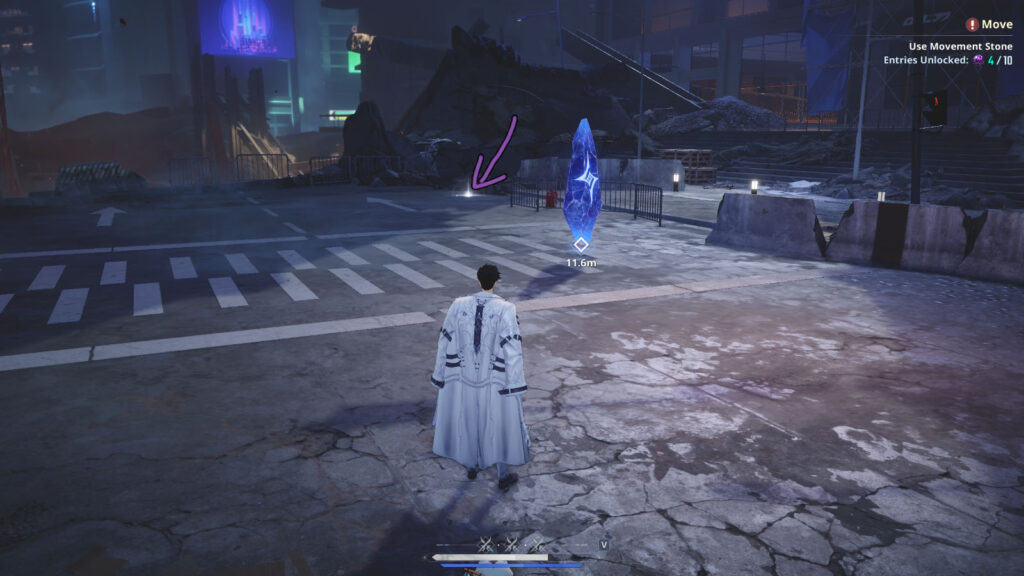
Again, almost impossible to miss. Go to the Move point after the boss battle and look behind it. The collectible is besides the rubble.
Floor 4
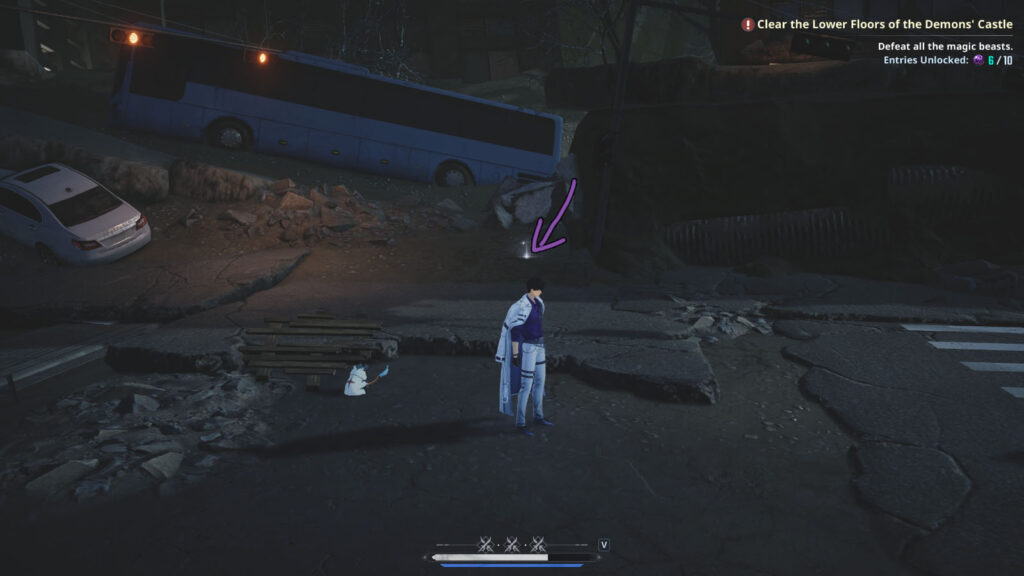
Right at the spawn point, look to the left.
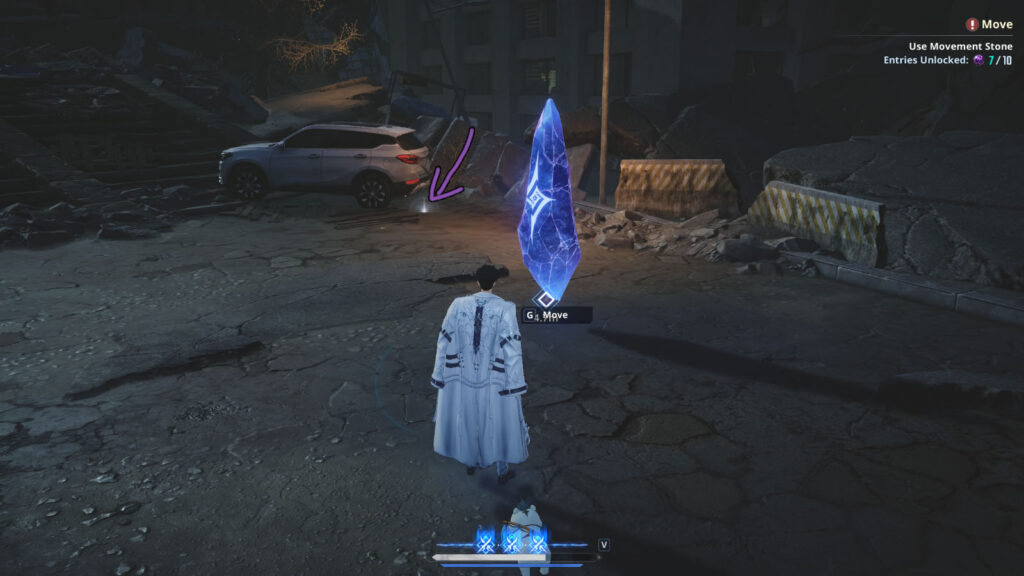
The second one is behind the Move stone, next to a white car.
Floor 5
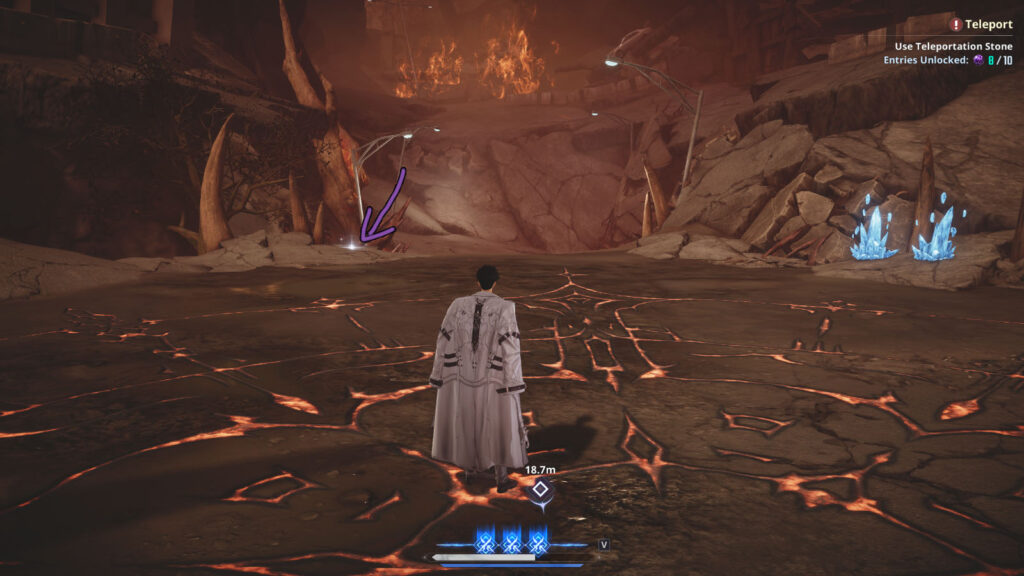
The first one is opposite the Move stone, next to the edge of the map, surrounded by the spike-looking branches.
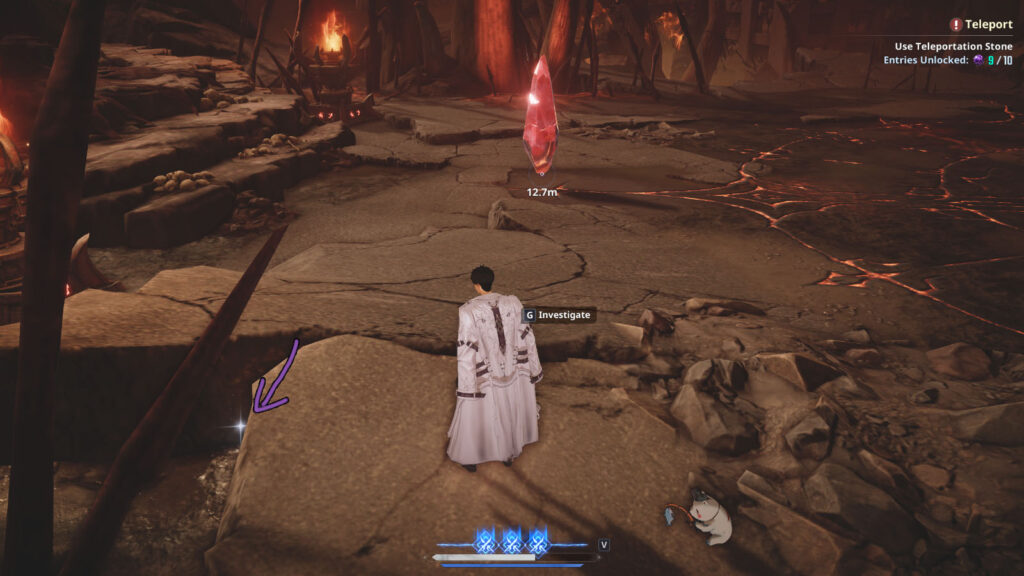
The last one is to the left as you look at the Move stone, hidden behind the ledge.