Want to see Raider King content first? Add us as a preferred source.
Are you a completionist aiming to get all the Steam achievements but not sure how? Well, you’ve come to the right place. Because I am too and I’ve tried everything so you don’t have to. Most of the achievements actually get fulfilled simply by playing the game and through the tutorials, but I made sure to explain each one, as well as how to unlock the hidden ones. Here’s how you can get all of the achievements in Quarantine Zone: The Last Check.
All Achievements List
Tooling Up
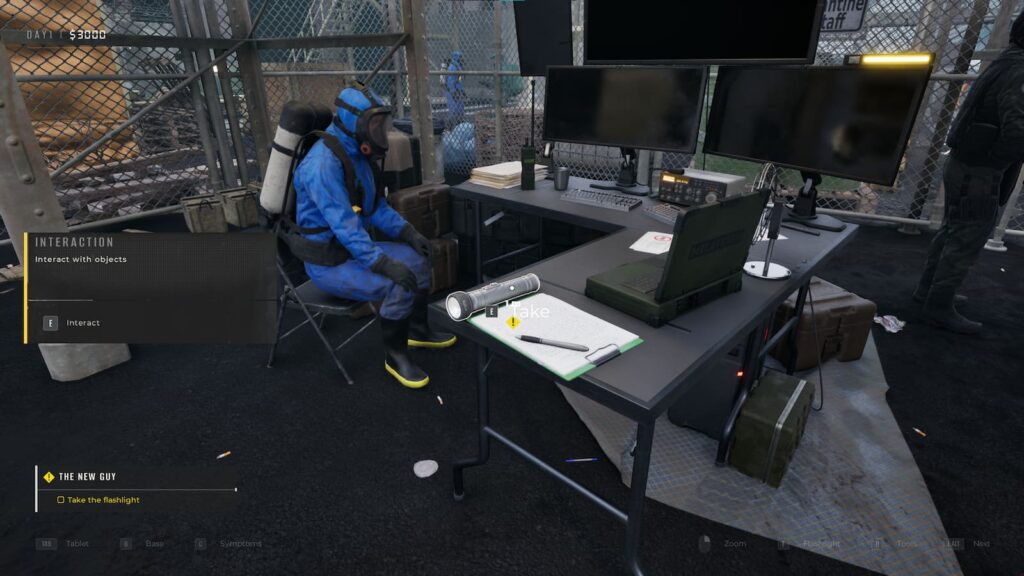
Requirements: Get your first inspection tool.
Pretty much as easy as it sounds. On the first day, before starting your inspection, grab the flashlight from the desk. You can turn it on by pressing F.
First Time, Huh?
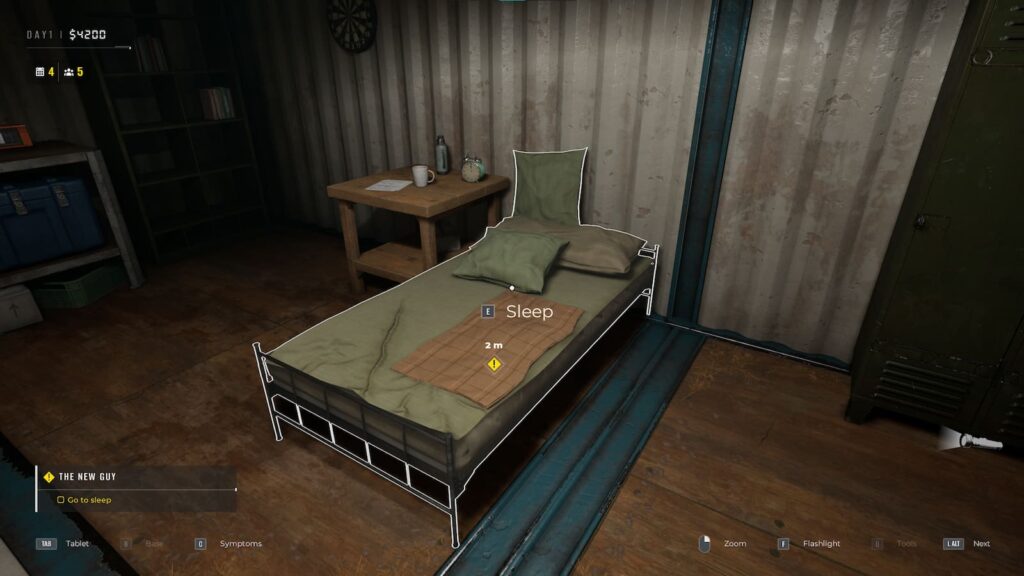
Requirements: Finish your first day.
After finishing up all of your inspections, simply press E on your bed and sleep. That will trigger the end of the day and the next day of inspections.
City Builder
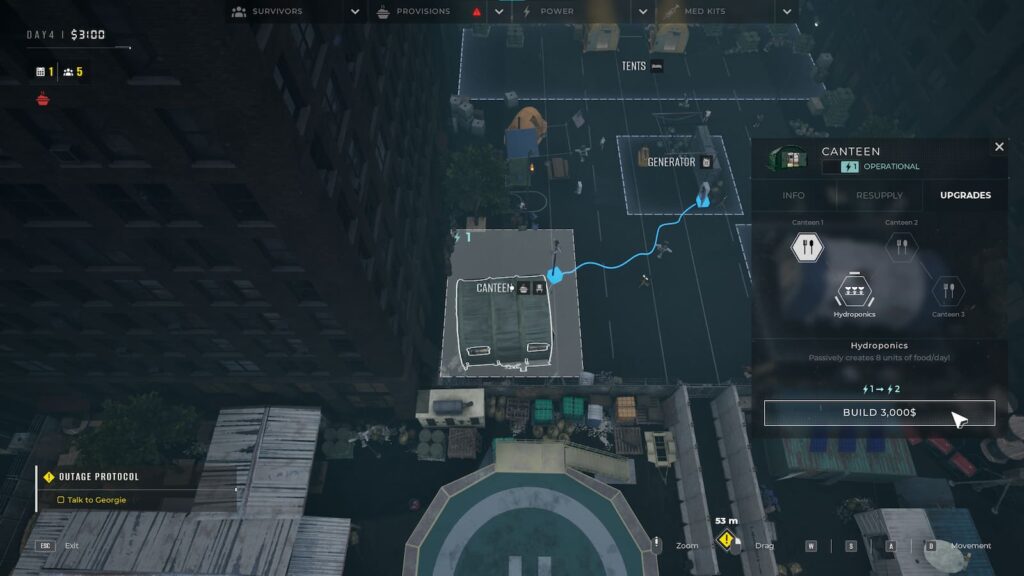
Requirements: Upgrade a building in the survivors block.
On Day 4, you get a tutorial on how to upgrade buildings, but in case you’re still not sure, all you have to to is press B to go into Base mode. Press on any building you want to upgrade, go to Upgrades which is the option on the far right, and then hold build. If you don’t have enough money, the writing will show up red and it simply won’t let you upgrade.
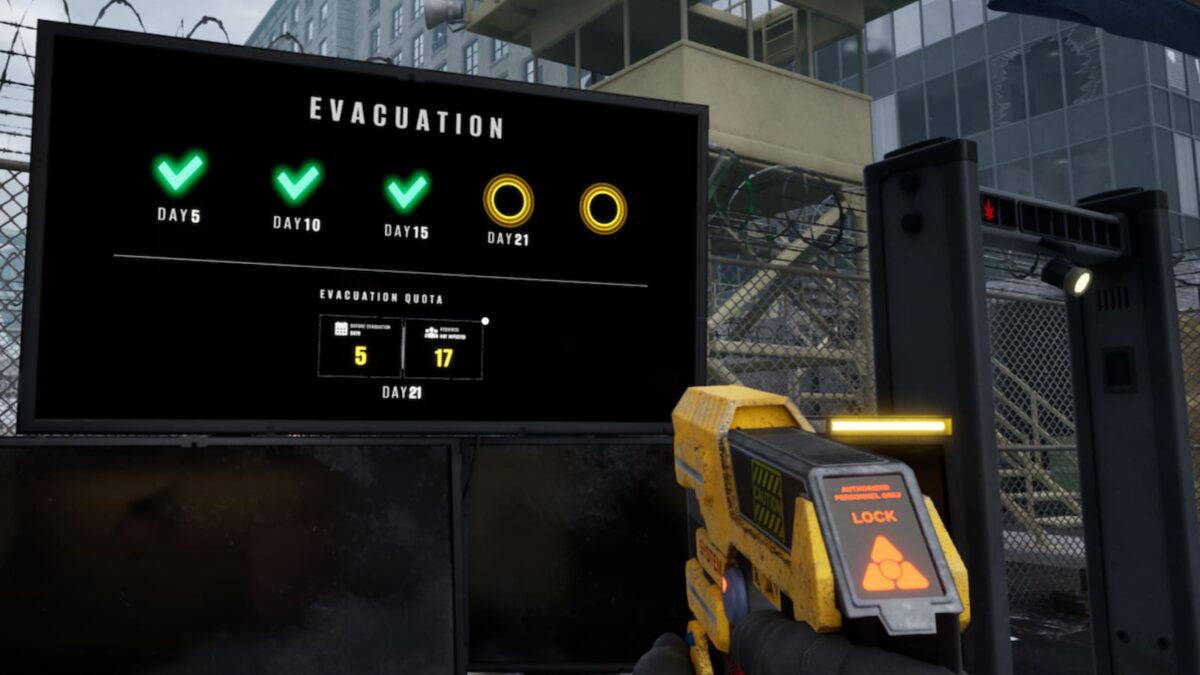
Evacuator
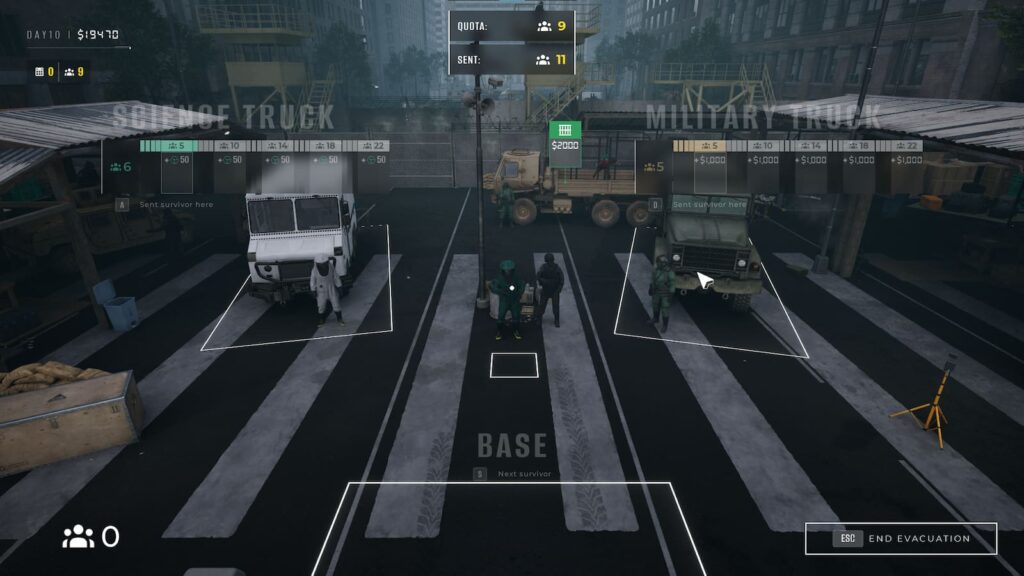
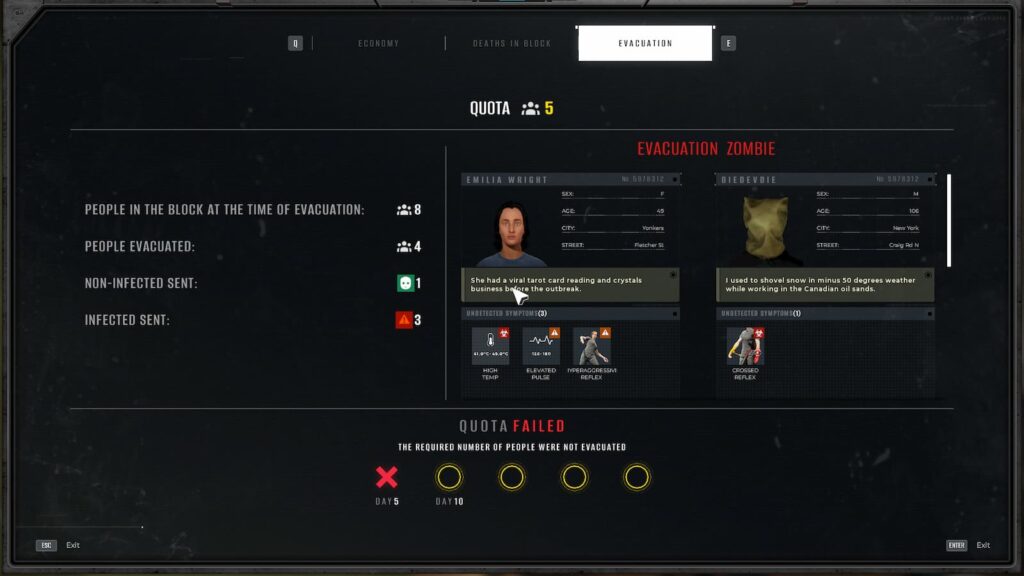
Requirements: Achieve evacuation quota.
At the beginning of every cycle, you get an evacuation quota of how many people you need to send away from the base. This happens about every 5 days, and the number of people required will show up on the top left corner, as well as the days left until evacuation.
I suggest trying to get this achievement the first few times, as it gets progressively more difficult later. If you have extra people on evacuation day, I also suggest keeping them for next time, as you get no extra rewards unless you send numbers of 5 to the Science Truck or Military Truck.
Light My Fire
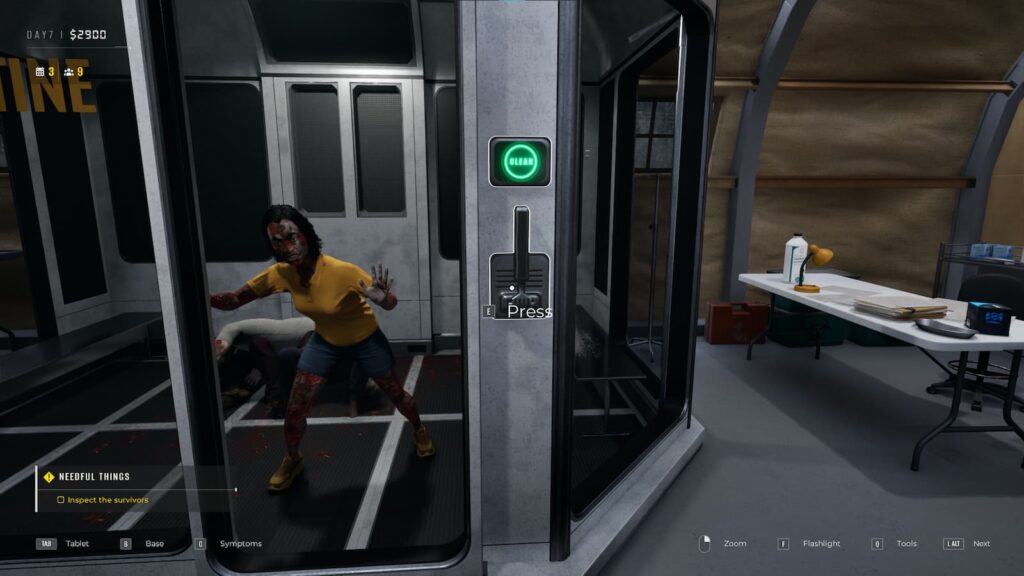
Requirements: Cleanse the quarantine cell for the first time.
Eventually, one of the people in Quarantine will turn into a zombie, which is when you shouls be able to clear this achievement.
Finders Keepers
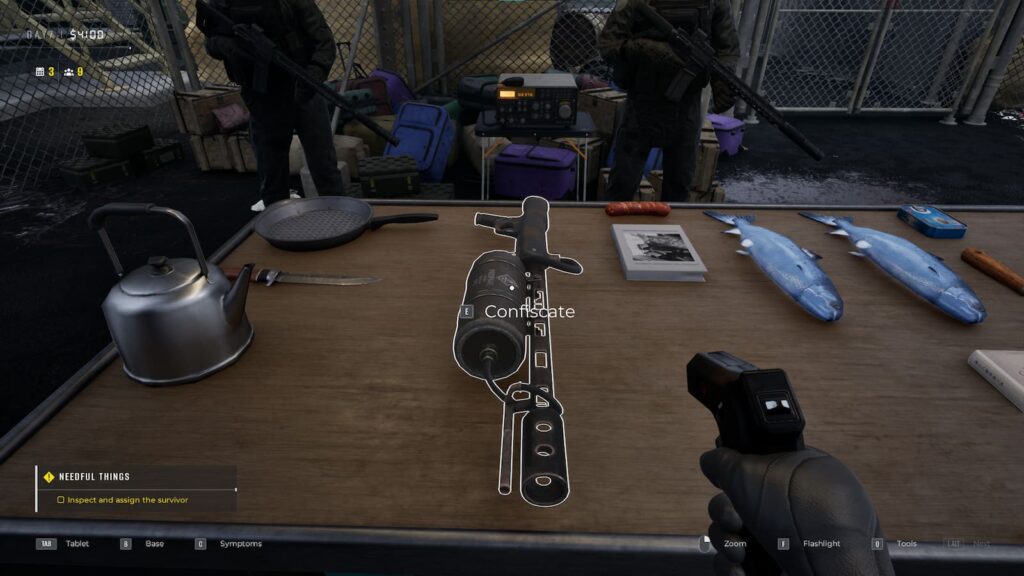
Requirements: Confiscate contraband.
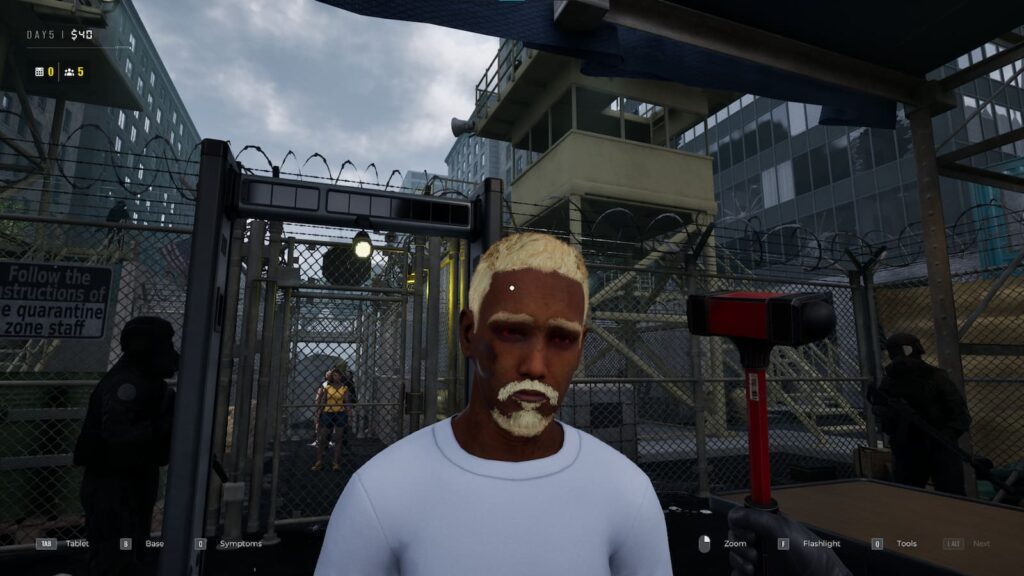
On Day 6, we get the mechanic of checking bags. That’s when you should be able to confiscate contraband. Just pick any of the items that seem dangerous, such as weapons or drugs. Once you confiscate an item, you will be rewarded 100$.
I Can Read (Hidden)
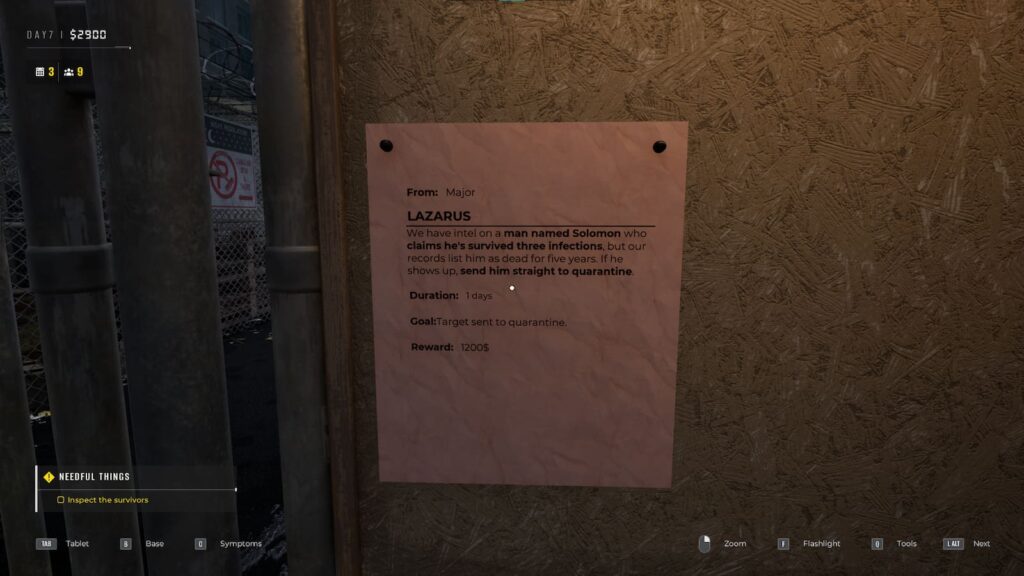
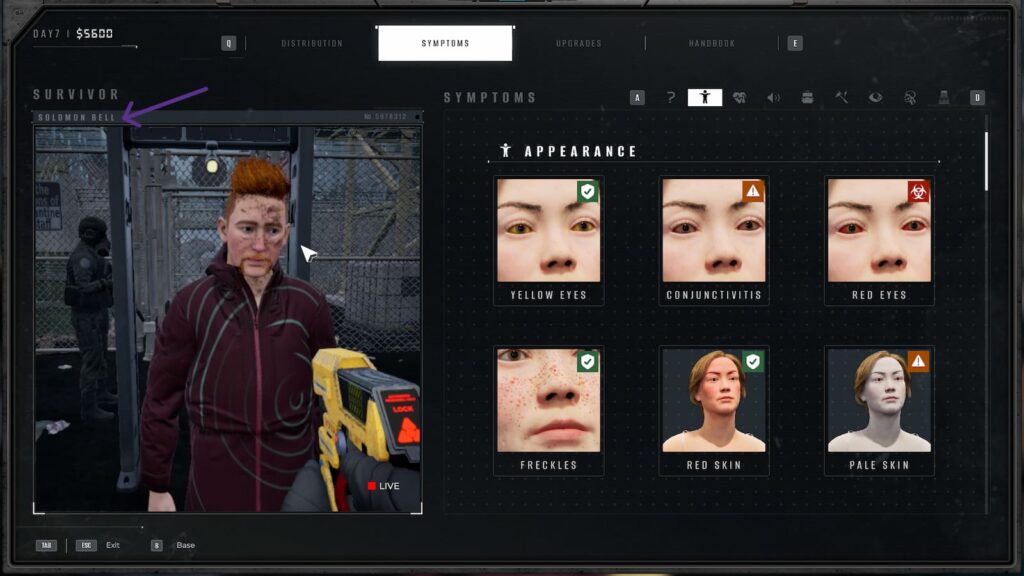
Requirements: Complete one task from the bulletin board.
Starting with Day 7, you will start getting daily missions from your superior. Don’t worry if you haven’t done the first one, there will be one every day, so you can achieve the hidden achievement quite easily.
I will describe how to clear the first one, for future reference too. Make sure to read the words in bold, since they tell you pretty much all you need to know. But be careful! The person you’re looking for won’t always be obvious. In this case, it says the target is called “Solomon”, so all you have to do is check the survivors names when you input their symptoms.
Make sure to also complete the mission the way you’re required. In this case, send Solomon to Quarantine and you should get a rewards of 1200$ with the achievement!
Yeah! Science! B…aby!
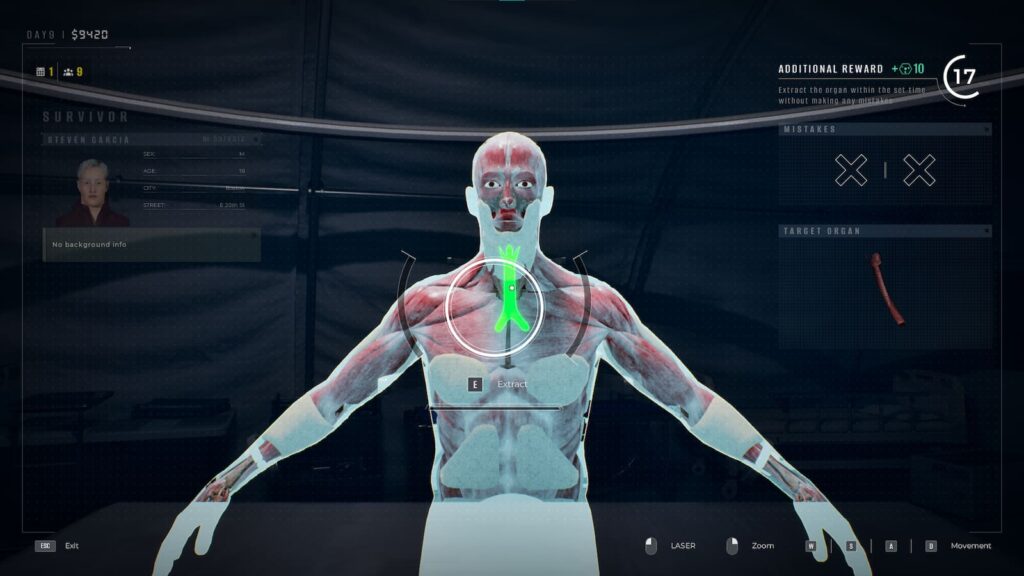
Requirements: Research a symptom in the laboratory.
You should unlock the laboratory on Day 8. You will get an in game tutorial on how to do it, but just make sure to extract the green organ in order to unlock a new symptom. You will typically have to clear away the organs colored yellow/orange, just make sure you don’t grab the red ones.
Click Left to clear away obstacles, and hold E to extract organ. There is a timer on the top right corner. You can still unlock the new symptom even if you run out of time, but extracting it quickly will give you extra rewards.
Headhunter
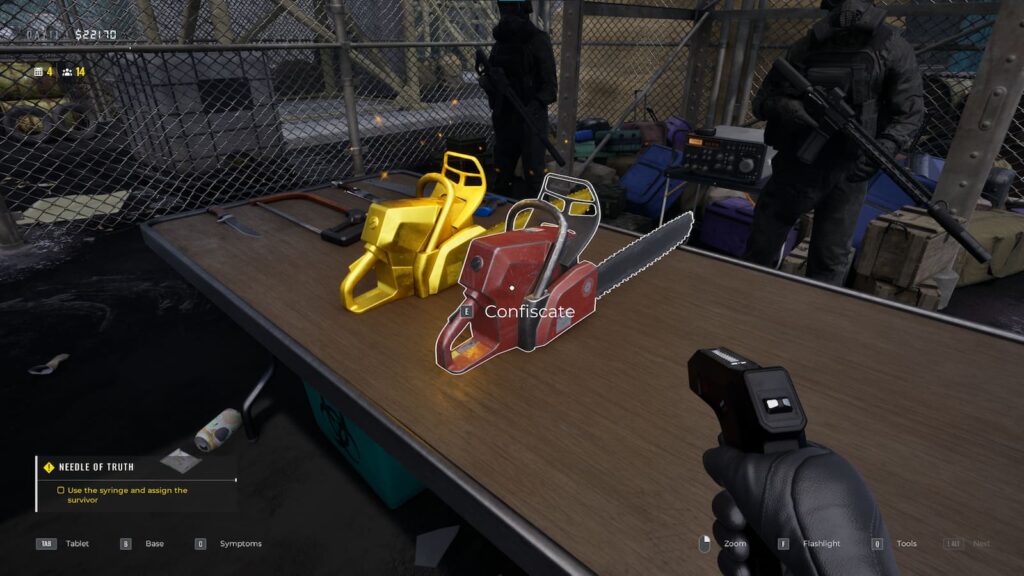
Requirements: Eliminate a contract target from the bulletin board.
On Day 11, you will receive a new directive to eliminate the target in possession of a saw. There might be multiple people with weapons and contraband, but this survivor in particular will have only weapons and two very obvious chainsaws, one of them a collectible. The method of elimination doesn’t usually matter, but at this point in the game you can only send the target to Liquidation.
Perfect Day
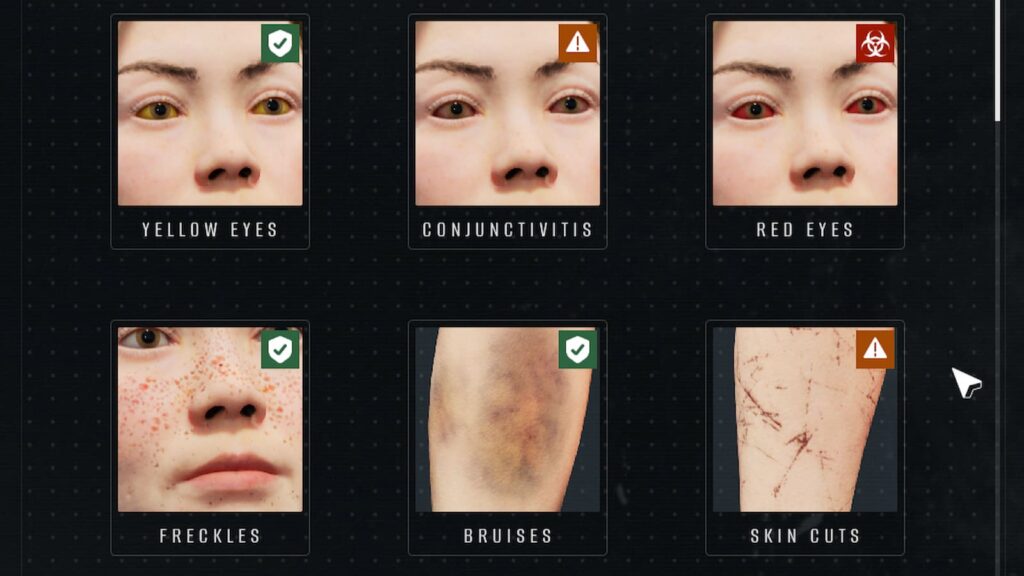
Requirements: Score a perfect inspection on every check in a single day.
There are three types of inspection outcomes you can get: Exceptional, Competent and Poor. The goal is to get Exceptional on each inspection. To do that, you need to get about 75% of the symptoms right.
Personally, I suggest doing this on Day 2. The longer you go, the more complex the symptoms get, and the more time spent trying to get a diagnosis. On Day 2, the symptoms will be fairly simple and few.
Some advice for getting an Exceptional Inspection:
- Some colour looking off on the skin isn’t considered a bruise. The bruises will be obvious.
- Check the hands! Inside and out.
- Scratches might be more subtle but they will always be a multitude. If you see just one line that could be a scratch, it’s not enough.
Ain’t That a Kick? (Hidden)
Requirements: Knock out a survivor with the medical hammer.
Just to let you know, since I think we were all curious what happens when Georgie mentions it, you can hit survivors with the hammer on the head and not much happens. They just get back up. So don’t worry about having to restart the day. You can pick an infected survivor if you don’t want to feel guilty though.
Safety First (Hidden)
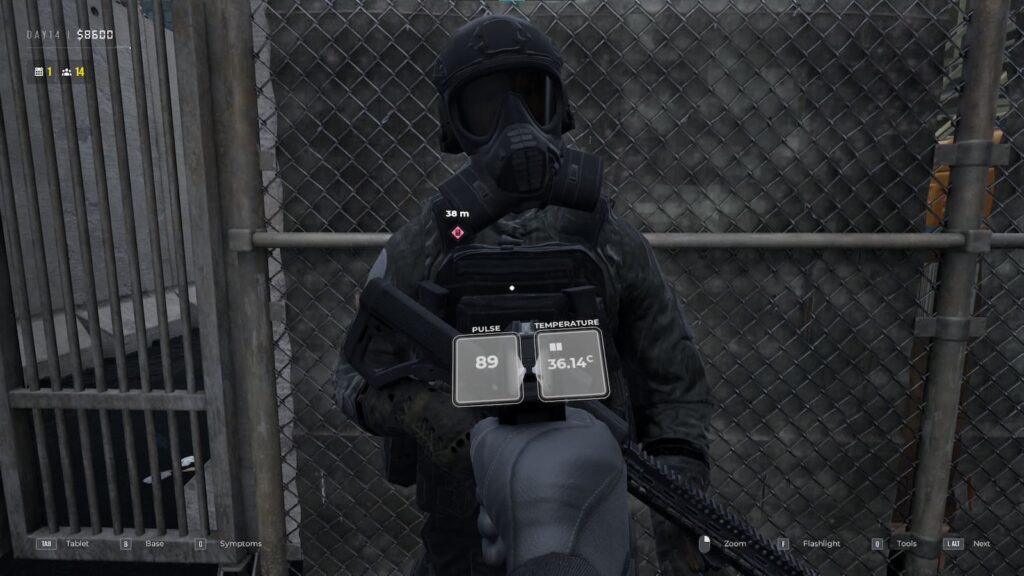
Requirements: Use an inspection tool on a checkpoint staff member.
You can get this achievement on the first day you get the thermometer. Just use it on any member of staff, such as the guards or your colleague, Georgie.
Jackpot!
Requirements: Earn 50,000 dollars.
In case you’re worried, it refers to the total amount of money you earn progressively though the game. You can relax and spend on upgrades without trying to get to the 50,000 mark.
Some ways to earn money are through: finding collectibles, good inspections, sending survivors to the right facilities, and confiscating contraband.
Certified Next-Shouter
Requirements: Shout “Next” 100 times.
You will get this achievement quite easily just by playing the game. It should trigger around Day 13 or so, or at least that’s how it did for me.
Watch Them Closely From Now On
Requirements: Liquidate a survivor who attacked you.
On Day 13 you will receive a gun. As part of the tutorial, the first survivor at the inspection will turn aggressive and attack you if you turn away or go towards the Quarantine. In any case, when a survivor attacks you, aim the gun and headshot them. It’s the only way to stop them, unless the security guards help.
It might say ‘liquidate’. but don’t confuse that for sending them to Liquidation. They will keep attacking unless you do it yourself.
Can’t Touch This (Hidden)
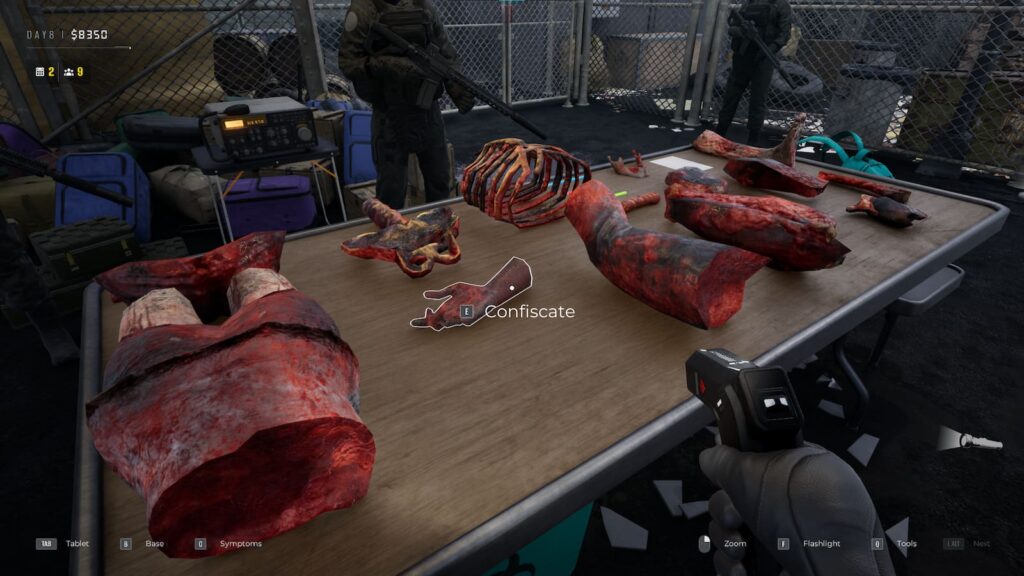
Requirements: Confiscate a zombie body part.
After unlocking bag checks, one of the survivors will have zombie body parts in their backpack. Just know that you will get a small fine if you confiscate them.
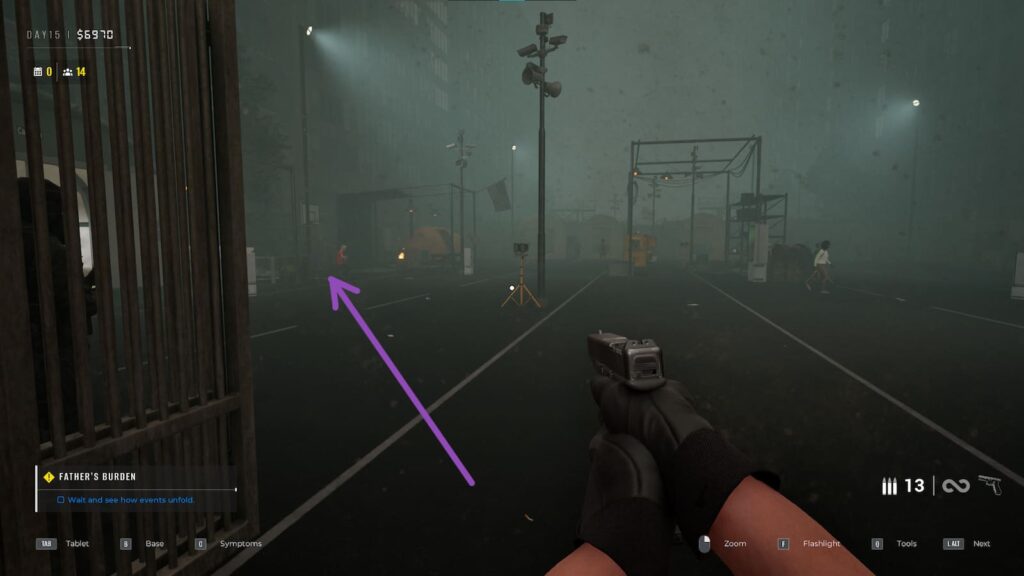
Janitor
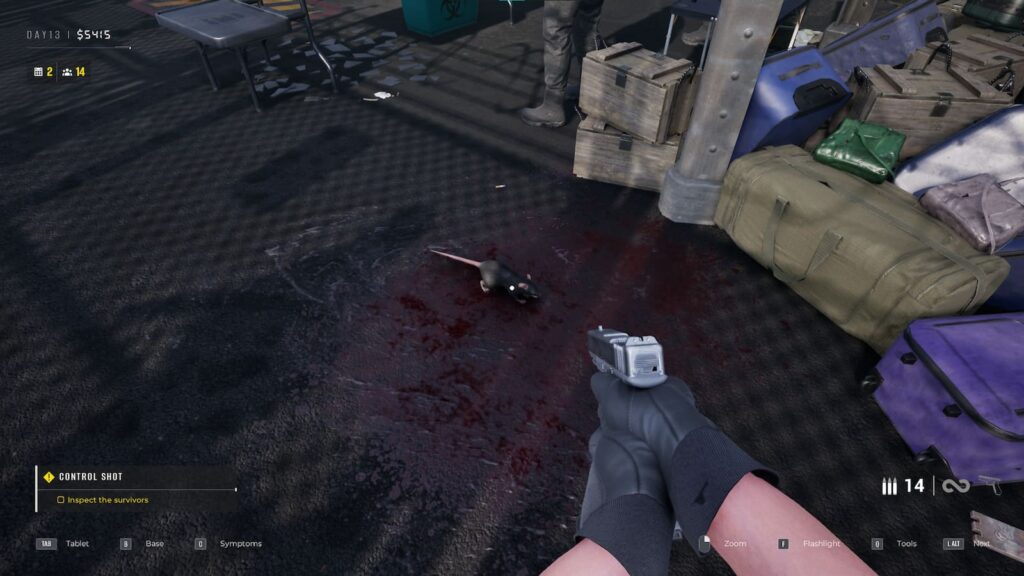
Requirements: Kill a rat.
After acquiring the gun, look for rats around the Checkpoint Area. They will move pretty fast, so either look for a moment when they’re still, or aim for the trajectory they’re moving in. You get 25$ per rat.
Dinner Is Served
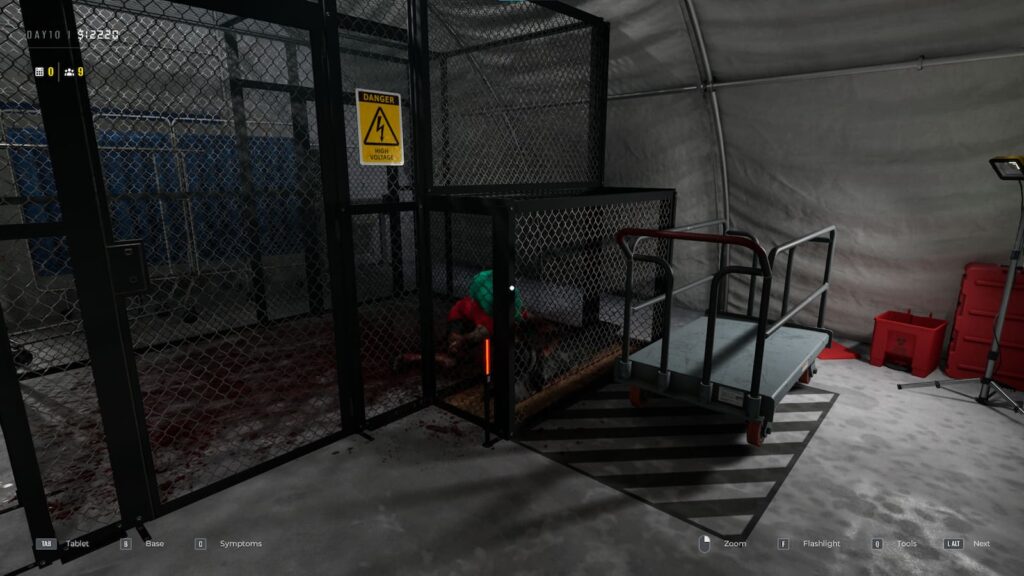
Requirements: Feed a zombie in the cage.
On Day 10, you will get a mission called “Hi, Doggy”. Part of it is the tutorial on how to feed the zombie in the cage. Be careful and take it one step at a time. There is a slight bug if you do things ahead before the Major tells you to. You can later upgrade the cage so the zombie gets fed automatically.
Under My Skin
Requirements: Confiscate contraband hidden internally.
On Day 16, you unlock the mechanic of confiscating internal contraband. Make sure you buy the upgrades for the Checkpoint so that it makes it easier to see which objects to look out for.
Good Work, Son (Hidden)
Requirements: Get the good ending.
For the Good Ending, you pretty much just have to try your best to do each task to the best of your abilities. Meaning doing good inspections, making sure to send each survivor to the appropriate facility, doing the quests, and protecting the base from zombies.
It is also important to get as many evacuations right as possible. There is a level of error that still lets you get the good ending, but essentially it’s about fixing your mistakes if you make them. For example, if you accidentally let an infected into the Survivors area, make sure to get rid of all the zombies the next day.
Master Evacuator
Requirements: Achieve every evacuation quota in a single playthrough.
If you’re trying to get the good ending, this will pretty much set it in stone. Make sure to plan at the beginning of each cycle.
When you do evacuations, try to keep some people in camp so you have enough for the next round. For example, if the quota is 9 and you have 14 survivors, send 10 to get the rewards but then keep 4 for next time, as the numbers increase with each evacuation.
Lights Out
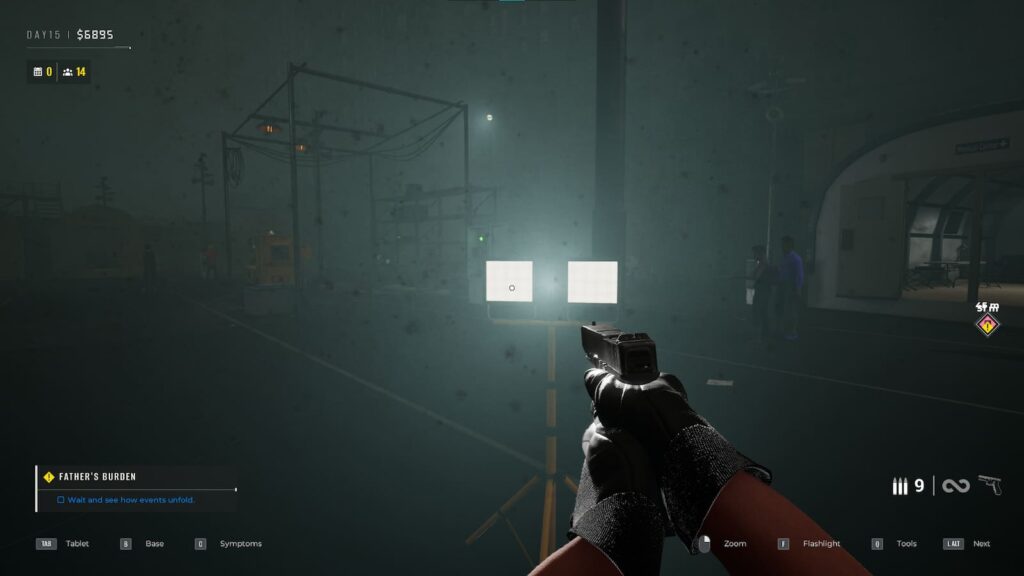
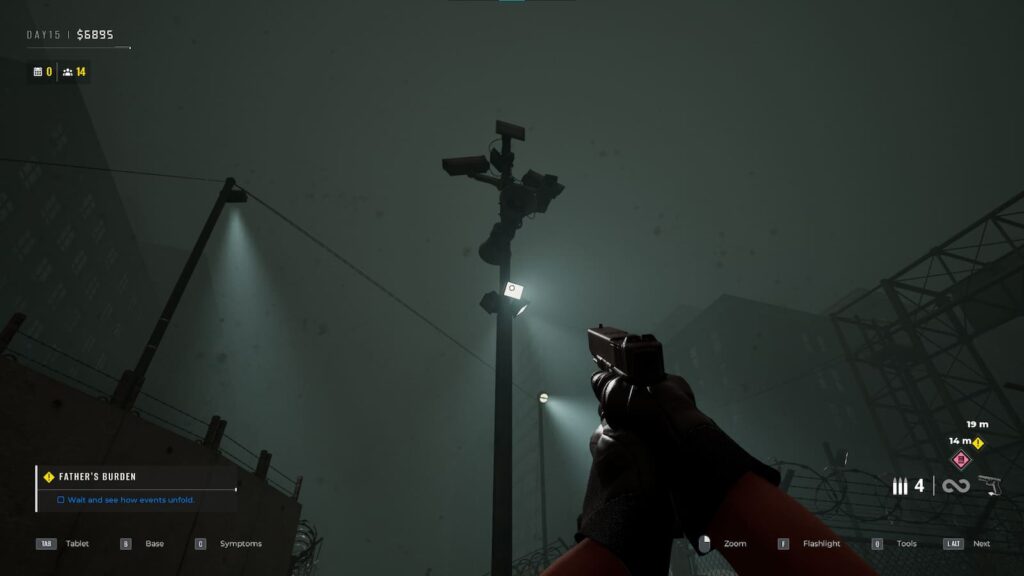
Requirements: Shoot and break 5 light bulbs. Total blackout, courtesy of you.
The only bulbs that worked for me were these white ones either in the residential area or in the hallways. The yellow ones didn’t work. Shoot 5 of these and you should be set.
Rat Slayer
Requirements: Kill 30 rats.
Your bullets are rechargeable, so feel free to do this whenever. When you finish your 15 bullets, they just respawn by themselves, you don’t need to do anything.
Make sure to aim slightly higher so you don’t miss your target, since the mice are really small and fast.
Brain Slam
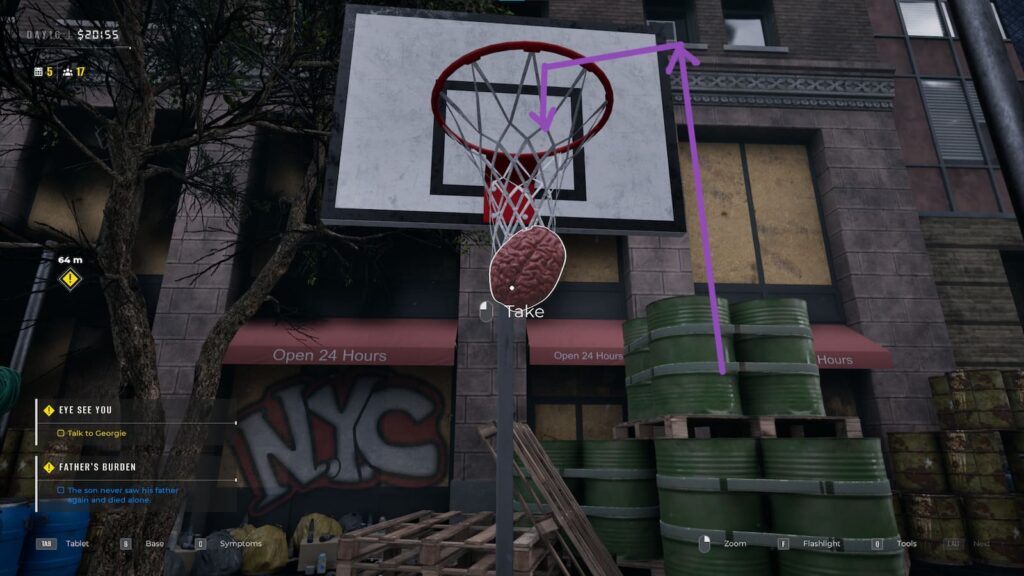
Requirements: Shoot a human brain through a basketball hoop. Clean shot, zero conscience.
The first step for this achievement is to send a survivor to the lab. When you extract an organ, just ignore the one they suggest with green and go to the area where the brain is. Dig the yellow/orange areas with Left Click, and then extract the brain (which will be highlighted red) by holding E.
Once the brain has been extracted, take it from the lab and go to the Survivor Block, where there will be a basketball hoop on the left side. This will probably take a few tries, but try throwing it in the hoop. The way it worked for me was going as close as possible to the hoop and then thrown in from the side, so you can give it a bit of an angle.
SNAFU (Hidden)
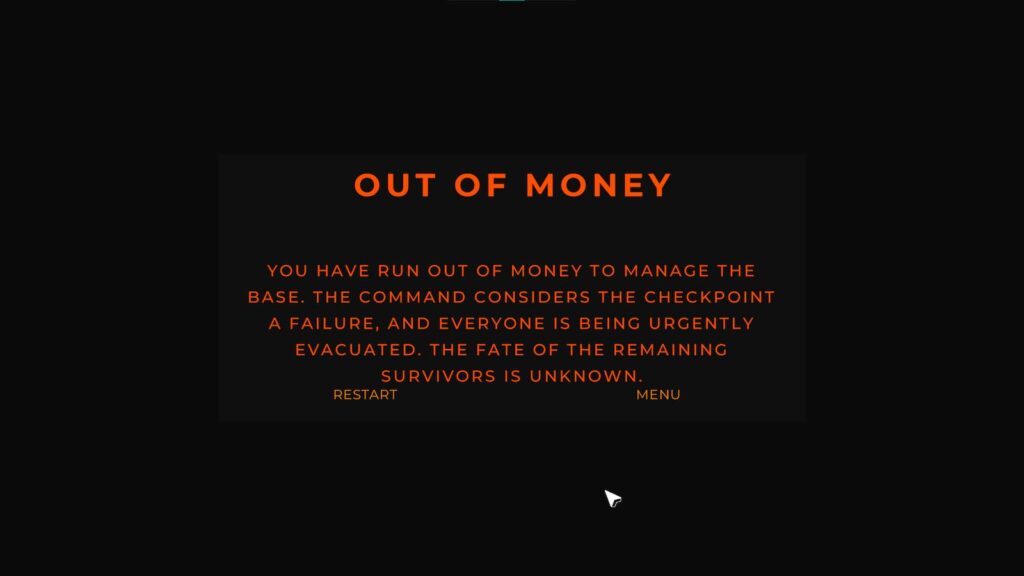
Requirements: Get the bad ending.
So…I tried a few methods. But to get the ending you simply must fail the quotas. Otherwise, the game kind of forces you to retry stuff. For example, if you fail to defend the base against zombies and the wall falls, you just restart the challenge. If you run out of money, you restart the day. Now, if you fail about 3 quotas, you should be getting the bad end.


